- Author Arianna Cook [email protected].
- Public 2024-01-12 17:55.
- Last modified 2025-01-23 09:40.
Zentangle and doodling will help you draw in a graphic-like manner. Patterns of patterns, a master class are attached. Zentangle and doodling are interesting drawing techniques. Many of you are familiar with them. Sometimes, during boring meetings at work or during telephone conversations, some draw various lines and squiggles on paper, not knowing what they are really doing.
What is doodling?
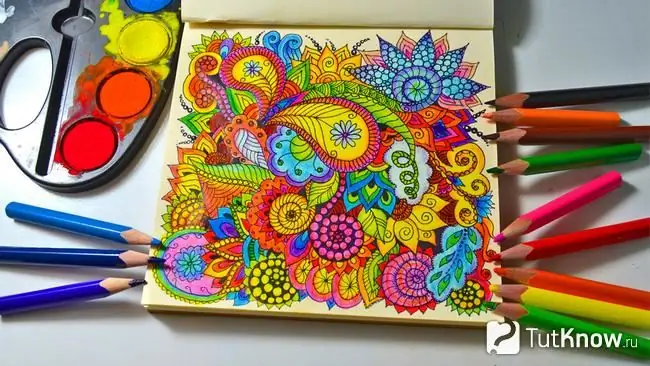
Doodling is an interesting drawing technique. In this case, simple graphic elements called doodles are used. Using them, a person relaxes, expresses himself and shows his creative abilities. Here are the graphic elements used for this:
- dots;
- sticks;
- squiggles;
- rhombuses;
- circles.
In the common people, they are called scribbles. But these simple graphic elements unite and the most complex compositions are obtained. However, you can create lighter ones.
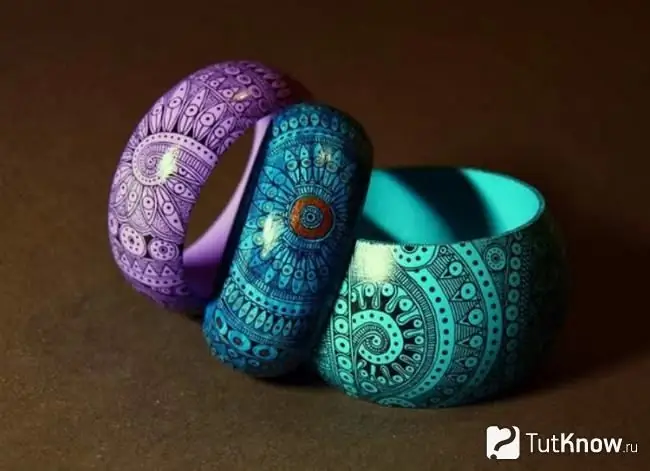
You can form such drawings not only on a sheet of paper, but also on jewelry items. See how you can decorate a bracelet using this simple technique.
What is Zentangle?
This technique has arisen not so long ago. Its founders came up with the idea of creating patterns that will help meditation at the same time.
The zentangle creates repeating patterns that turn into an abstract image.
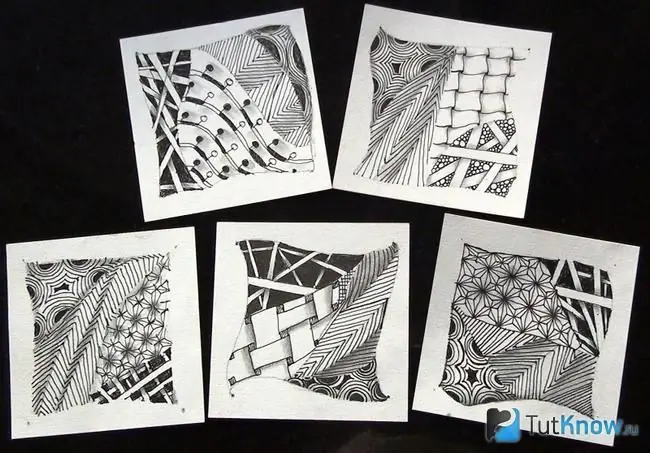
The word itself has two roots, which denote the name of a Buddhist sect and a ball, weaving. The drawing has a limited space, fits in a square. There are certain rules, using which, you can create drawings using the zentangle technique.
You can view the created masterpieces from any side, since they do not have one direction.
- Patterns should be objective, abstract.
- Masterpieces are created without using a stencil or ruler.
- Each pattern should have at least 6 strokes.
- Elements are performed in black and white.
- When drawing patterns, you usually don't use an eraser.
To draw a zentangle, cut a 9 cm square out of paper. They are called tiles. Such a small size is needed in order to complete the drawing in one go. Get into a comfortable position, relax, and get creative.
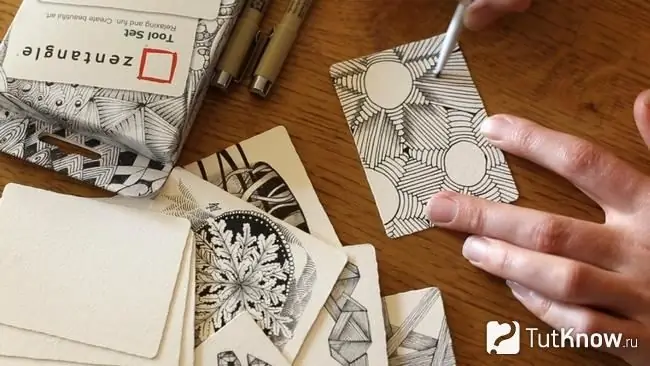
If you will be drawing on black paper, then use a white pen or marker. If you are using white paper, then use a black pen. When you first start creating patterns, you can take ready-made ones to adopt them.
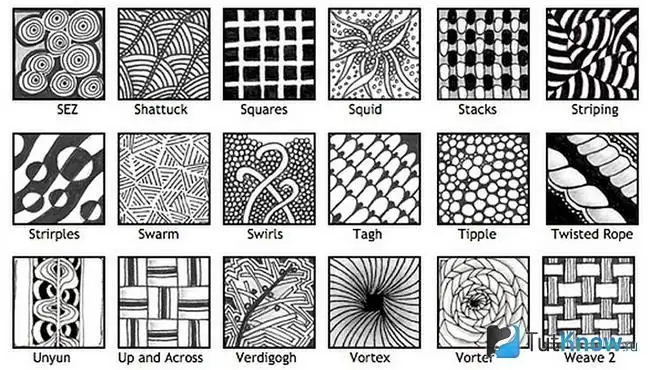
Here's how to draw a zentangle step by step:
Place a paper square in front of you, step back a little from its corners inward and mark four points that will form a frame. It can be straight or curved. Now select one piece of paper space and start drawing the lines you want. Better to start at the bottom. You can use the following master class to draw such a pattern.
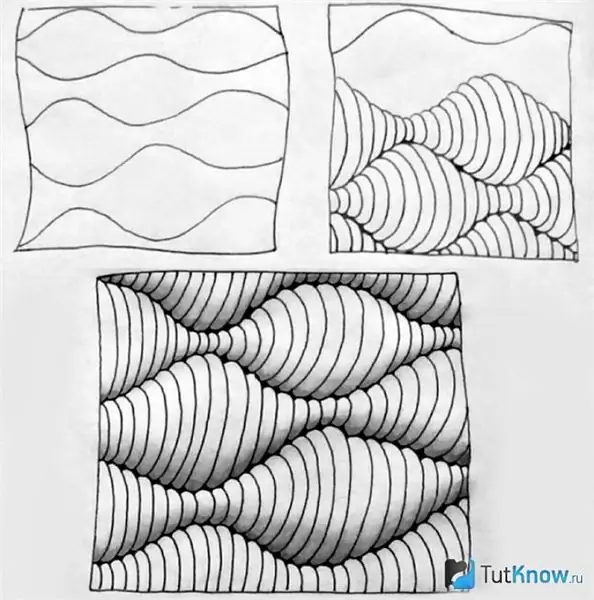
Draw a curved frame first, then start at the bottom to draw wavy lines. Each subsequent one is similar to the previous one in a mirror image. Now all sectors need to be filled with semicircular strokes. You will get this kind of volumetric effect.
If you like to knit, then draw a thematic pattern that resembles loops.
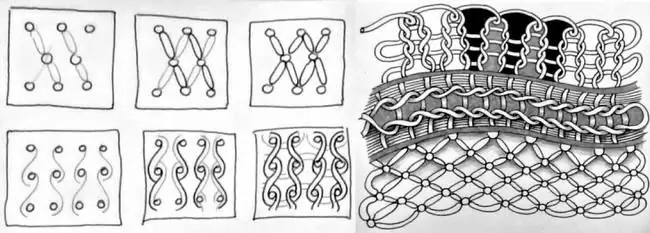
First you need to draw small circles in a checkerboard pattern, then connect them with parallel, slightly curved lines. If you want to make a different knitting pattern, then draw the circles in even rows and connect them with wavy lines.
For the next masterpiece, you'll need to learn how to draw simple shapes.
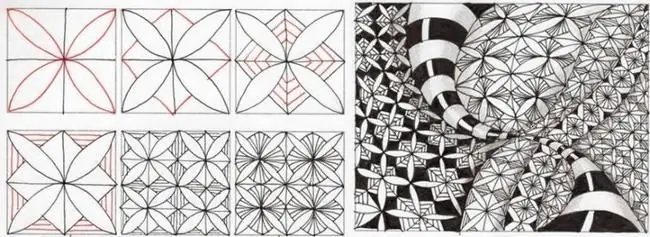
First, draw two perpendicular lines going through the paper sheet. Now in each of the 4 sectors draw narrow diagonal petals. There is a rhombus behind them, fill it with straight lines parallel to the sides of this shape. You can make such strokes behind the rhombus, and leave it in white.
Now you know what zentangle and doodling are, you can create drawings using these techniques.
Zentangle and doodling for beginners - how to draw a pumpkin?
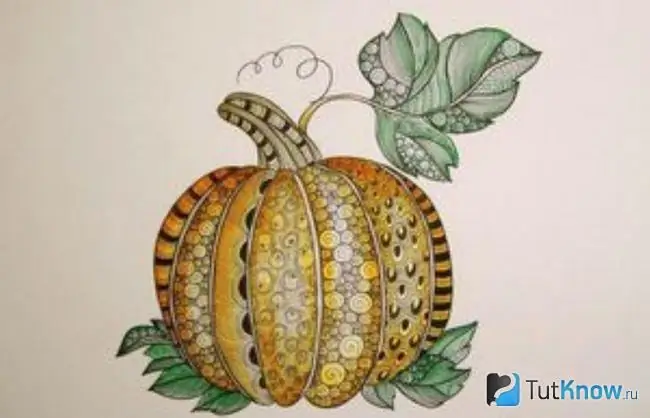
To depict this vegetable, use the zentangle and doodling at once. Here's what you need:
- ballpoint or gel pen with a thin black refill;
- black thin felt-tip pen;
- thin synthetic brush;
- eraser;
- simple pencil;
- watercolor;
- sheet of thick paper.

Using this image, draw a pumpkin on thick paper. Now start painting it with watercolors. You can make some strokes brighter and others lighter to show the effect of volume.

When the paint is dry, now in each segment you need to draw a certain pattern.
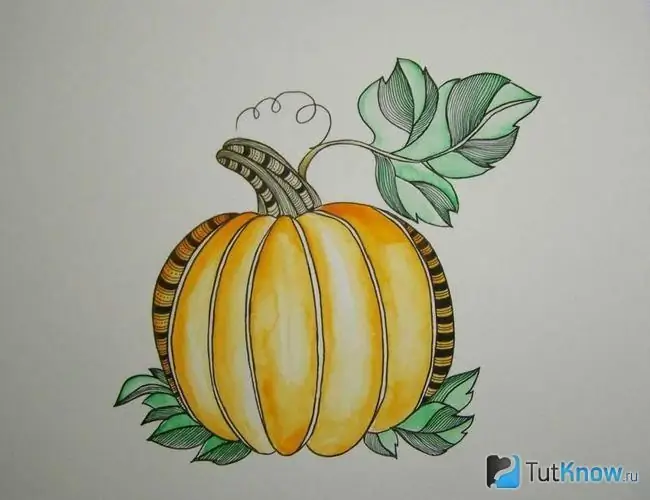
Start at the edges, here the patterns can be in a darker saturated color. Closer to the center, they are lighter.
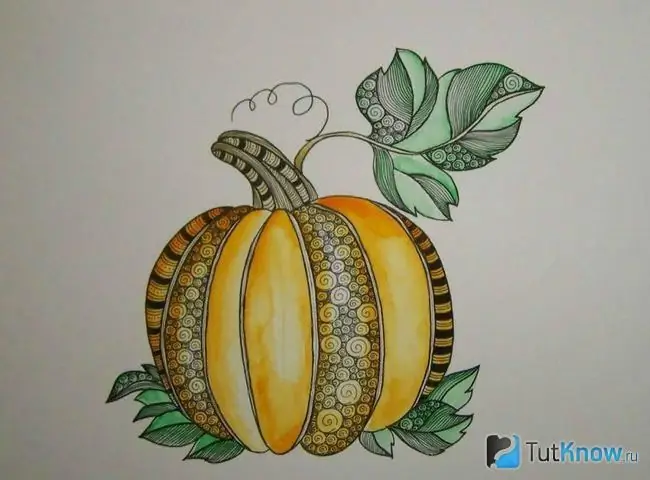
Continue in the same spirit.
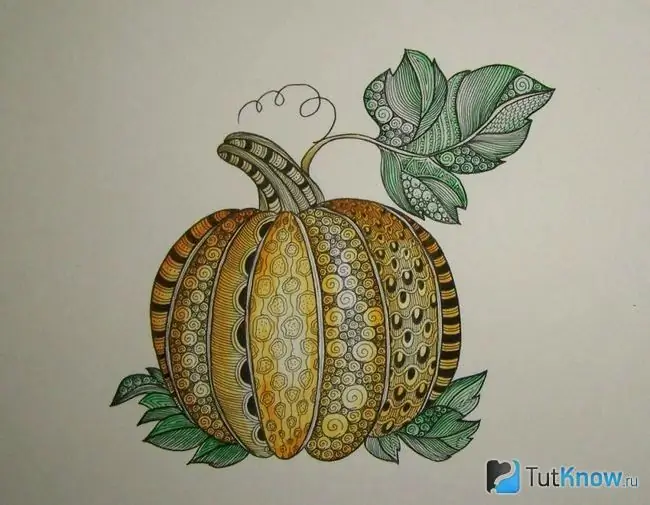
Fill in the entire space of the pumpkin, as well as its tail and leaves. If you still need to remove some wrong dashes or lines, then use an eraser. Such an interesting work will turn out.
You can use this idea to decorate not only the pumpkin, but also various other vegetables or objects. So that you know how to do this, practice drawing individual elements.
Zentangle and doodling - patterns and schemes for drawing
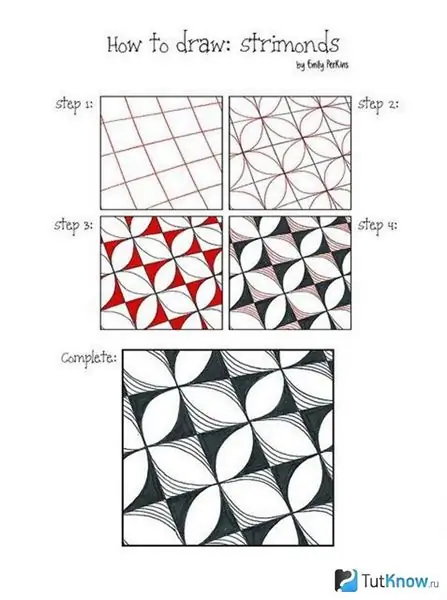
- To make the final drawing look like staggered 4-lobed flowers, first draw the correct perpendicular lines, located slightly diagonally, on a sheet of paper.
- Now, in each square, draw a diagonal petal so that two petals of one flower refer not only to it, but also to other flowers. You can fill in the space between the petals with strokes, and paint the other with a black pen or felt-tip pen of this color.
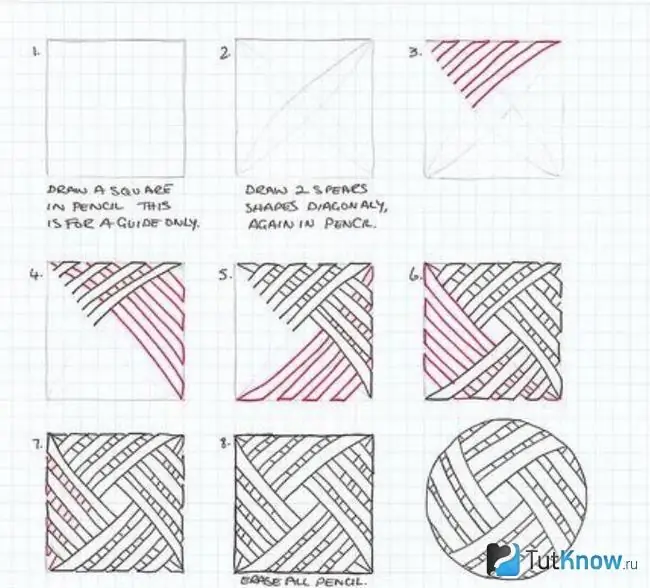
- The following diagram will allow you to create a ball-like pattern. Draw a diagonal petal across the entire sheet and another one perpendicular to it. These details will help you create others.
- Some of them run parallel to one diagonal element, and the second - to another. Leave the small square free in the center. If you are drawing a tangle, then round off your outline.
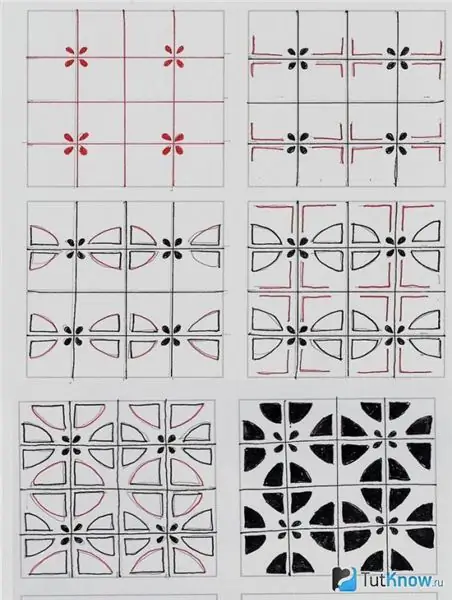
The next abstract drawing is created from symmetrical elements. First, draw lines on a piece of paper that run parallel or perpendicular to each other. Draw a small petal at the intersection of each square with the other. Complete the pattern with quarter-oval sectors. Highlight the elements with a black pen or felt-tip pen of that color.
How to design a personal album using zentangle and doodling techniques?
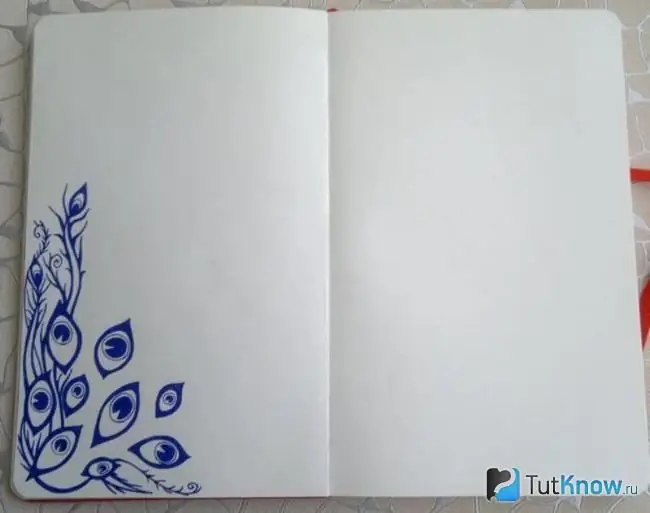
Zentangle and doodling will also help. Open a sheet of your notebook and draw oval elements at the bottom that look like eyes. Connect some with lines.
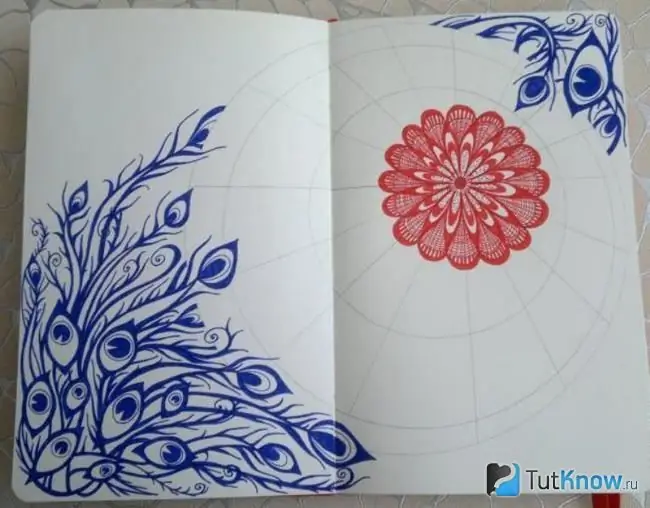
In the upper right corner, you can create a similar pattern, but in a smaller size. The center can be decorated with an abstract flower. To create it, first draw a point, and draw circles around it using a compass or freehand.
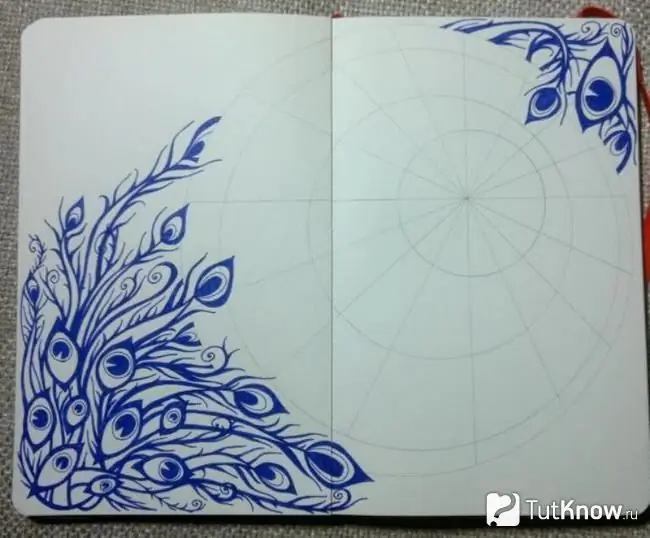
Now you can draw a flower in the center, filling it with different strokes.
Fill the large circle with dashes, make the flower more picturesque. In the free space, you can write smart sayings or something else.
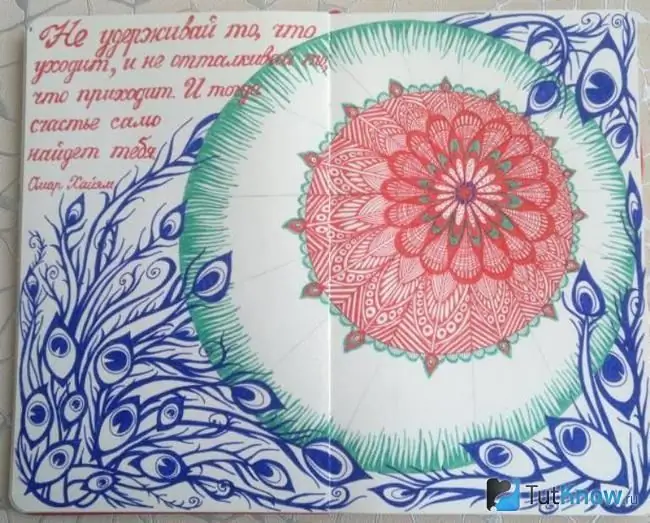
Fill the outer ring of the circle with repeating patterns, see what remains to be done. If everything suits you, then this diary page is ready.
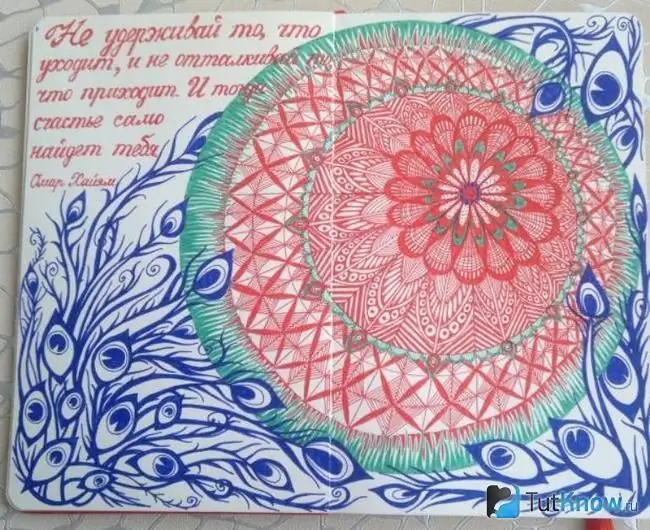
You can move on to another. First create it in black and white using a dark pen.
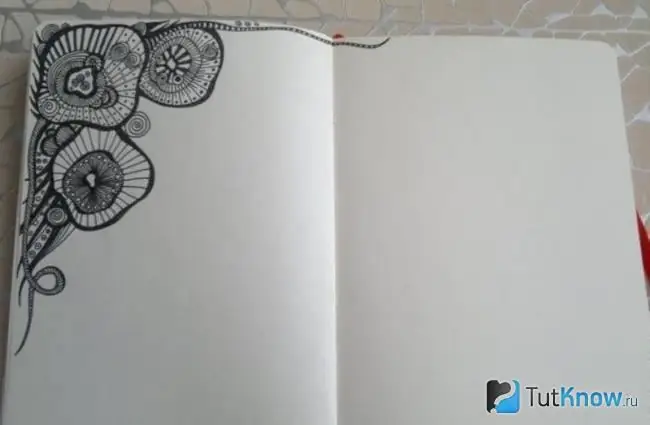
Start decorating the diary from the corner. Now smoothly move to another corner, depicting other elements of the schematic drawing here.
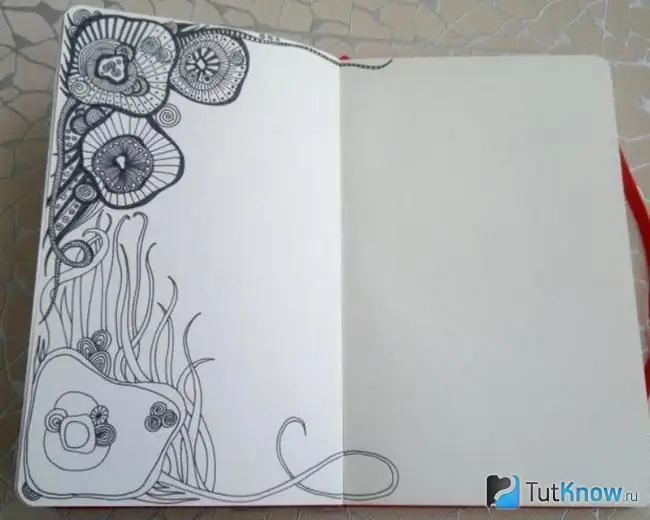
Now fill in the next corner, write clever sayings in the free space, make spectacular curls in the center.
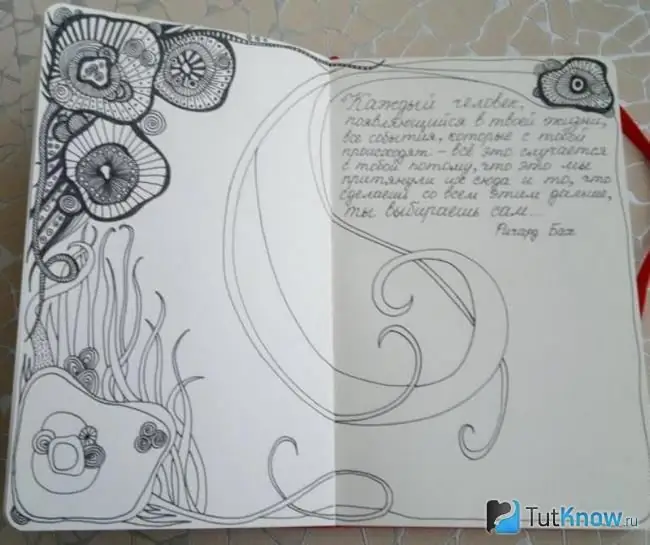
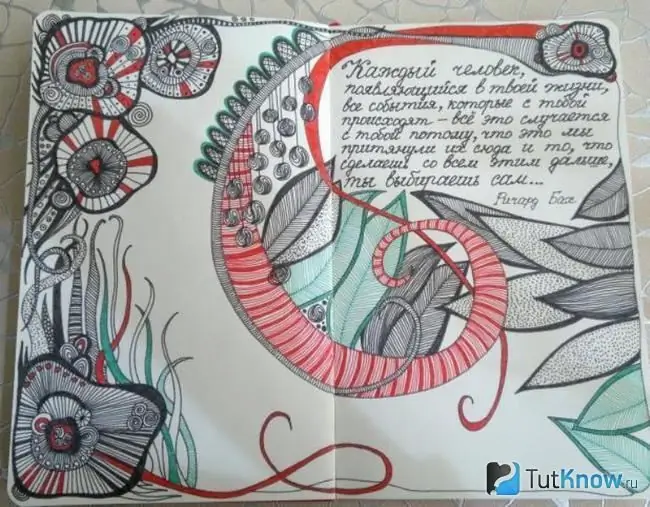
Decorate your drawing if you like. Make it brighter.
On the next unfolded sheet, you can depict a lady in an old dress.
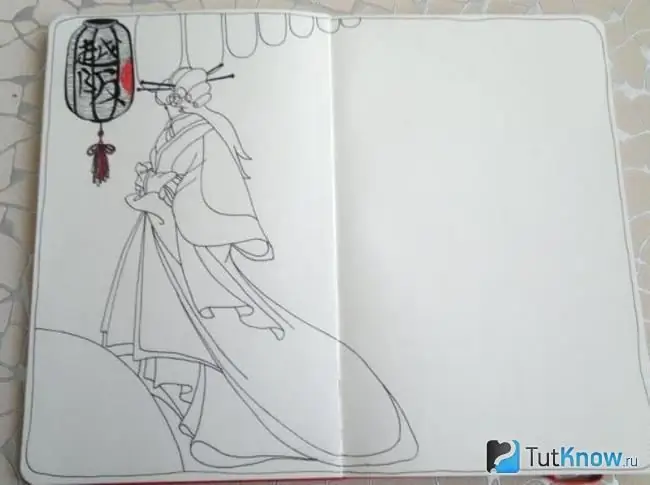
Use doodling and zentangle patterns to fill in the surrounding area.
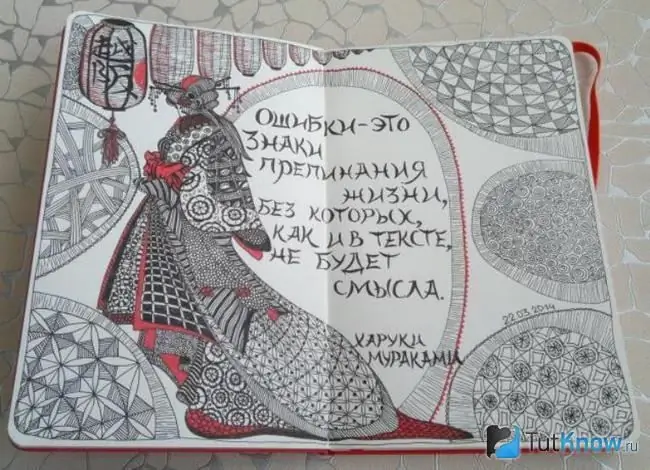
Make the drawing more expressive, write down what you want to immortalize on a piece of paper.
If you want to depict a city, you can also use a familiar trick for it. Buildings can be placed not strictly horizontally and vertically, but diagonally. First draw out their borders, then fill them with themed designs.
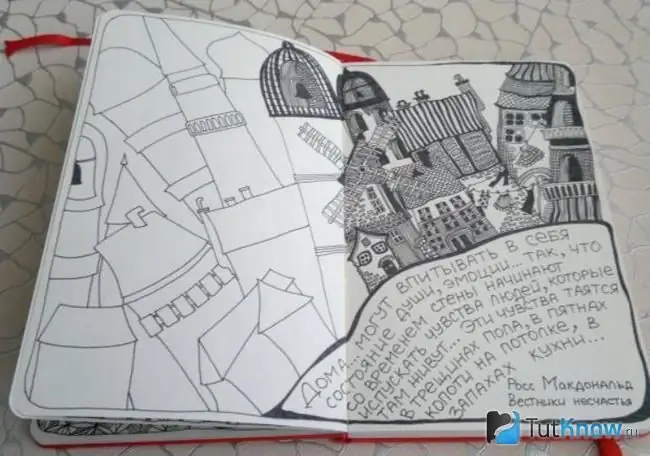
As you can see, the inscription is also applied diagonally.
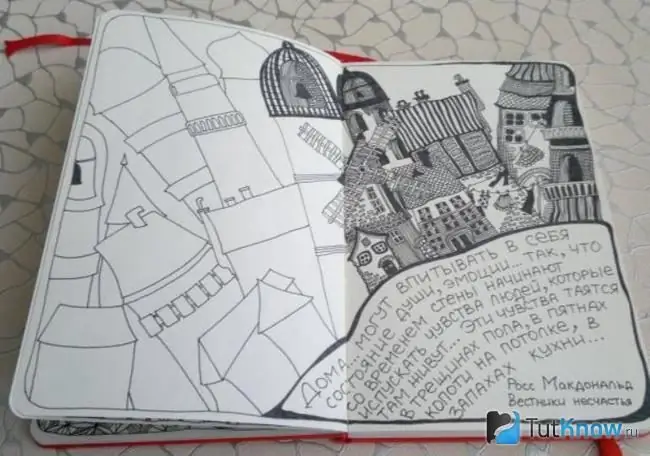
It remains to make them clearer. After that work on the author's diary was completed.
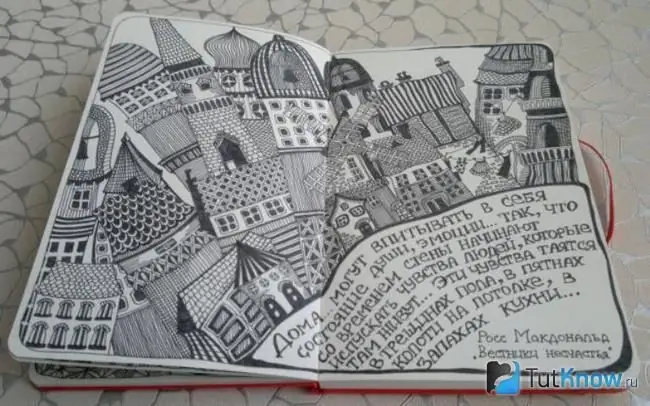
You can also position the label diagonally, but not in the bottom corner, but almost in the center. Frame it with all sorts of colors, leaving them in black and white or adding colors.

This is how, using various techniques of self-expression, you can arrange a diary.
Zentangle - master class
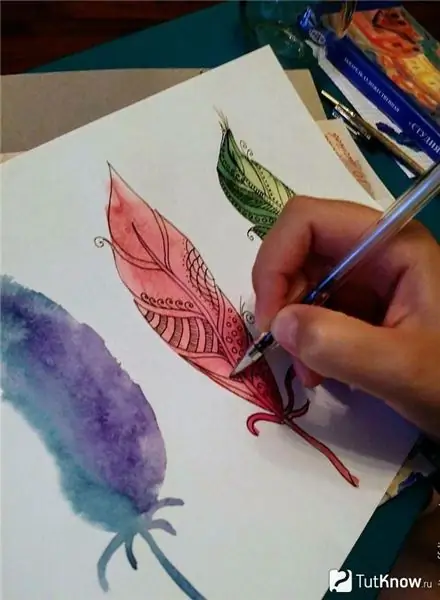
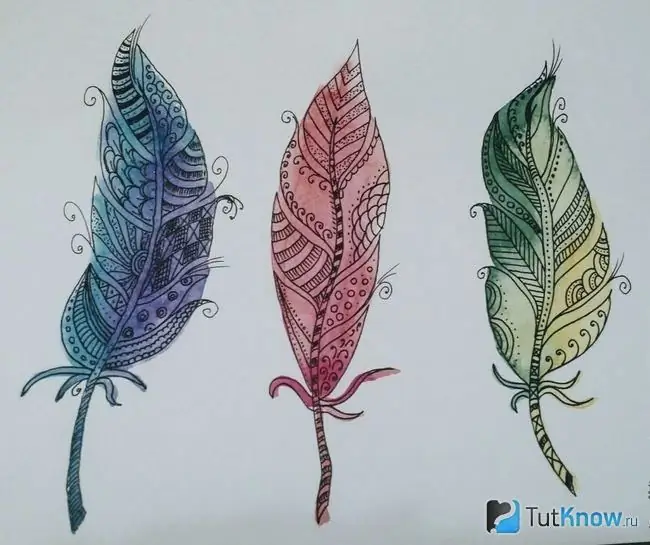
See how you can paint feathers in watercolor using the technique presented.
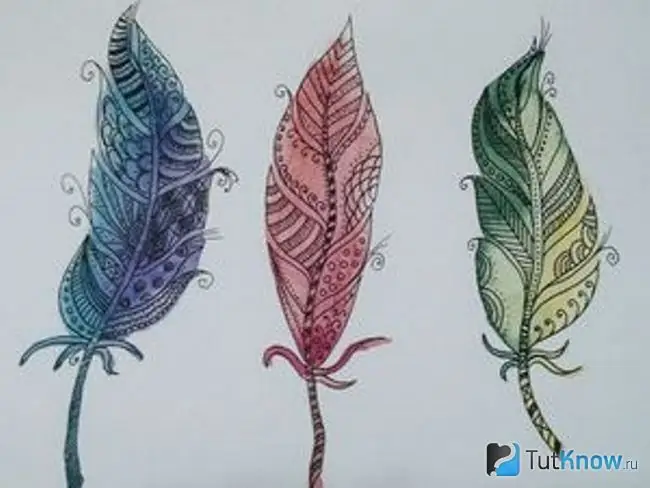
To get such an image, you need to take:
- watercolor paper;
- brush;
- simple pencil;
- gel pen with black ink;
- simple pencil.
Draw pencil sketches of feathers on a piece of paper.
When painting with watercolors, use thick paper, like a Whatman paper, so that it does not get wet.
To prevent watercolors from merging or mixing, dampen the painted feathers with water. The tops of the feathers do not need to be moistened to keep these parts of the design crisp.
You can use the color mixing chart to decide which shades you want to achieve.
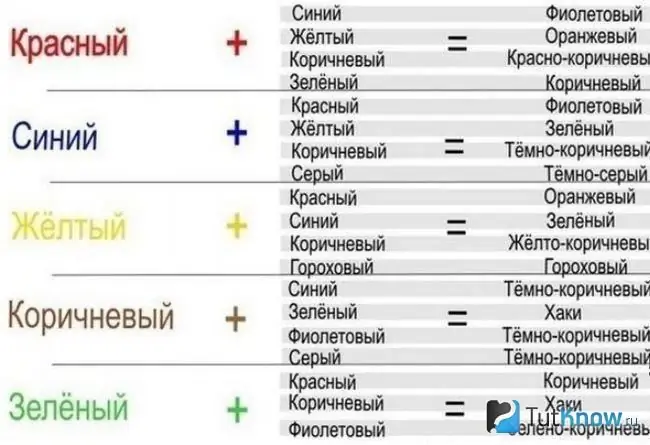
In this case, the sketch looks like this.
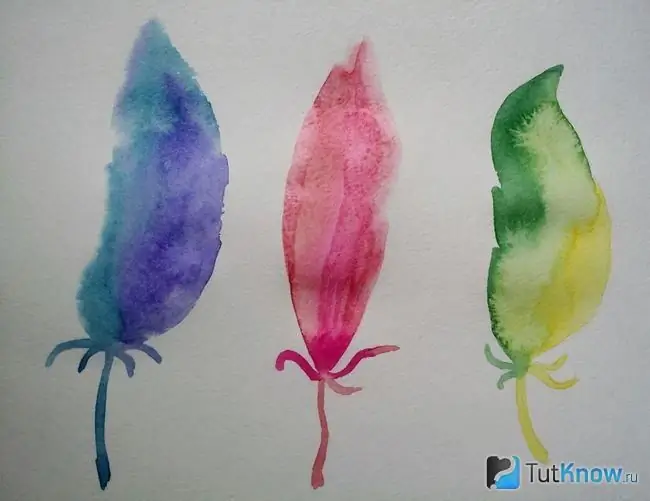
Now let the paint dry completely and you can move on to the next step. To do this, first demarcate the space with a pencil, then draw the lines with a gel pen. In this case, the pen must contain a rod, right and left horizontal branches.
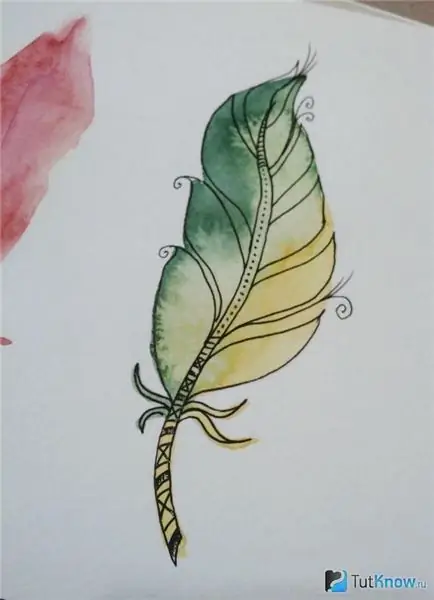
Fill in the sheet with various curls, dashes, circles.
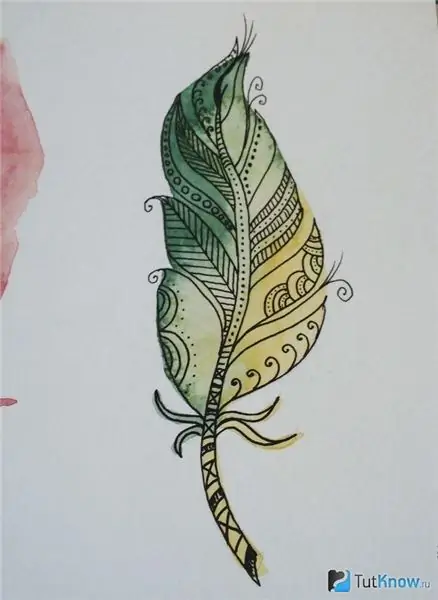
You can use the following zentangle patterns to create them.
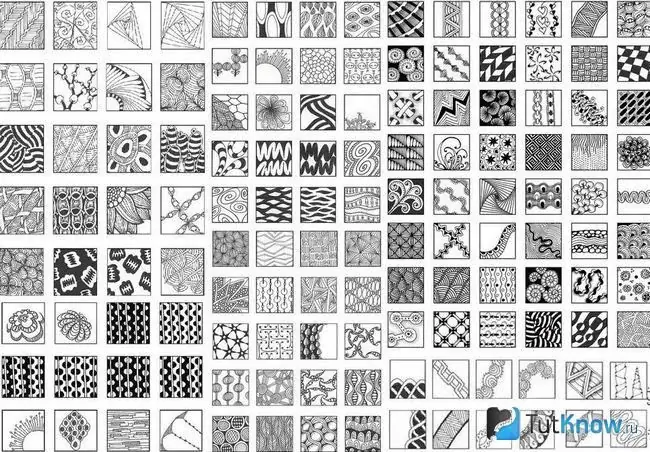
Having painted the first feather, come to the second. You can make the images the same or different.
Decorate the third, after which the process of pleasant meditation and at the same time creativity is over.
Using the above schemes, you can create animals as well.
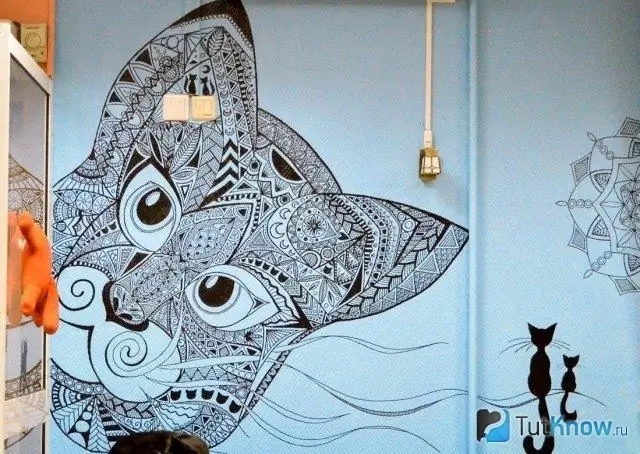
Take a closer look, and you will understand what the muzzle of this cat consists of.
Try to make an inscription using already known techniques. You will see how the letters will play in a new way.
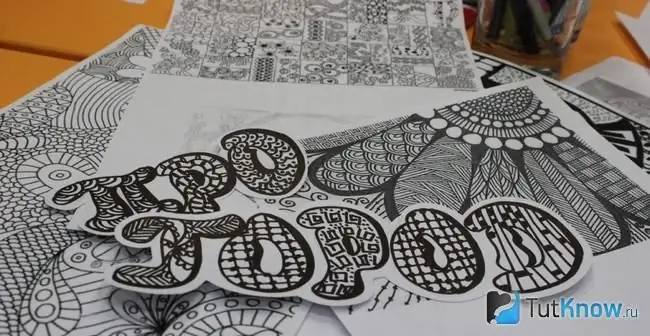
Ochechnik - doodling
Now it's time to put all the knowledge and training gained into practice and paint some subject. Let it be an eyeglass case. To decorate it this way take:
- case for glasses;
- sponge;
- paper napkins;
- glossy acrylic varnish;
- white acrylic paint;
- black gel pen;
- brush;
- a glass of water.
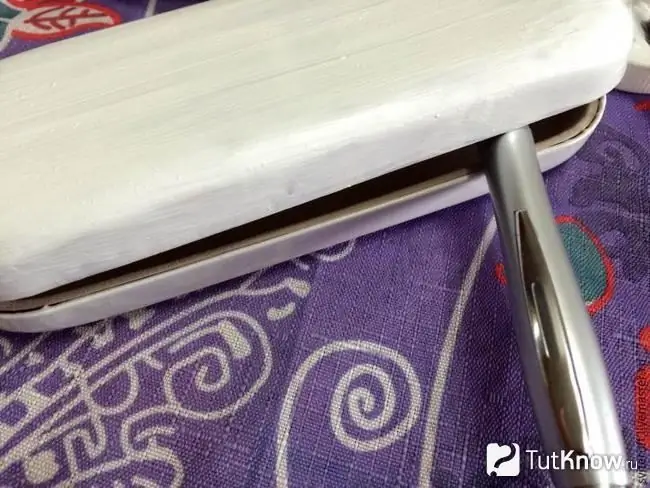
Paint over the case with white paint. In order not to stain the bottom cover, you can insert a handle into it for a while.
Choose a drawing that suits you. It can be black and white or color, conceal the image of some animal, flowers, or have an abstract drawing. In this case, repeating shapes were drawn parallel to each other.
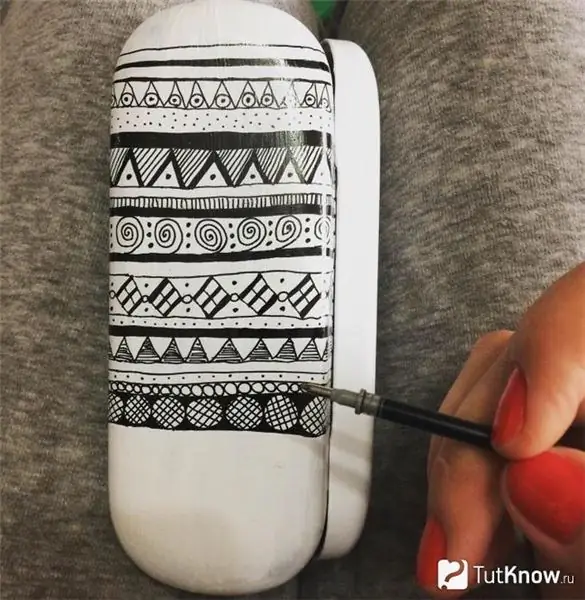
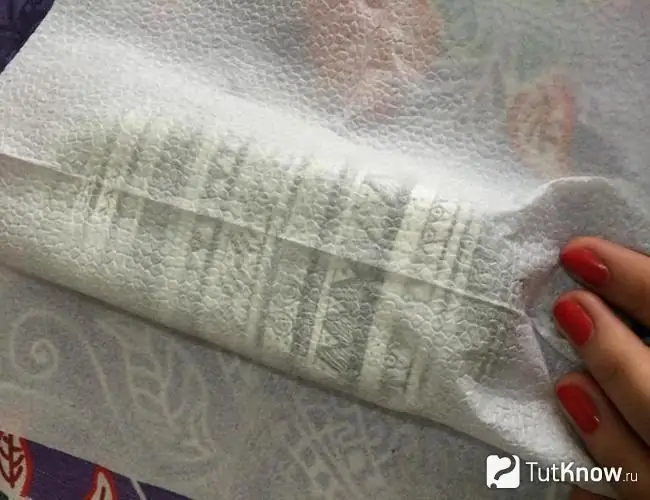
Let the paint dry now. If you want to speed up this process, then you can dry it with a cold stream of a hair dryer, placing it away from the eyeglass case. But be careful that the elements of the picture do not creep. Then blot the surface with a tissue to remove excess paint.
Next, you need to varnish your creation. But since the gel pen tends to smudge, this must be done very carefully. Use a spray bottle or sponge. It is best to take an empty spray bottle and pour varnish here. Now you can spray the surface. After the polish is dry, it's time to use this stylish piece.

This is how, using the zentangle and doodling technique, you can decorate your personal diary, draw various objects, vegetables, animals in a new way, engage in meditation, paint the eyeglass case.
The videos below make it easier to understand this type of art. By repeating after the needlewoman from the first master class, you and her will be able to create simple patterns using the zentangle technique for beginners.

The second video tutorial will teach you how to draw using the doodling technique. These techniques are also suitable for beginners.


