- Author Arianna Cook [email protected].
- Public 2024-01-12 17:55.
- Last modified 2025-01-23 09:40.
The genealogical tree of the family can be made directly on the wall of the house or in the form of a panel. Both the drawn family tree and polymer clay look great. Surely, each person is interested in who his ancestors were, what they looked like, what they did. Ask your elders about this. Tell your children about them and about your great-great-grandfathers, great-great-grandmothers. Create a family tree with him.
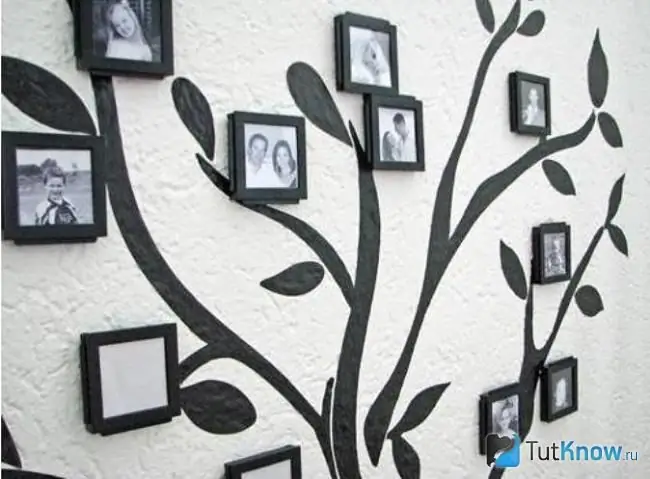
Genealogical family tree on the wall
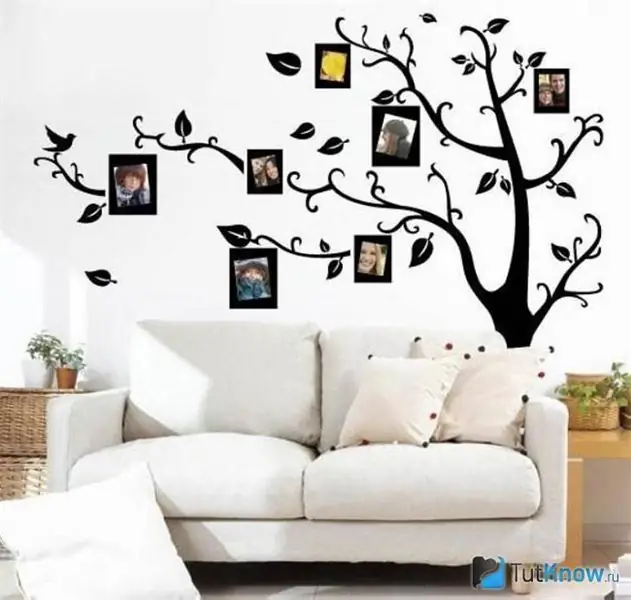
It will become not only a decorative element of decoration, here you can hang photos of family members. Such a tree will certainly attract the attention of guests. And you will tell them what kind of relationship you are with this or that person.
You can buy ready-made stickers of such a tree with frames or make it yourself using a stencil. For the latter option, you will need:
- cardboard, whatman paper or wallpaper;
- scissors;
- stationery knife;
- large ruler;
- sponge;
- brown paint;
- brush;
- Scotch;
- soft cloth.
Follow these instructions:
- You will need not only a template for the family tree, but also a stencil, which is easy to make yourself. To do this, draw parts of it on a disassembled cardboard box, Whatman paper or wallpaper. You can take large pieces or glue small pieces with tape to draw the whole tree at once. It should be with a trunk and branches.
- You can make it symmetrical. For this, only half of the tree is drawn on a paper basis. It will be enough to unfold it in a mirror image, in order to then apply the outlines of the second half on the wall.
- But first, carefully cut through the inside of the template with a knife and scissors. If your wall is dark, then the tree is cut out from the outside, applied to it, paint over the used part of the wall with light paint.
- If the wall is light, then attach the stencil to the wall, glue it to it with tape. Dipping a sponge in paint, sketch out the trunk and skeletal branches, thin ones can be drawn with a brush.
- Make separate stencils of the leaves, attach them with tape to the wall, paint the inside with paint, when it dries, depict the veins with a brush.
- If you do not want to draw a tree, but to glue it, then buy brown adhesive paper, cut out the elements of the tree from it.
- Cut out rectangles inside the sheets, attach them to the wall, paint over. When dry, glue a photo to each.
You can arrange photos not vertically and diagonally, but slightly obliquely to avoid strict forms. On the left, arrange the relatives along the mother's line, on the right - along the father's line. Glue photos of older family members at the bottom, the youngest are at the top. You can cut rectangles out of sticky paper to create photo frames. It's okay if you have small fragments of different colors left from the repair. These will look good too, especially if their tone is in harmony with each other.
If you want to make a family tree quickly, you don't have to cut out the leaves. And without them, this ancestral relic looks great.
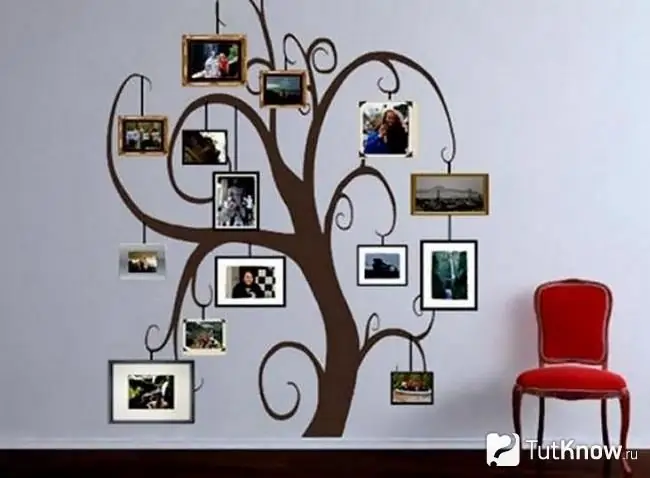
You can make the ends of the branches with curls, as in this photo or without them, as in the following.
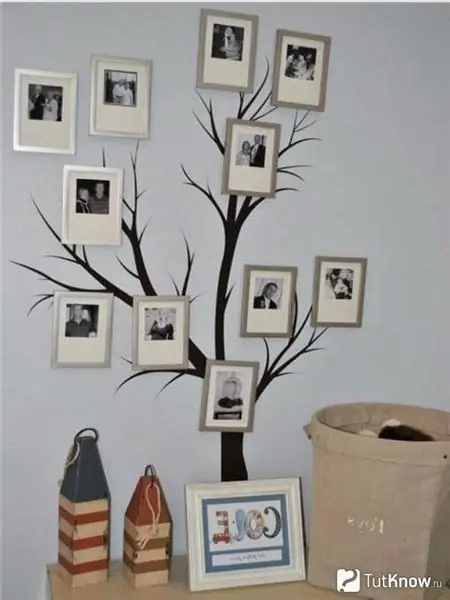
If you have a desire to create a family tree on the wall, but there are few materials, you should still not give up this idea. If you have a plain light wall, it will work fine, if not, you can paint it. If there is no dark paint, self-adhesive paper, then use pieces of brown suede, leather or fabric of this color. From such materials, you need to cut out wood elements, glue them on the wall.
In order not to get confused, draw the parts of the tree first on the newspaper. Number them starting at the top or bottom. Then put these numbers on the back of the fabric or leather pieces.
It remains to nail or glue the photo frames. If you do not have them available either, lay out everything from the same fabric or leather or glue from the ceiling plinths.
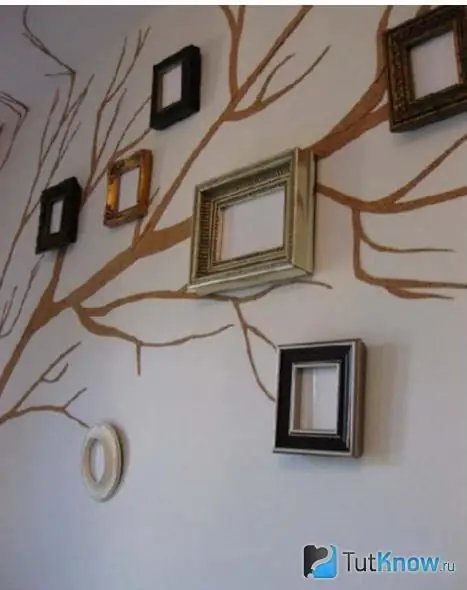
Lovers of high-tech style can make a family tree and photo frames for it in a single color. Using the above materials for this.
Bulky family tree - master class
It can be made from a wide variety of materials. Knowing how to create a topiary, you will make the base of a tree from wire, wrap it with paper. If you have enough time, try creating a family tree to look like a golden heirloom.
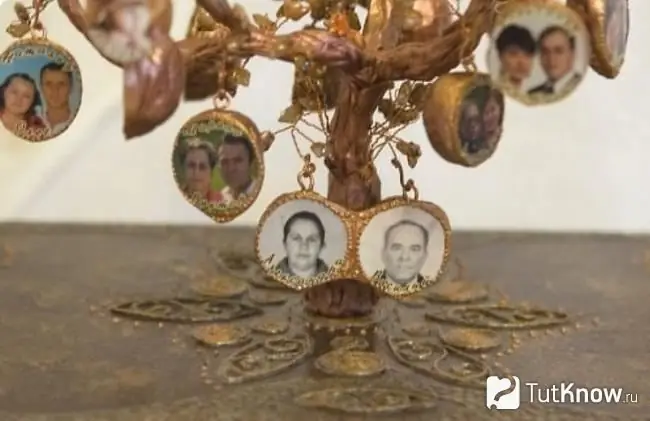
To do this, take:
- brass tube;
- copper wire;
- plastic;
- walnuts;
- brown and gold acrylic paint;
- hot gun;
- foil;
- large beads of gold color;
- copper paint in a spray can;
- a finished box or wooden planks, paint, glue and varnish for it.
And here is a step-by-step manufacturing plan:
- The brass tube is the trunk of a tree. Cut pieces of wire. Take a few, twist them to make branches. Leave the ends of these blanks free for now to wrap around the barrel and attach to it.
- If there is no ready-made box, make it from wooden planks or plywood, but you can do it easier - put the tree in a pot, pour gypsum or alabaster here, let the solution dry out so that the artificial plant is well fixed in it.
- Now take the plastic (polymer clay) that air hardens. Gradually coat the entire tree with it. When the time written in the instructions for this material has passed, start decorating the tree. But so that there is no downtime while the plastic dries up, take walnuts.
- Carefully split each into 2 halves, remove the contents, only the shells are needed. Spray them with copper paint from the outside. Inside, put a piece of crumpled foil in your hand.
- Cut a photo of the first member of the family to fit a hole in the shell, glue it along the edge to the nut shell with a hot gun.
- Blind the frames for the photo from polymer clay, attach them along the edge of each shell so as to fix the photos. Use a thin brush to coat these decorations with gold paint.
- Cut the copper wire with pliers, bend each piece in the shape of a hook, attach to the branches. Other segments need to be given a crescent shape, lubricate their straight edges with silicone from a hot gun, and stick into a drying polymer clay decoration on a nut.
- When the plastic and glue are dry, slide the portraits onto the branches. If you want to donate a family tree, then take off the pictures in shells from it, put them in the compartments of the box during transportation.
- Make leaves for a tree from gold beads. If you want to speed up the process, then cut them out of a plastic bottle of this color or brown. Punch a hole at the top of each leaf with a hot needle or an awl, insert a piece of wire here to secure these elements to the tree.
Here's how to make such a heirloom that can be passed down from generation to generation.
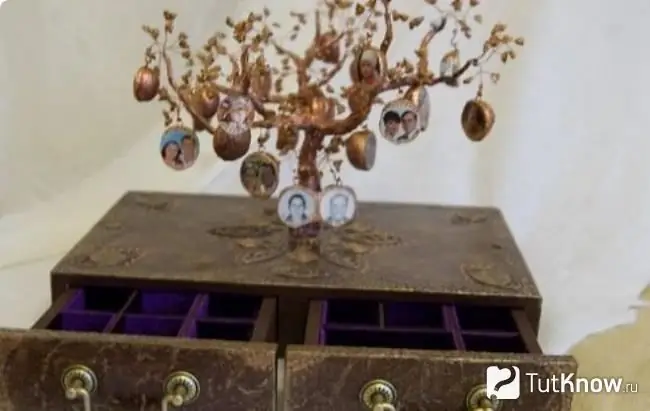
If you do not set yourself such a goal, you want to know about an easier way to create it, then check out the next idea.
How to draw a family tree of a family?
Tell your child how to do this. Prepare:
- a sheet of white cardboard;
- colour pencils;
- eraser;
- simple pencil;
- white paper;
- scissors;
- portraits of family members;
- glue;
- oval pattern.
Show your child how to draw the trunk of a mighty tree. In this case, only its lower part is shown. A crown is drawn in the center and at the top. First, this is done with a simple pencil, then the child will color the visible branches in brown, and the leaves in green.
You can trace the oval pattern ahead of time to leave these areas unpainted. But it's easier to cut them out of white paper, stick them on a tree, as shown in the photo.

Now have the child cut out the portraits of the household. Then he will stick them on the prepared ovals. Then you can circle the photo with a pencil. As you can see, he will place his portrait below, a little higher - his parents, and above - his grandparents. As a result, he will clearly know who are whose parents, their names and patronymics. Since in the process of work you will begin to call them.
Make sure that when cutting, the child holds the scissors with the tips away from him and twists not them, but the paper in this process. How you can make such a tree as a gift to your grandmother, you will learn from the video below.
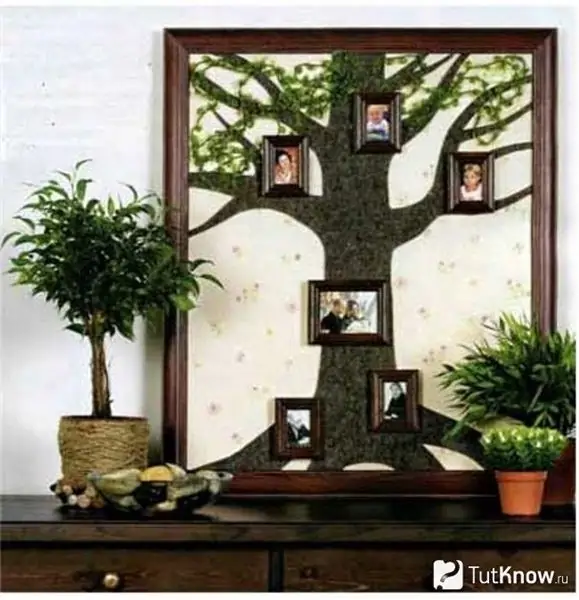
To make the next family tree, a template is not required, since it is very simple to do. For him you need to take:
- dark felt;
- glue;
- cardboard;
- double sided tape;
- a piece of wallpaper measuring 50x60 cm;
- green yarn or felt of this color;
- dry soap;
- glue;
- photo frames.
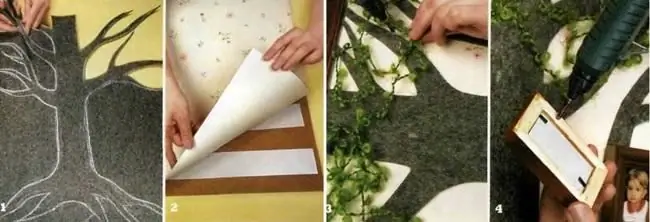
On the inside of the felt, draw a remnant of a tree with a trunk and branches. Cut it out.
Glue a piece of wallpaper onto the cardboard using 2-sided tape or glue. Attach thin branches and their tips especially carefully.
Glue yarn on top of the crown, which will imitate leaves. You can cut them out of felt and attach them as well.
Insert pictures into frames, glue them to the finished tree. Here below are portraits of older family members - above - young ones.
Here's how to create a family tree that can be flat or three-dimensional. Make this not only for yourself, but also to give to the elders of the family. They will certainly be delighted. Therefore, in conclusion, take a look at the visual process of creating it. See what family tree you can make as a gift to your grandmother.

And here is how to create a panel "Family tree", which will also be an excellent gift or a source of pride for your home.


