- Author Arianna Cook cook@women-community.com.
- Public 2024-01-12 17:55.
- Last modified 2025-01-23 09:40.
It is very exciting to do interior paintings with your own hands. In this case, the most affordable materials are used, such as: buttons, paper, lemon, feathers, a balloon, cupcake packaging. Making paintings? it is creative self-expression. Moreover, you can "draw" them not only with a brush and paint, but also use the most unusual objects for this: feathers; buttons; threads; pieces of paper and even custom packaging for cookies and muffins.
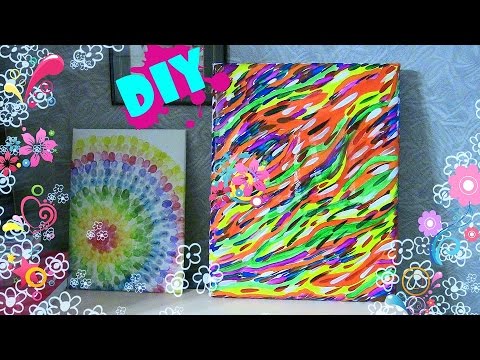
DIY interior paintings
Feather painting
Feel like real contemporary artists by creating an amazing canvas. It will be light and airy, as it is created from feathers.

Here's what will be needed to make such interior paintings:
- feathers;
- spray paint;
- frame;
- large bead;
- glue;
- sheet of cardboard.
Cut a piece of cardboard to fit the frame to fit. If the base is not the color you would like it to be, then glue it over, for example, with a white sheet of paper. Now attach feathers to this base to understand how they will look in the final form.

Then, on another surface, you need to paint the feathers using paint in spray cans.

As you can see, shades of the same color look great. Therefore, you can use dark and light blue paint. Glue the feathers on the outside of the circle first, and then make the rows closer and closer to the center.

When this entire surface is filled, glue a large bead in the middle.

After the glue has dried, you can frame the finished work and hang it in the bedroom or in the living room, or present it to a dear person as a souvenir.

Such a picture in the interior looks great, like the following.
Paper painting
Soaring butterflies will certainly cheer you up.

It doesn't take a lot of materials to create such beauty. You will only need:
- colored paper of pink and white shades;
- a sheet of polystyrene or expanded polystyrene;
- glue;
- whatman;
- chalk;
- scissors.
If you are good at drawing, you can create a small freehand butterfly. If you are in doubt that it will turn out the way you want, then you can use a template.

- Cut strips of the desired width from pink colored paper. The distance between the sides should be the same as you want to see the wingspan of this insect.
- Attach the butterfly to the beginning of the paper strip, fold the tape several times so that the insect has enough space on the square allotted to it. Outline the butterfly and cut along the contours. You will get not one, but several insects at once.
- In the same way, when folding the paper sheets into a stack of squares, cut out the rest of the butterflies. Use dark pink, pink and light pink paper for this.
- Using double-sided tape, you need to glue a sheet of foam or expanded polystyrene with Whatman paper. Draw on it the outline of the future shape using a washable marker or crayon. Start gluing butterflies, filling this shape with them. When the work is completed, you can use it for its intended purpose.
Also, as in the presented photo, make the left outline of the drawing indistinct, as if it were soaring butterflies gradually settling here. Such works look especially beautiful in sunlight. You can not glue the foam, but tint it using a sponge and paint. Then glue the butterflies using double-sided tape.

You can create interior paintings by making cardboard frames with your own hands. And so that the butterflies are visible on the canvas, draw their outlines on a sheet of cardboard and cut along them with a clerical knife. But the lower part of the base should be of a more contrasting color so that the butterflies can be clearly seen.

You can leave them white or paint them.
Do this fun creativity with your kids. After all, they can also create original paintings with you. Each butterfly can be painted and glued to the canvas.

Use heart-shaped figures to make a wall panel. For the next work, you don't even need a frame, but only need:
- double-sided cardboard;
- scissors;
- fishing line;
- bar;
- dye;
- awl.
Cut out the hearts using the butterflies method described above. Make a hole at the top of each with an awl. Insert the line here. To make this easier, use a needle to thread the line here.
You should have several rows of hearts. Paint a block and tie the tops of the line to it.
Now you can hang such a beautiful panel above the bed in the bedroom or on the wall in another room.

The creative impulse should not be held back by the lack of some material, for example, paper. If you don't have it, use the newspapers you read. Cut out hearts from them and glue them to the paper base, make a frame for work out of cardboard.

If you still have a ceiling tile, this material will make wonderful interior paintings.

For such, you will need the remains of colored paper. Taking into account the above template or creating your own, you will make such a cheerful panel.
Button and cork paintings
The following design decisions will suggest waste material. After all, wine corks are usually thrown away, and you can make a lot of interesting things out of them. This is the kind of work that is created on the basis of this material.

For the first picture, you need to cut each cork in half, and if you have a lot of such material, then use whole elements. First, draw the outline of the future masterpiece on the base, and then fill it in with blanks. If you want the picture to take on a rainbow tone, then paint them first.
To get such beautiful interior paintings, you can only use:
- bottle caps;
- rope;
- awl.
Make a through hole in each plug with an awl. Now, stringing them on a rope, connect.
No frame is needed for the next picture. You just glue the cork in rows on the main surface and you can attach a postcard here to congratulate your loved one.
If you have a lot of unnecessary buttons on your farm, then you can also make interior paintings from them.

For the next one will use:
- buttons of green shades and brown;
- glue;
- wooden plank;
- pencil.
Use a pencil to sketch the future masterpiece on a wooden surface. Using a hot glue gun or Titanium clear glue, attach the green buttons in place of the crown, and the brown ones will become the trunk and roots of the tree.
The following button paintings will also beautify the interior.

You can lay out the first letter of the name of a loved one with buttons, gluing them to the base and hand the masterpiece to him. The motive can be very different. Make the outlines of an animal or an anchor out of buttons, such works will certainly be appreciated.
You can confess your love in the most unexpected way. Paint the wood surface, when it's dry, glue the pink heart buttons here. Seeing such a sign of attention, the person dear to you will certainly be delighted.

Pictures in the interior can be very different. If you want to capture the dark time of the day, then pre-paint the background with brown paint. You don't have to make it even. Spread the paint with a sponge, then it will turn out to be so mysterious.

A black marker will help to highlight the contours of the branches and trunk, and a rainbow crown can be made from buttons of various colors.
If you prefer light colors, when using a white base, draw here the barrel with a marker or brown pencil. You can give your creative imagination free rein and lay out this part of the tree using threads of this color. Glue the buttons, which will turn into colorful leaves.

Nature itself will help to draw interior paintings. Check out the following interesting ways to create them.
Method of printing interior paintings
It is enough to dip a chamomile or other flower in paint, and it will become a wonderful printing tool. You will lean the plant against a white sheet of paper and create original drawings.

Lemon can be used not only for its intended purpose. Dip half of this fruit in paint and print on paper.

This kind of art therapy will certainly cheer you up. You can use a wide variety of fruits and vegetables to create interior paintings. If you have an ear of corn, then cut a piece of the desired length from it, pin it on both sides on forks or other sharp objects and print to your health.

If you don't have fruits and vegetables or don't want to use them to create paintings, then you can take a balloon.

Pour paint into a bowl. And if you want the prints to be more interesting, then add paint and other shades here. Dip the ball into this mass, then lift it up and print patterns that you come up with on a sheet of paper.
If you want to draw your favorite teddy bear, but you can't, then you can make a print. In order not to spoil the toy, take water washable paint. Dip the teddy bear in here and attach it to a sheet of contrasting paper.

If there are no such consumables, then you can even use your own palm. Dip it in a bowl of paint and lean it against the paper base.
If you want to make a picture for memory, then invite all family members to do such manipulations. In this case, the largest palm should be printed first, and then the next ones are arranged in decreasing order. Use different colors of ink to make each print clearly visible.

It remains to see a few more ways that will allow you to create interior paintings. To make such masterpieces, you will need very little time.
Interior paintings on the wall in 15 minutes - master class
This is how long it will take to create the next masterpiece.

Also for an interior painting you will need:
- planks;
- dye;
- brush;
- glue;
- Pictures.
Paint the planks and wait for this layer to dry. Better to paint the surface a second time. When this layer is dry, all that remains is to glue the cut-out photographs of animals, and you will get an interesting mini-exhibition.
Create the next canvas just as quickly. Such works will appeal to lovers of glamor.

A step-by-step master class, detailed photos will help you quickly understand an interesting idea. First you need to prepare:
- simple pencil;
- Scotch;
- glue;
- sparkles.
Then draw on a piece of cardboard or on a prepared canvas how you see your work. Such zigzag lines look interesting. To make them even, you first need to draw parallel lines, then divide each into two or three segments. The dotted points will help to achieve evenness. They are needed in order to stick scotch tape on zigzag strips. Which is what you will do. Now grease the gap between them with glue and pour glitter here.
If you do not have glitter, then you can grind the broken Christmas tree ball. To do this, cover it with a cloth and gently knock on top with a hammer. Remove the tape after the glue is dry. Where there was sticky tape, you need to go through the paint using a brush. After a while, the work can be glued to the wall using double-sided tape.
If you liked similar interior paintings, then use almost the same principle to create the next one.

To do this, you will need to take:
- picture;
- self-adhesive letters;
- white acrylic paint.
Stick the letters over the picture, creating the desired word or phrase from them. Paint the surface with white acrylic paint. Wait for it to dry, and then peel off the letters. You will have a colorful inscription and an original painting.
If you have even less time, then you can make panels in the same minimalist traditions as Malevich's black square.

To do this, cover a white sheet of cardboard with black paint using a coarse brush. All that remains is to hang your masterpiece on the wall and wait for the approving responses of home and visiting guests.
Even leftover fabric will give you interesting ideas.

Wrap the rectangles and squares pre-cut from cardboard with these shreds. Fold over the back of the fabric and secure here. Make a loop, hang your masterpiece with it or double-sided tape. You can create interior paintings to create an entire exhibition or make one or two. It all depends on the amount of free time and the availability of material.
If you have small patches left, then you can make such a voluminous flower.

Cut out the petals for it according to the template. Bending the edge of each slightly, glue it onto the prepared surface. It can be a sheet of foam or non-woven cardboard wrapped in a cloth. First create the outer circle of petals, then the next, staggered. Going to the center, complete your work. In the middle, the petals are slightly smaller and look up.
If the braid remains from the needlework, it can also be used. See what kind of interior paintings you can create with it.

To do this, you need to cut these tapes into strips of the same size and glue the end and the beginning of each. Then you need to pull the resulting circles to the center from 4 sides, and you get four-petal flowers. You can also quickly make a panel from packages of cupcakes and cookies. Glue these paper molds to the prepared surface, see what a delicate and airy picture you get.

By attaching a template of leaves to paper, you can cut out such blanks of the same size pretty quickly.

It remains to glue them next to the paper branches and frame the finished work.
Here are some interesting works of art you can create in minutes from the material available. If you want to see how others make interior paintings, then your desire will be fulfilled right now.