
- Author Arianna Cook cook@women-community.com.
- Public 2023-12-17 14:23.
- Last modified 2025-01-23 09:40.
Features of the use of polymer floors in rooms, the types of coatings used, their disadvantages and advantages, preparation and installation on their own.
Advantages and disadvantages of polymer flooring

The most important positive aspects of using such a coating include:
- Ease of use, thanks to a perfectly flat coating surface.
- Temperature resistance. Such a floor is not afraid of frost, drafts, or heat, so you can successfully install a polymer floor in a garage or even in a sauna.
- Increased strength (wear resistance). All types of polymer floors last much longer than a number of other floor coverings.
- Variety of interior solutions and application possibilities - pay attention to this when carrying out renovations indoors.
- No need for waterproofing.
As for possible disadvantages, it should be borne in mind that it is very difficult to dismantle such a coating and it is not economically feasible. Therefore, the easiest option would be to install the next layer right on top of the first.
In addition, this type of surface can hardly be called natural. Many potential customers are concerned about the environmental safety of this type of coating. It is rumored that self-leveling floors give off resins that are undesirable to human health.
But what experts say about this: of course, polymer flooring is not a natural material. But all volatile substances that it contains evaporate even at the stage of polymerization (solidification). After a week, that is, the period of complete hardening and readiness of the floor, it becomes 100% safe, even for children's health.
In terms of sanitary and environmental characteristics, a self-leveling polymer floor is not inferior to many more familiar natural materials. This is evidenced by the relevant sanitary certificates and quality and safety certificates issued for this type of coating.
Tools and materials for pouring a polymer floor

What tools and materials are needed in order to independently fill in any types of polymer floors:
- The polymer material itself in the factory packaging;
- Tank (bucket, basin, other container) for mixing;
- Wide construction trowel;
- Roller for painting;
- Painting tape (scotch tape);
- Construction level;
- Electric drill with mixing attachment.
It remains to prepare a mixture that will serve as the basis for a new flooring. In the composition of any kind of mixture, a pair of components is always present. Mix them thoroughly in a bucket or similar container. For mixing, you can use an electric drill, into which any metal pin is inserted instead of a drill.
Preparatory work before pouring the polymer floor

The service life and external data of the future coating will depend on how correctly the work on preparing the surface for pouring will be performed. In other words, if you want the floors to please the eyes of the inhabitants for a long time, pay the most attention to preparation. Neglecting this stage can lead to the fact that an incorrectly laid coating will eventually deform and subsequent destruction.
To begin with, different requirements are imposed for different types of bases. So, the wooden coating must be sanded, and also make sure that it is always dry. But such floors should not be primed.
Another porosity is a concrete floor or cement screed. Since they perfectly absorb moisture, such a surface must be primed. In addition, you will need a sealant to seal any cracks and seams as much as possible.
If there is old concrete on the floor, then you will have to remove the topmost layer, and then sand the surface well. After sanding, use a vacuum cleaner to pick up any raised concrete dust and particles.
At the stage of preparing the room and the floor surface, it is also necessary to worry about the ambient temperature. This directly affects the properties of the poured mixture and its drying. It is normal if the pouring is carried out at a temperature of 5 to 25 ° C, while the humidity should be approximately 60%. If you do not follow these conditions, the floors will dry longer than expected.
In order for the future floor to have an ideal structure, a priming procedure is performed before pouring it. The primer fills in any, the smallest pores and prevents the flow of oxygen, which will increase the life of the coating.
Some craftsmen add a little dry sand to the soil solution to increase the adhesive properties of the solution. In addition, in this case, the finished solution acquires a slight roughness, and it becomes easier to work with it.
The primer is applied in an even layer using a construction roller. If required, reapply another primer coat. To do this, you need to wait until the starting layer is completely dry, and this is 12-16 hours on average.
Features of pouring a polymer floor with your own hands

The necessary information on mixing the working mixture and its preparation is always placed by the manufacturer on the packaging of his products. Better to purchase materials from the same brand.
Before pouring the future floor, it is necessary to carefully prepare the base (base level). If this is a board, then each of them should be checked and secured so that none of them dangle. All cracks must be sealed with a cement mixture and sealant, otherwise the finished solution will flow into them and lead to unevenness of the coating as a whole.
The thickness of a self-leveling polymer floor is based on whether it will be an independent coating or will serve as a base for another material on top of it. With its help, differences in surface levels up to 30 cm are eliminated. Most often, the height of the finished polymer floor is 10 mm or slightly less.
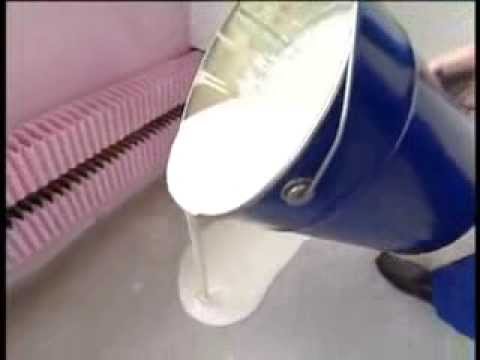
Warm water is poured into a container prepared in advance (usually a basin, a bucket), after which a dry solution is poured. It is important to observe all proportions so that the coating has all the necessary qualities after drying. The finished solution should not contain air bubbles or all sorts of lumps. Its consistency is somewhat reminiscent of liquid kefir.
The prepared mortar is gradually poured onto the base of the floor and spreads evenly over the entire surface with a construction trowel. It is important to work with a partner, since the solution must be distributed as quickly as possible. One more thing: to move around the room, you need to use special spiked shoes. To do this, you can take any old shoes and attach to them along the cut of the board with tape. Self-tapping screws or nails are pre-packed on each board.
After the solution has been distributed over the surface of the room, it is carefully processed with a paint roller. It is necessary to pay attention to the fact that all air bubbles are removed as much as possible - in this case, it will be possible to achieve the most even, smooth, glossy surface. It will take no more than 40 minutes to complete the work, since after this period the solution begins to set and it will be wrong to carry out further work.
The very technology for the production of polymer floors should be organized in such a way that for each square meter of the floor surface in the room, the average consumption of dry matter is about 1.5 kilograms. For pouring, you need to prepare protective gloves and goggles to protect yourself from harmful vapors. It is necessary to provide good ventilation in the room - this way the resins will evaporate much faster, and the solution will dry out better.
After 2-3 days have passed after pouring the main polymer layer, you can start leveling the floor. This is the finishing part of the technological process. The thickness of the last layer should not be more than 3 millimeters. After the final drying of the finishing layer, proceed to varnishing the finished surface. It is best to use a polyurethane-based varnish. This will create additional protection for the floor and increased resistance to aggressive effects of alkalis, acids, paints.
It will take about two days or more to completely solidify, depending on the climatic conditions in the room. After the top layer is completely dry, you can start applying a decorative coating layer.
Another good thing about polymer floors is that you can use a variety of decorative elements on them. Absolutely any desired pattern based on different colors and shades can be used as an image. With well-organized work and careful study of the instructions, you can independently get a result that will not be inferior to the work of an experienced master.
Indoor polymer floor care

Caring for this type of flooring is not particularly difficult - as if you have to take care of ordinary parquet. Typically, classic wet or dry cleaning is sufficient to keep it clean.
To wash the polymer floor, household chemicals are used, which are distinguished by a significant acid content. Such a product is applied to the floor surface for 5-10 minutes, then removed. The floors are then washed with plenty of water. If there are stains from various contaminants on the surface, they are treated separately.
As for the processing of polymer floors in industrial and commercial premises, the intensity of their use can be much higher. In such cases, there are hardly visible cracks on the floor, into which dirt particles are packed. They lead to the fact that the floors dull and lose their former attractiveness. Therefore, it is first necessary to remove the accumulated dirt and dust with a high pressure washer. The floors are then washed, after which they can be varnished to give the same glossy look.
However, in cases where floors will be frequently exposed to harsh chemicals, additional protection is required. The device of polymer floors at this stage will be as follows: before the start of pouring, the surface is covered with a special protective polish. It will require renewal every 6 months. But it is impossible to leave detergents and other aggressive agents on the surface of polymer floors for a long time, since they are susceptible.
The polymer flooded floor has proven itself well in those rooms where people go barefoot or in light shoes. It is recommended to fill the floors with polymers in the bathroom, shower, kitchen, bedroom and so on. In corridors and public areas, the coating will wear off faster due to contact with dirt and sand particles on the shoes. In such cases, the floors will have to be refurbished more often, which is associated with additional costs.
How to pour a polymer floor - watch the video:
Thus, the self-leveling polymer floor belongs to the finish type coatings, which allow you to achieve a perfectly smooth and absolutely flat surface that is resistant to abrasion and impact. This type of floor covering is to a certain extent still distinguished by its novelty for the domestic customer. This is used by construction companies and repair crews to receive higher rewards for services. But making polymer floors with your own hands is not so difficult if you follow the indicated tips and approach the pouring process carefully.


