- Author Arianna Cook [email protected].
- Public 2023-12-17 14:23.
- Last modified 2025-01-23 09:40.
Insulation of the floor of the first floor, the choice of heat-insulating material and the technology of laying each type of insulation. Insulation of the floor of the first floor is a set of works to preserve heat in a residential area. Having skipped this stage at the stage of building a house, you will have to do thermal insulation after settling, which is fraught with some difficulties.
The need for floor insulation on the ground floor

Thermal insulation of floors on the ground floor is necessary both in a private house and in an apartment building. In the first case, insulation will help to save a decent amount of money on energy, which is important for the cold season, in the second - to make the apartment cozy and warm. In multi-storey buildings, especially panel buildings, basements are always cold. As a result, in winter, no matter how hot the radiators are, the floor always remains cool, and the temperature in the apartment often drops below the comfort level. Thus, there are quite a few reasons to insulate the floors of the first floor in the house:
- Saving money … Up to 30% of the heat escapes through the floor. By insulating it, you can save a lot. The question is relevant for the owners of private residential buildings.
- Improving tactile sensations … Walking barefoot on a cold floor is unpleasant. You have to wear slippers and socks to boot. The insulated floor is pleasant to the touch, you can walk on it barefoot without fear of getting sick.
- Elimination of dampness … On the ground floor of a private house, moisture penetrates from the ground, in a high-rise building - from the basement. Most insulation materials require waterproofing of the base. After laying them, the floor will always be dry.
The choice of material for insulating the floor of the first floor
Before thermal insulation of the floor, you need to decide on the material that will be used. The insulation market is diverse. On sale you can find thermal insulation made from natural substances and synthetic. To choose the optimal material in terms of technical characteristics / price ratio, you will have to deal with each type separately, and then draw conclusions.
To insulate the floor of the first floor in a private house or high-rise building, the following materials are used:
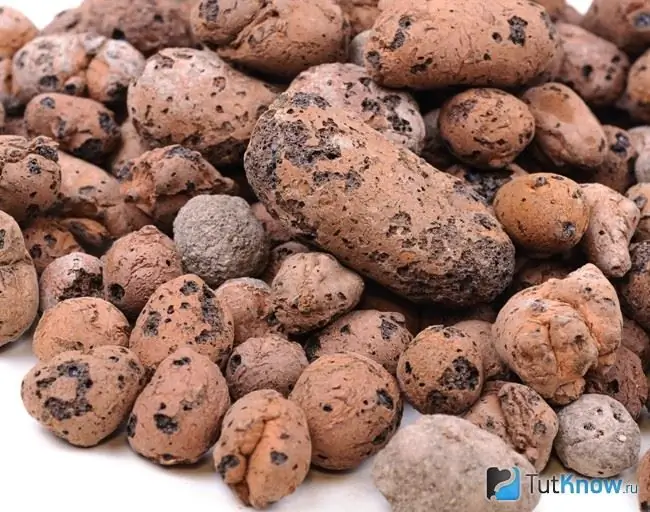
- Expanded clay … It is made from pure clay that is kilned at high temperatures. There are three fractions - crushed stone, gravel, sand. For the best thermal insulation of the floor, a mixture of two fractions is used (gravel, crushed stone, sand is obtained with partial destruction of the material at the time of installation). The insulation is different in density. For thermal insulation of the floor, you need to choose a sufficiently dense material. Expanded clay absorbs moisture well and gives it away poorly, therefore, waterproofing is required when laying. It can be mastic or a thick plastic wrap. Thermal conductivity of expanded clay - 0.18 W / m * K.
- Ecowool … It is made from the remains of the paper industry - waste paper. Borax and boric acid are used as essential additives. Borax is a strong antiseptic that prevents moisture build-up and decay. Boric acid acts as a fire retardant, making ecowool less fire hazardous. The insulation goes on sale in a highly compressed form in plastic bags. Before work, it must be fluffed using a drill with a mixing nozzle and previously dumping the contents of the bag into a large tank. Thermal conductivity of ecowool - 0, 032-0, 041 W / m * K. The insulation is breathable and breathable. Double-sided waterproofing is not required, since when the ecowool gets wet, it is taken with a thick, rather strong crust and protects the rest of the insulation, while the thermal conductivity remains at the same level. Fire hazard class - G2, non-spontaneous combustion. Ecowool is not interesting for mice.
- Mineral wool … There are three types - glass wool, slag wool, basalt wool. The latter is distinguished by the best technical characteristics, it also costs 30 percent more expensive. Available in rolls, mats, plates. Thermal conductivity depends on density: the higher it is, the better the material conducts heat. Technical characteristics of mineral wool: low thermal conductivity (0, 032-0, 045 W / m * K), good air and vapor permeability. The insulation does not burn, at a temperature of + 1000 ° C it melts. Mineral wool is not interesting for mice.
- Expanded polystyrene … This includes ordinary foam and the brand of extruded polystyrene foam, which has become a household name, penoplex. Despite the same basis, heaters differ not only in appearance, but in technical characteristics. Penoplex is better than polystyrene in many of them: thermal conductivity - 0, 032 W / m * K, water absorption - 0, 4% (for foam 4%), flammability group - G1-G4. The insulation does not allow moisture to pass through, it is convenient for cutting. True, it is expensive. It is cheaper to use simple polystyrene under a conventional cement screed, and penoplex under the "warm floor" system.
- Polyurethane foam … It has low thermal conductivity (0, 019-0, 028 W / m * K), almost zero water absorption and low vapor permeability, fire hazard class - G2-G3 (GOST 12.1.044), is absolutely inert to chemical environments and natural solvents, not interesting to rodents. It is applied using a special machine that sprays the material under pressure. If you purchase it (there are disposable ones), then all the work can be done by hand. Polyurethane foam is available in different densities (from 18 to 300 kg / m3), the lower this indicator, the weaker in terms of mechanical strength the layer of thermal insulation will turn out. The material "grows" strongly upon contact with air, closing all cracks and pores, has excellent adhesion to any type of substrate.
- Foil insulation … Presented on the construction market by rolls of thin mineral wool or foamed polyethylene. Such insulation has two purposes - insulation and repulsion of heat back into the room. In order for the foil thermal insulation to work correctly, a counter-lattice is installed (the thickness of the timber is 3 cm or more), a tongue-and-groove board is laid on top as a finishing floor covering.
Before working on floor insulation, it is required to correctly calculate the thickness of the thermal insulation material. If you lay a layer that is too thin, the desired effect of protection against the penetration of cold will not be achieved, if you install too thick insulation, extra financial resources will be spent, which is impractical.
Ground floor thermal insulation technology
Each of the listed heaters is laid in its own way. It also matters what kind of base is required to be insulated - concrete capital, wooden or floor along the logs. Expanded clay and expanded polystyrene are laid both under a concrete screed and under a fine wooden floor. Expanded clay is also filled up on logs with obligatory double-sided waterproofing. Penoplex (extruded polystyrene foam) is always placed under the "warm floor" systems, ecowool is poured into the cavity between the subfloor and the final floor, mineral wool is laid along the logs and is never used in a concrete screed due to insufficient strength characteristics and increased water absorption. Foil insulation is not used on its own, as it is thin.
Insulation of the floor on the first floor with expanded clay
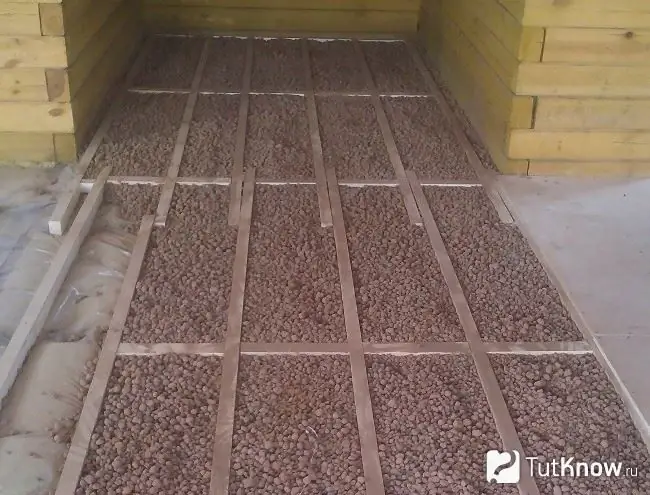
Several types of floors are insulated with this material: on the ground, in houses on screw piles, along logs. The first two options are similar in terms of installation technology.
For work, you will need: expanded clay, cement mixture (concrete screed), a container for mixing, a drill with a mixer attachment, a trowel, a reinforcing mesh, dense polyethylene (thickness 200 micro and higher), a rake.
The order of work on the insulation of the concrete floor of the first floor:
- Disassemble the finished floor. Carefully remove the wooden floorboard, inspect each floorboard, clean it of old paint, treat it with antiseptics, set it aside to dry, then lay it horizontally so that it does not twist. Other types of flooring, tiles, plywood, chipboard, are dismantled and thrown away.
- Inspect the rough base, remove debris and dust, check for evenness with a level. This is necessary in order to pour expanded clay as evenly as possible, without differences in height.
- Treat the subfloor with an antiseptic and let it dry.
- Lay polyethylene, be sure to put it on the walls, 5-7 centimeters above the level of the intended final floor. Trim after installing the skirting boards. Secure the joints of the film with tape.
- Pour out expanded clay, level it with a rake, check with a level in places where there were deviations from the horizontal. Add insulation there, if necessary, and level again.
- Spill the expanded clay with cement milk. This will increase the adhesion between the granules.
- Install reinforcing mesh. The height of the mounting posts is 3 cm.
- Seal the cement mixture with water according to the instructions, let it stand for 5 minutes and stir again.
- Pour the floor in parts, after carefully leveling each of them with a trowel and checking with a level.
- Let the surface dry and work hard. This will take about a month (28 days).
- Install the topcoat. Don't forget to put on the skirting boards and cut off any excess plastic wrap.
The procedure for insulating the floor of the first floor with expanded clay on the ground and if the house is on piles is approximately the same. Tools and materials are the same as when working on a concrete base. Additionally, you will need sand and crushed stone for arranging the pillow.
We carry out the work as follows:
- Disassemble the floor.
- Remove the top layer of the earth and go deep into the ground about half a meter.
- Tamp the bottom of the resulting pit. For these purposes, either a small skating rink, or a special machine, or a home-made device consisting of a heavy handle and a dense, durable sole of an arbitrary size are suitable.
- Fill the sand with a layer of 10 cm, spill it with water, tamp it.
- Lay the crushed stone on top of the sand in a layer of 15 cm, tamp. It is better to use a special rammer here.
- Fill the sand again (10 cm), spill it with water, tamp it. Check the resulting surface for evenness with a level.
- Lay a plastic wrap, place it on the walls to a height of 5-7 cm above the level of the future finished floor, fix the joints with tape.
- Pour out expanded clay, layer thickness of at least 15 cm, level with a rake and spill with cement milk.
- Install a reinforcing mesh.
- Pour the concrete screed and let it dry for a month.
- Install the topcoat. Install skirting boards. Cut off any excess waterproofing film.
It is also possible to insulate with expanded clay on the logs. In this case, clean the rough base, lay a plastic wrap and fix it with a construction stapler to the logs. The joints of the film are fixed with construction tape. Expanded clay is poured flush between the logs. Another layer of polyethylene is mounted on top and a grooved board is laid - a finishing floor.
Important! For houses on a pile foundation, no excavation is required. The thickness of the sand and crushed stone cushion, insulation and concrete screed must reach the level of the final floor in the house.
Thermal insulation of the ground floor floor with mineral wool
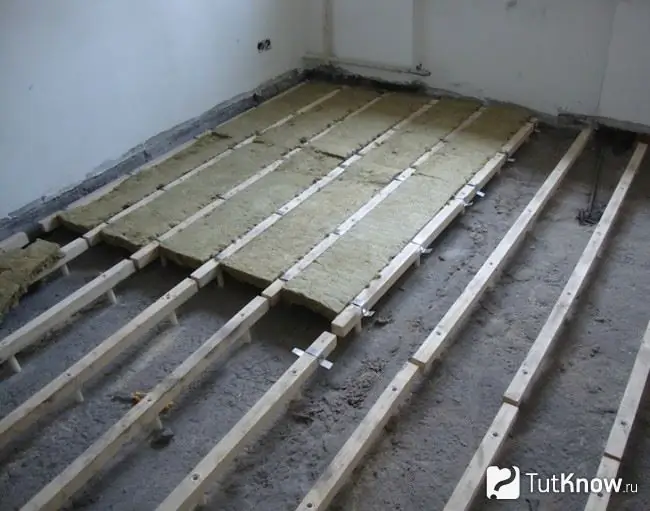
It is convenient to use rolls for such thermal insulation. They are cut to size before laying. The roll width should be half a centimeter larger than the lag step. You can also use mats. Mineral wool is used to insulate the wooden floor on the first floor along the logs.
Work order:
- Remove the old wood floor. Inspect the boards, remove old paint, sand, treat with an antiseptic. Leave to dry and then lay horizontally.
- Remove debris and dust from the subfloor. Carefully inspect the logs, replace the rotten ones.
- Treat all lags with an antiseptic and let dry.
- Lay dense polyethylene, insulate the joints with construction tape, fix the waterproofing with a stapler to the logs.
- Open the mineral wool and place it between the logs. The insulation should be tight!
- Close the material on top with a vapor barrier membrane, also connect the joints with tape and attach to the logs with a stapler.
- Lay down the prepared old boards. Install the skirting board.
- Trim off excess waterproofing.
- Paint the finished coating.
If a private house has a basement, you can insulate the floor with mineral wool from below. In this case, you will need the help of someone from your family or friends. The ceiling in the basement must be primed with an antiseptic, then install a log system with a thickness of insulation, cut out the mineral wool, fix the waterproofing film, lay the thermal insulation between the logs, close it on top with a vapor barrier membrane and finish it with, for example, moisture-resistant plywood. In this case, the height of the living space will remain the same, and the floor temperature will become much more comfortable.
Insulation of the floor on the first floor with ecowool
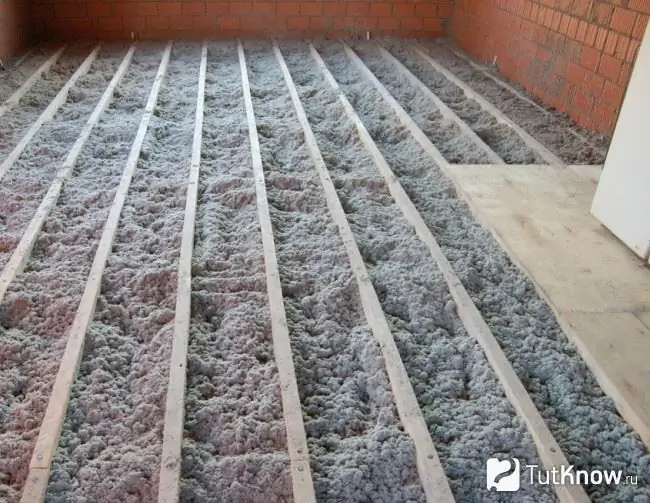
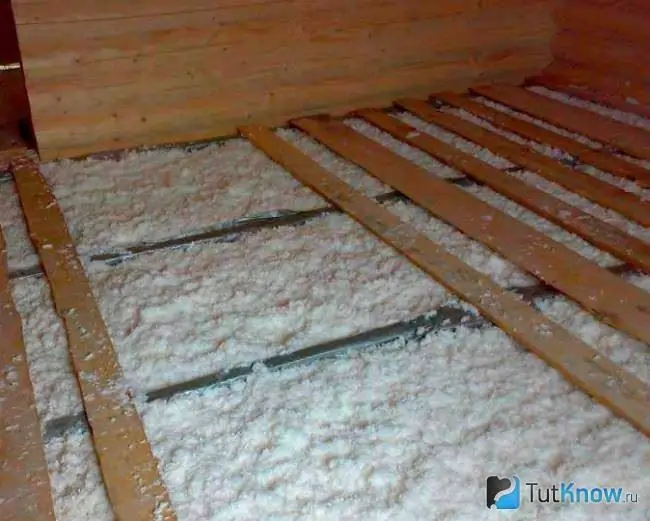
This insulation is laid in several ways: blown out, sprayed (water or glue is used for wetting), fall asleep. For independent work, only one option is suitable - backfill. It is convenient to insulate wooden floors in this way:
- Disassemble the finished floor.
- Treat the boards in the same way as in the case of mineral wool.
- Remove dust and debris from the base.
- Open the insulation bag and place it in the large tank.
- Fluff the material with a drill with a mixer attachment.
- Lay a layer of waterproofing, thick polyethylene will do. Fix the joints with tape. Do not forget to enter the walls.
- Pour the ecowool into the first compartment between the joists. Start tamping using a wide trowel, or make a tamping plane with a trowel-style handle.
- Ram until you feel significant pressure under your hands.
- Add insulation and repeat the steps. The final option is a tightly laid flush insulation at the level of the log.
- Repeat all the steps with the rest of the cells between the lags.
- Install a fine finish, install skirting boards and trim off any excess waterproofing.
Thermal insulation of the floor on the first floor with expanded polystyrene
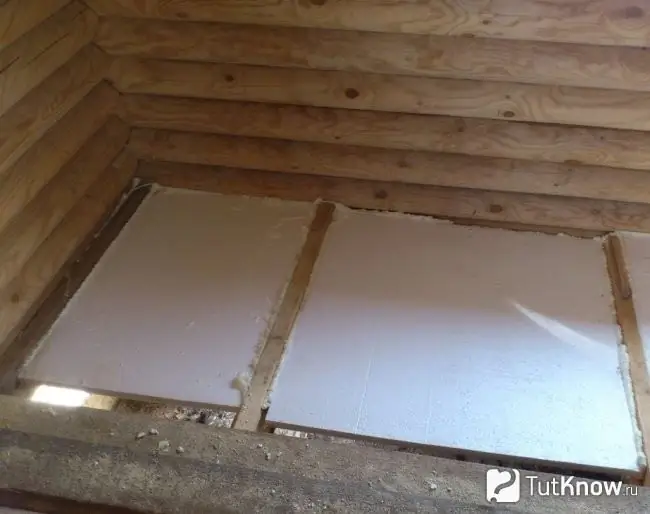
For thermal insulation of the floor on the ground or in a house on a pile foundation, it is recommended to use foam (under a concrete screed). If you need to insulate the concrete base, the foam is also poured into the concrete screed. It is important to consider the height of the room here. In standard apartments with a ceiling height of 2, 3-2, 4 m, such insulation will "eat" at least 10 cm.
Polystyrene is sensitive to the quality of the substrate on which it is laid. If there are obvious bulges and large horizontal deviations, this insulation may crack when loaded. Therefore, it may additionally require leveling the subfloor, and this will take another 3-5 cm of the height of the room. If this is the only possible option, proceed according to the following plan:
- Remove the fine finish - remove the wooden floorboards, knock down the tiles.
- Inspect the base and check for levelness with a level.
- If the height differences are more than 1.5 cm per linear meter, there are humps, you need to level the base. Knock down irregularities, dust the floor, fill in a self-leveling cement screed of the required thickness (3-5 cm). Let it dry and work hard.
- Next, proceed directly to the insulation.
- Cut the styrofoam with a small hacksaw.
- Lay dense polyethylene on the subfloor, connect the edges of the panels with construction tape, roll the film onto the walls and secure.
- Lay the foam in two layers. This way you will avoid cold bridges. Lay the first layer with the bandaging of the vertical seams. The second is similar, but above each seam of the first layer there should be a whole slab from the second. Also observe the dressing.
- Install a reinforcing mesh. The height of the racks should be 3 centimeters.
- Prepare the screed mixture: cover with water according to the instructions, stir with a drill with a mixing nozzle.
- Concreting the base. Fill the floor in pieces. Smooth each compartment with a trowel and check for evenness with a level.
- Wait for it to dry completely and cure (approximately 28 days, depending on conditions).
- Carry out a fine finish. The best option is tiles, laminate, linoleum, carpet. The wooden floor on the logs will "take away" additional centimeters of height, so this option is unacceptable for standard rooms.
Insulation of the floor of the first floor with expanded polystyrene on the ground or in a house on logs is carried out similarly to thermal insulation with expanded clay.
Brief technology:
- Disassemble the floor, remove the top layer of soil, go deep into it half a meter.
- Make a crushed sand pillow.
- Lay polyethylene on top of the insulation board, observing the dressing.
- Install the mesh reinforcement and pour the concrete screed.
Just as in the case of thermal insulation with expanded clay, in houses on a pile foundation, for thermal insulation of the first floor, digging of a pit is not required. Smooth the surface of the soil, compact it. Next, accurately calculate the thickness of the thermal insulation cake: sand-crushed stone pillow + insulation + concrete screed. Its height should completely cover the distance between the ground and the finished floor in the house. Deepening below the soil level may be required only if there is not enough space from the ground to the floor for arranging a full-fledged insulated concrete screed.
Combined thermal insulation of the ground floor
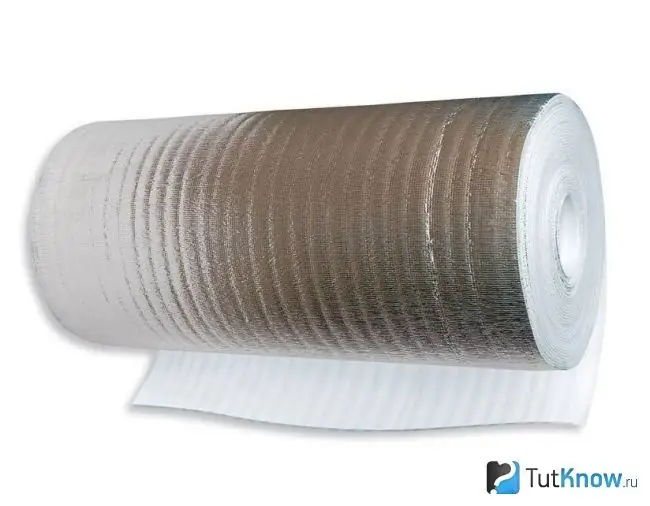
It is optimal to insulate the floor with penoplex on the ground floor in combination with foil insulation (it is better to take foil insulation, it is thinner than foil mineral wool in rolls). In the case of such thermal insulation, the finishing coating can only be a grooved board laid along the logs, otherwise the foil will not work.
Installation technology of the combined heat-insulating cake:
- Remove the old topcoat.
- Clean the rough base from debris, inspect the logs.
- If necessary, replace the rotten logs, lay new ones, treat all wooden parts with an antiseptic.
- Lay the foam boards. The thickness of the insulation is flush with the lags. You need to lay the material in the niches as tightly as possible. Plates must not dangle!
- Cover the insulation with foil insulation from above, make an overlap and secure the joints with metallized tape, fasten to the logs.
- Install the counter grill. Use a bar that is at least 3 cm thick.
- Lay the tongue-and-groove plank (finishing floor).
Insulation with polyurethane foam on the ground floor
This material gives you a lot of leeway. They can easily insulate themselves both from the inside (from the side of the dwelling) and from the outside (from the side of the basement, or fill the space between the ground and the floor with material if the house is on stilts).
Usually professionals are hired for such work. This is due to the fact that a special installation is required for spraying polyurethane foam. However, progress does not stand still. Disposable installations have appeared on sale, they are not cheap, however, if you make a full calculation, there will still be some benefit.
Having decided to insulate the floor on the ground floor with polyurethane foam yourself, choose the Foam Kit system. The equipment comes with detailed instructions for the sequence of actions, so no special skills are required. Such installations do not need to be connected to the mains, which is very convenient when insulating the floor in a country house if there is no electricity.
The second task that will have to be solved is polyurethane foam (PPU) itself. It must be of high quality, only in this case the insulation layer will turn out to be durable and will have excellent technical characteristics.
PPU spraying technology:
- Prepare the base in the standard way - remove the debris, prime it with an antiseptic.
- If the base is concrete, without logs, install a system of wooden beacons (they are similar to logs, their height is equal to the thickness of the thermal insulation layer). If there are lags, the insulation is carried out directly along them.
- Spray polyurethane foam in one cell. Apply the composition evenly. It grows in size upon contact with air, so take your time. If in some place the layer is not thick enough, add a little material.
- Process the rest of the cells in the same way.
- After the polyurethane foam has hardened, cut off the excess flush with the logs and lay the topcoat from the tongue-and-groove board.
Important! Do not work with PU foam at low and negative temperatures. This will adversely affect the quality of the thermal insulation layer. The optimum temperature for working with polyurethane foam is + 10 + 40 ° C.
How to make a warm floor on the first floor
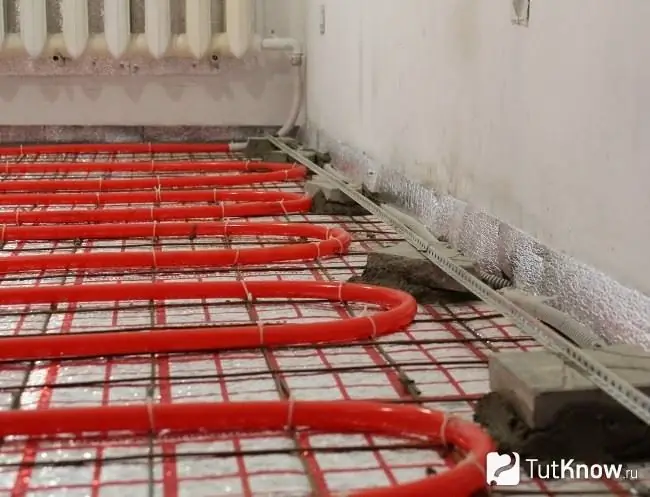
The ideal and most expensive option is to install a "warm floor" system on the ground floor. This work is not labor-consuming, but it is necessary to have knowledge in electrical engineering. If there is no desire to understand this, but at the same time you want to save money, carry out preliminary combined insulation of the floor with penoplex (insulation plus foil insulation), and invite professionals to install the warm floor.
In this case, the styrofoam will be laid not along the logs, but as under a concrete screed:
- Carry out preparatory work for cleaning and leveling the base.
- Lay the penoplex in two layers, seal the joints with tape or special sealant.
- Cover the top of the insulation with thin foil thermal insulation, close the joints with metallized tape.
How to insulate the floor on the first floor - watch the video:

In order to properly insulate the floor on the first floor, you need to have an idea of thermal insulation materials, be able to choose them correctly and calculate the required thickness. All types of work are available for doing it yourself, you just need a desire to do everything efficiently and save the family budget.


