- Author Arianna Cook [email protected].
- Public 2024-01-12 17:55.
- Last modified 2025-01-23 09:40.
Small architectural forms will add beauty and comfort to your summer cottage. Make yourself a bench, a decorative mill and a well. Decorative objects look beautiful at the summer cottage, their size depends on the size of the site, the preferences of the owners, the amount of source material. You can use the one left over from the construction of a house, bathhouse, barn, veranda. A decorative mill and a well do not require a lot of materials, but you have to be diligent when creating them. But you will rejoice in the results of your labor for a single year.
Decorative mill for a summer residence: master class
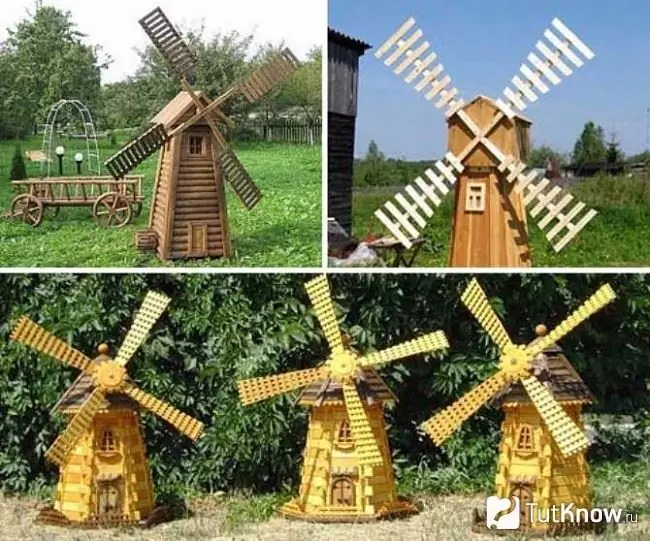
To do something like this, take:
- planks;
- bars;
- self-tapping screws;
- corners;
- metal pins;
- drill;
- shovel handle;
- screwdriver.
Basically, decorative mills are composed of three main parts: the bottom (platform); medium (frame); top (roof). When everything is ready, it's time to start. In this case, the platform is a hexagon. It can be assembled from boards or lining. A shovel handle is perfect for a log house, it must be cut into pieces of the same length, cut out as shown in the photo.
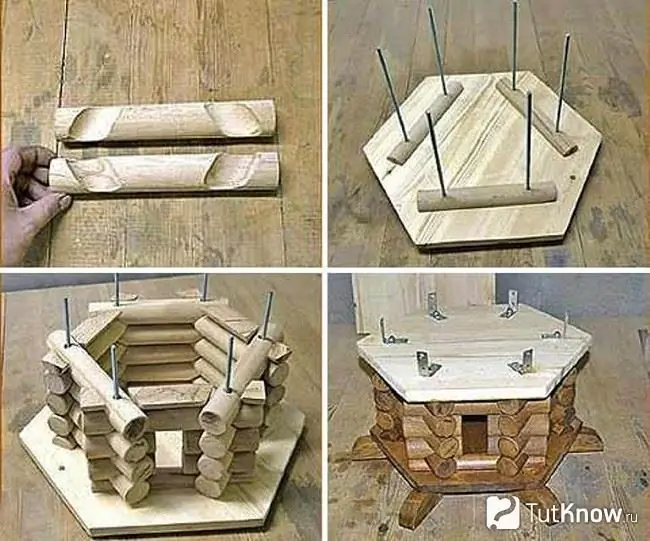
First, you need to attach 3 cuttings to this platform with self-tapping screws, which are divided in half lengthwise. Further, 6 metal rods are attached to them and simultaneously to the platform. With the help of them, the base will be assembled. To do this, in each "log" from the handle of a shovel you need to drill two holes with a drill, why put these blanks on these rods.
So that the lower base is not on the ground, does not rot or hint, you need to put it on the foundation or attach legs to it. They can be made from wood or PVC pipes.
For the second option, you need to take four pieces of pipe of the same size, insert a bar into each, and fix it with self-tapping screws. Next, these legs are attached to the base of the decorative mill. As a result, wooden surfaces will not touch the ground and rot.
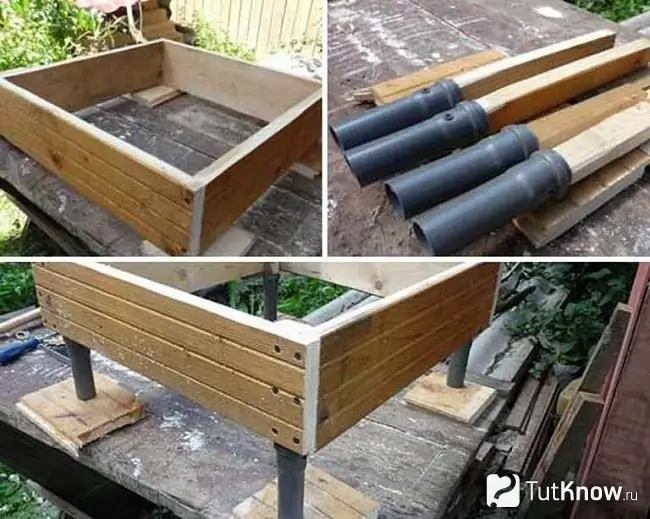
In this version, the base must be made in a simpler way than in the previous one, using a lining with a thickness of 20 mm.
If you are making a hexagonal mill from a shovel handle, then close its base from above with a figure of the same shape made of boards. If you are using the second idea for construction, then fix the lining or boards on top of the base so that they form a rectangle. We install the frame of the upper part on it. To do this, you need to take 4 wooden blocks 1 meter long, put them at a slight angle, horizontally fill the bars in the shape of a quadrangle on top so that they fix the top of the frame.
Also attach four bars to the base, the size of this lower square will be approximately 40x40 cm, the upper 25x25 cm.
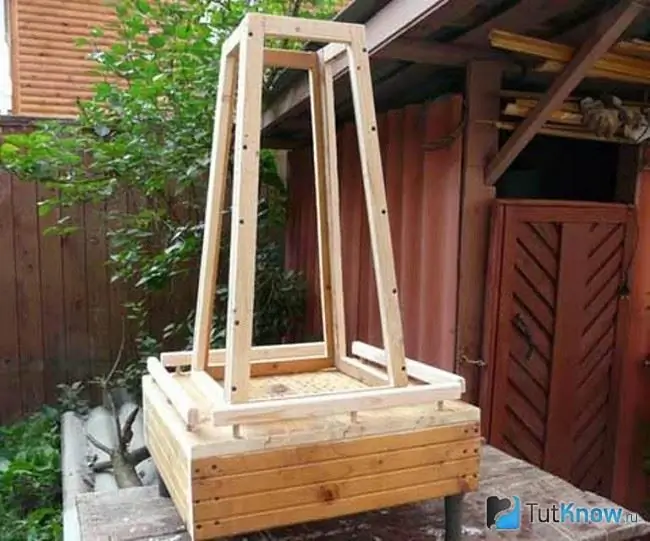
For the first option, you need to put 6 bars, squeak them with the same number of bars on top. For this, corners and screws are used.
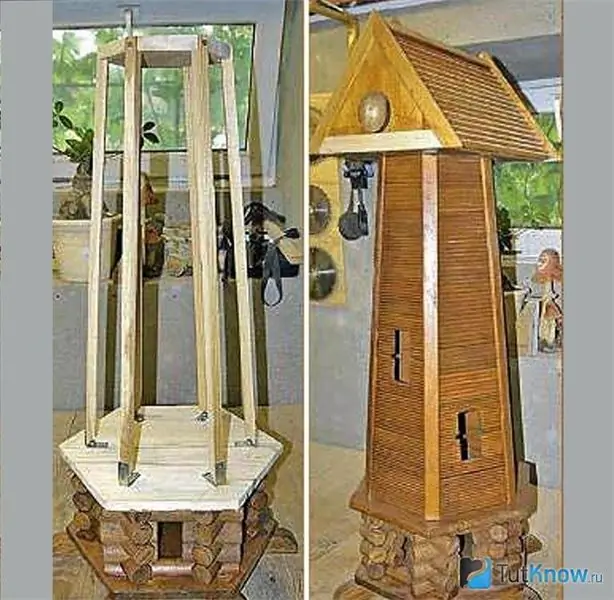
To make a gable roof, you first need to assemble the frame, then fill the boards on it. You can cover the roof with soft tiles or other roofing material. It remains to make the blades for the mill. To do this, use the following drawings.
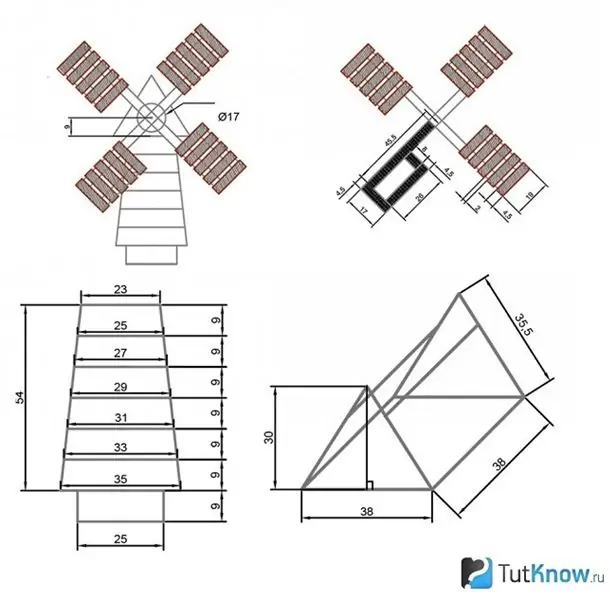
Based on these, assemble the blades. Put two slats crosswise, make a hole in the center. The same must be done from the end of the roof, then attach the crosspiece here, attach it to the roof with a bolt and washer.
Using small nails, hammer the strips onto the blades. Decorate the sidewall joints with wooden corners, paint the mill with an antiseptic. When it dries, you can set up a beautiful structure in the most visible place.
This is what a wonderful decorative mill you will get as a result.
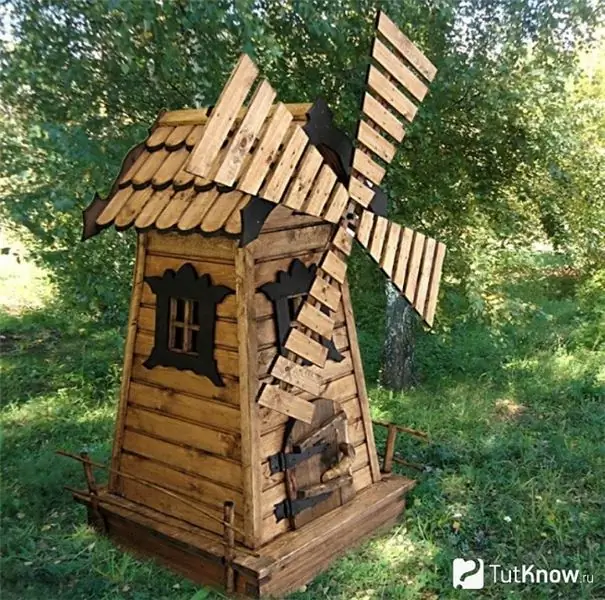
You can improve the presented model at your discretion. If you want, cover it with paint of different colors, fence it off with a small fence. Such a decorative mill will look beautiful on the site.
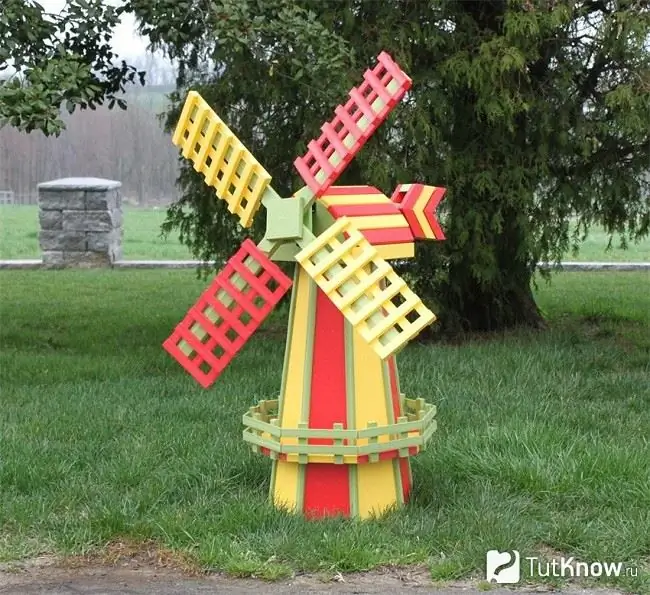
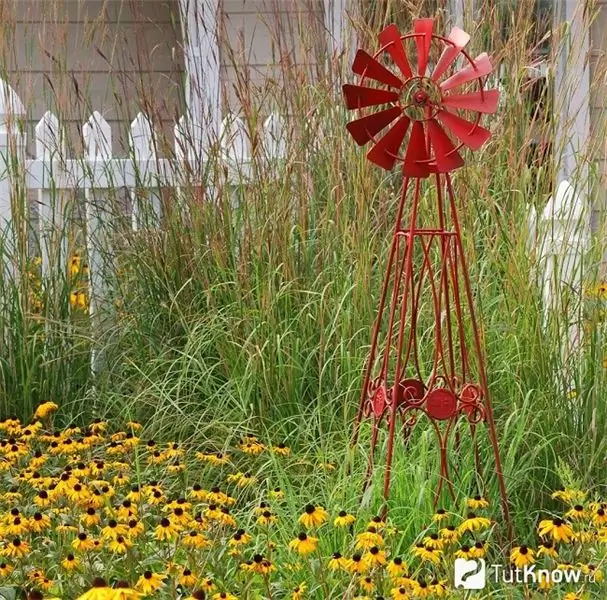
If you have tools for working with metal and this material, then you can make a structure out of it.
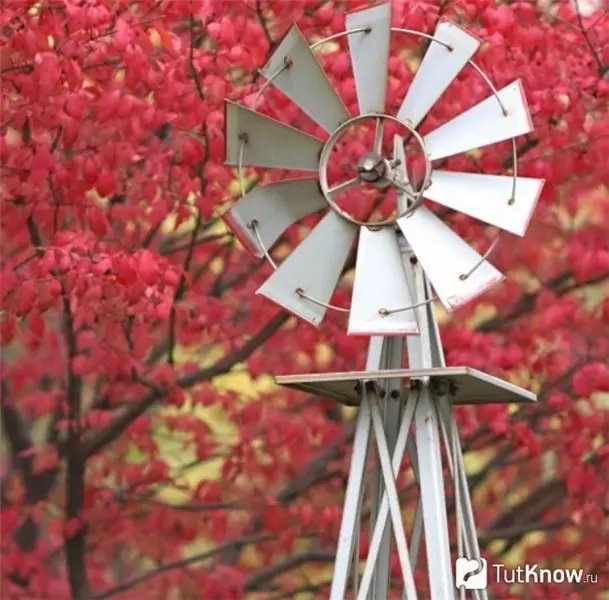
Here's another option.
Decorative well for summer cottages
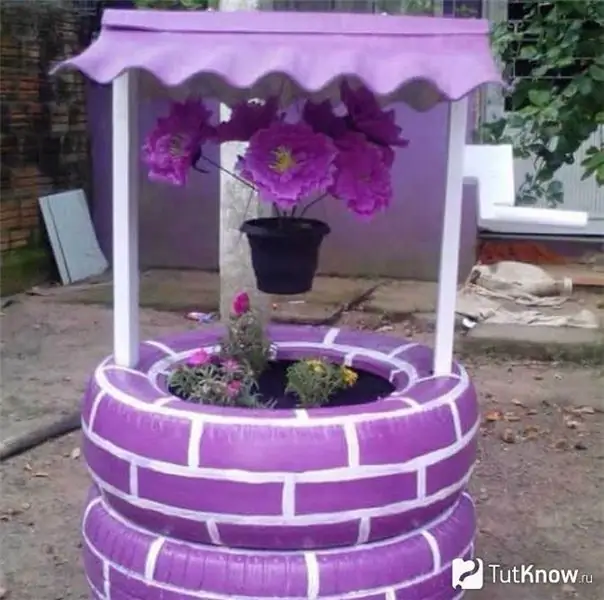
This small architectural form will also perfectly fit into the landscape of the suburban area. The well can be made of wood or use junk materials for this. See how quickly tires turn into a backyard decor item.
For such a craft, you will need:
- 3 wheels;
- two bars with a cross section of 50 cm;
- two small sheets of slate, ondulin or corrugated iron;
- roof ridge;
- bars for the handle;
- acrylic paint;
- brush;
- self-tapping screws;
- knife;
- screwdriver.
Manufacturing instruction:
- First of all, wash the wheels with a brush, let them dry. Then you can paint them at this stage or at the end of the work. As you can see, the lilac paint looks great, and in white, highlight the "brick" drawing.
- Paint two bars, roof details, let the solution dry. On opposite sides of each tire, make two rectangular cuts with a knife. The size should be such that the bar can pass here without hindrance. So that the wooden surfaces of the well, dug into the ground, do not rot, put PVC pipe pieces on the ends of the bars.
- Dig two small holes of a suitable diameter, put the bars in them with the pipes put on downwards, compact the structure with concrete mixture. Wait for the solution to dry completely.
- Now you need to put 3 tires from the wheels on the bars, attach two sheets of roofing material at the top, fix the ridge in the center with self-tapping screws.
- To make the handle of the well, attach three bars with self-tapping screws. One small, the other two fix perpendicular to each other, they will become a handle. Use self-tapping screws to attach it to the vertical strut.
- Such a decorative well can be turned into a flower girl. To do this, first put a drainage layer inside the tires in the form of broken bricks and small stones, pour some sand on them, and on top - fertile soil.
- Spill it, plant flowers here. You can hang the pots under the roof of the well, place artificial or natural plants in it to match.
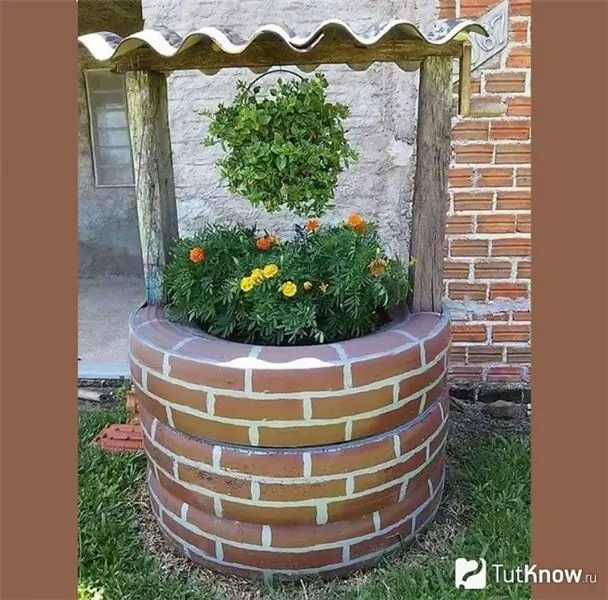
You can paint wheels for brickwork, place such a flower girl near a wall made of the same material. Even old logs look good on such a craft; wells function as a vertical and horizontal part.
A metal wheel axle is not used for this craft, however, it should also not be thrown away. Paint this part white, then paint on the surface. Attach this axis to the wall, it will become a real lifesaver for those owners who love order and try to save money. Hang a hose on this metal circle, it will not get tangled and take up very little space.
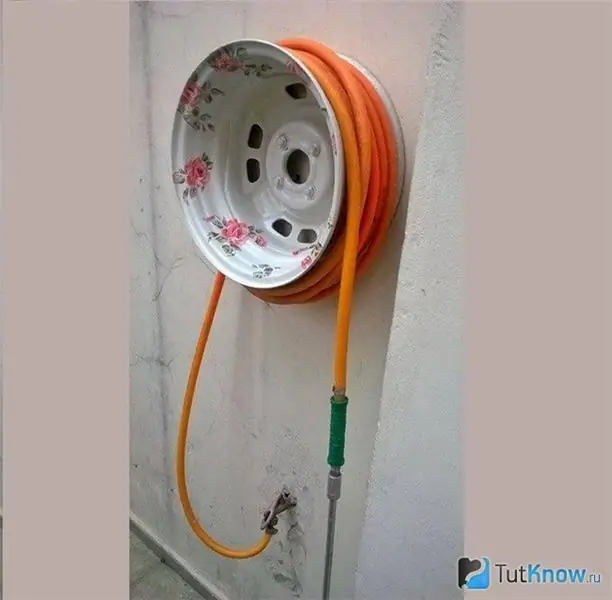
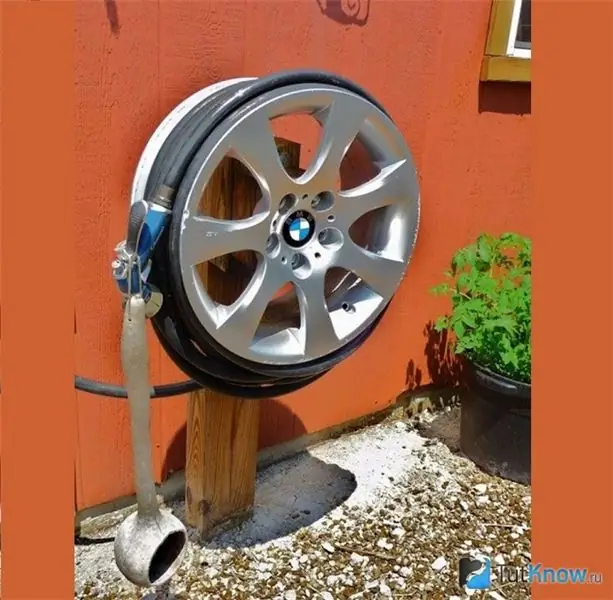
If you want such a coil to spin, then attach it in the middle to a bar or to the wall of the building using a large bolt and washer.
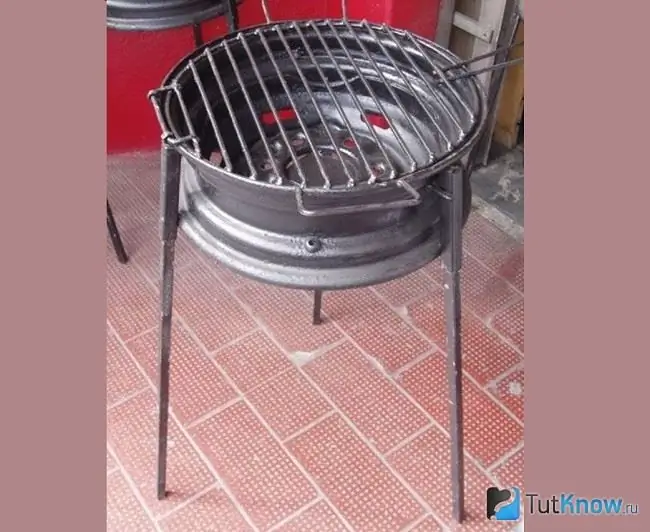
Weld three iron rods to a metal coil, place a mesh of the same material on top, the stylish barbecue is ready to use.
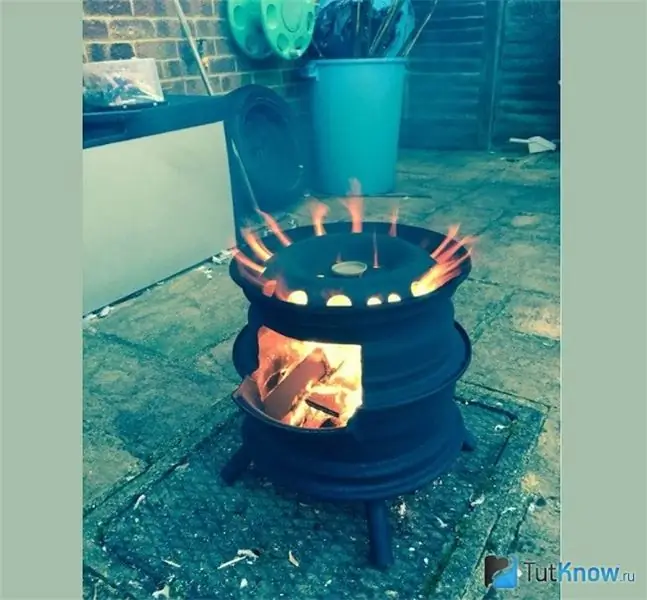
If you saw off the side holes in the two metal axles of the wheel with a grinder, put one on top of the other, then you get a wonderful miniature stove for the street.
You can look at other options that will help you make crafts from tires for a summer residence.
In the meantime, we will continue the topic of how to make a decorative well with your own hands. It is also easy to make it from wooden boards.
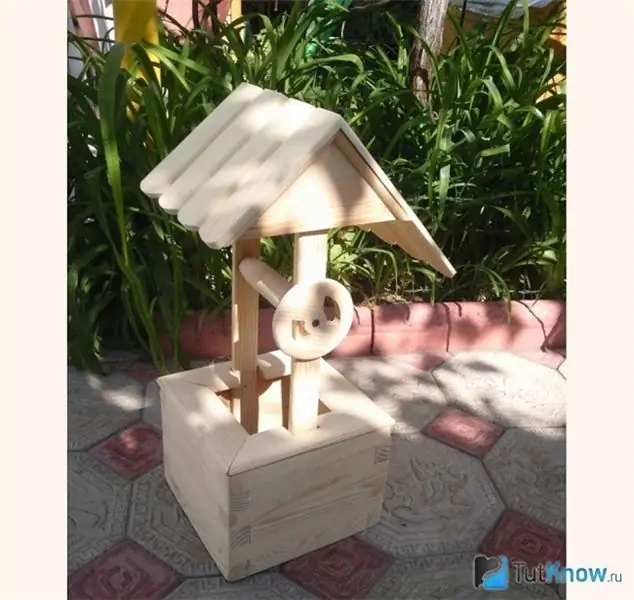
To do something like this, take:
- thick narrow wooden planks or bars;
- self-tapping screws;
- boards;
- jigsaw;
- screwdriver.
First you need to assemble a box of a well from wooden bars or planks.
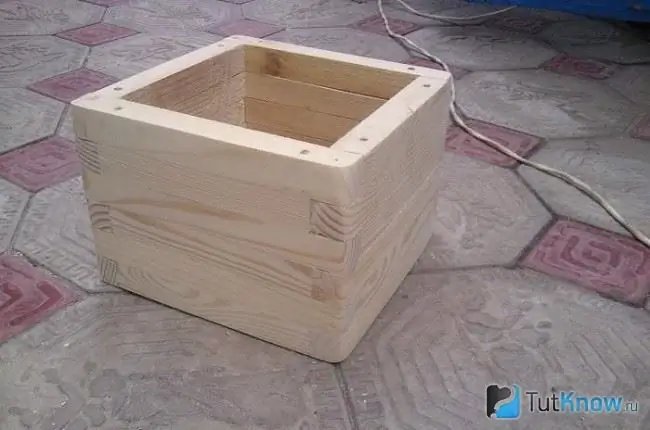
In this case, the square base has sides of 20 cm, and the height of the well is 60 cm. The smaller part of the roof is 20 cm long, and the larger part is 35 cm.
Place two wooden posts facing each other vertically, fix them on top with one short horizontal one. Also, using self-tapping screws, you need to attach one triangle for the roof on both sides.
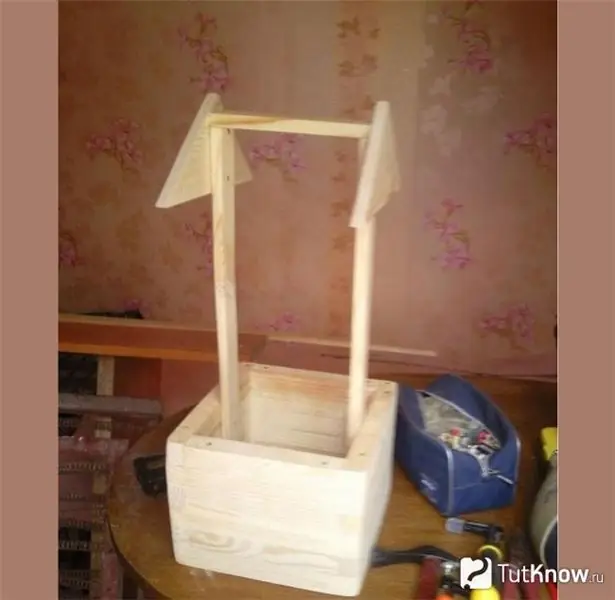
We also attach the beams to the upper part. Please note that these bars are nailed at an angle. They make the structure more durable and roof details are nailed here.
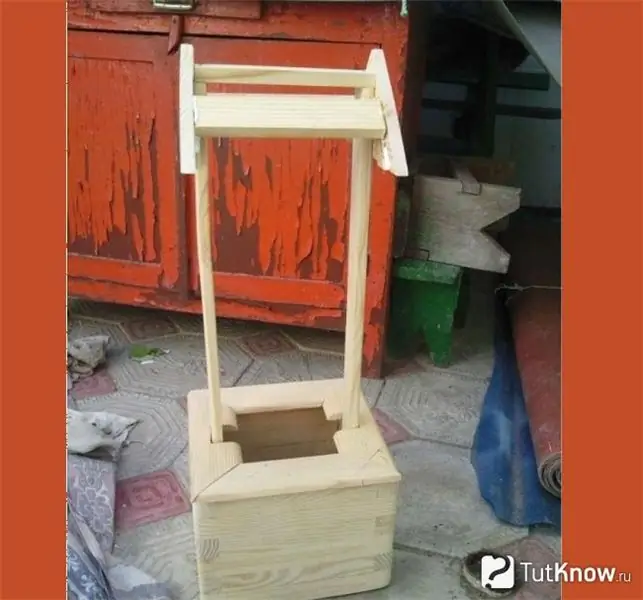
Attach the boards, and then use a jigsaw to decorate their wavy edges or immediately use blanks of this shape.
We make horizontal sides of a decorative well from plinths that frame doors or from planks, the corners of which need to be cut at an angle of 45 degrees. It is also necessary to make two holes opposite each other so that there are two vertical posts.
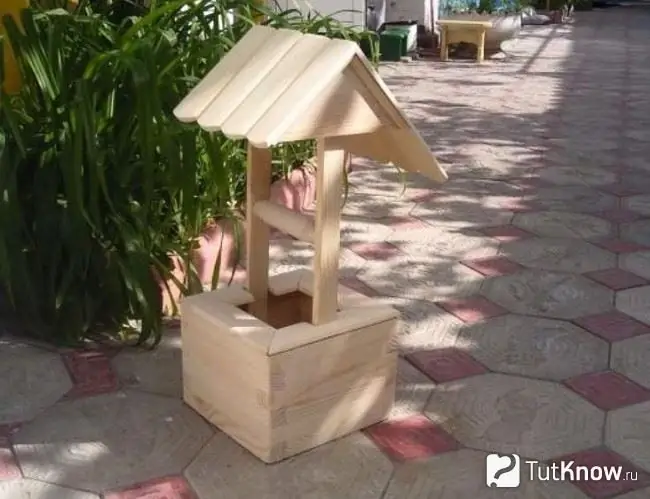
Make the collar of the well oval, if there is no tool capable of doing this, take an ordinary wooden rolling pin. You can attach a metal rod here that is bent on one side to make a handle. Or attach a wooden circle that will rotate an impromptu rounded log.
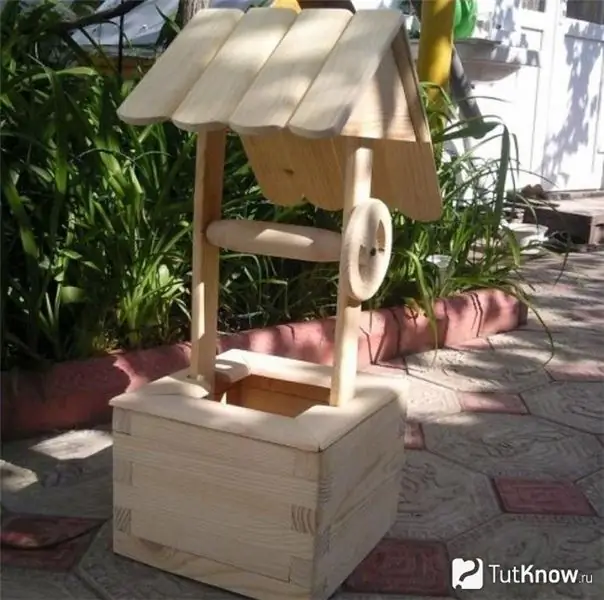
Do not forget to cover the decorative well with impregnation or paint it in your favorite color.
How to make a bench and other small architectural forms?
It can be crafted from an old wooden bed. To implement an interesting idea, not so much is needed, namely:
- wooden bed;
- nails or screws;
- paint for outdoor use;
- saw.
The bed has 2 backs. Usually - one is large, the head lies there, and the second is small, in this side are the legs of the sleeping person. The large back will be here practically unchanged. Here's how to make a bench.
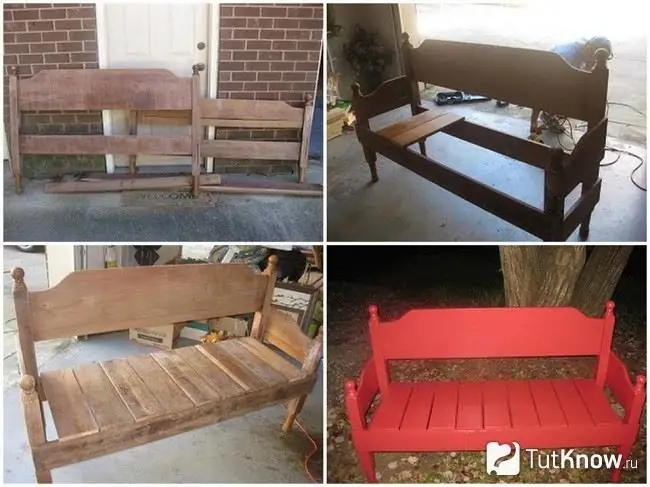
- Saw the lower back in half, these two blanks will become the side ribs of the bench.
- Well, if the corners of the backs are decorated with balusters, if not, then you can nail them here.
- Knock down the frame of the future bench, also using the details of the bed, in this case, these are boards.
- Now we take the boards that strengthen the base of the bed, nail them next to each other on the seat.
It is better to leave small gaps between the seat boards so that moisture from rain or melting snow does not linger here, but drips off. It remains to paint your creation and be happy about how to make a bench, you quickly succeeded.
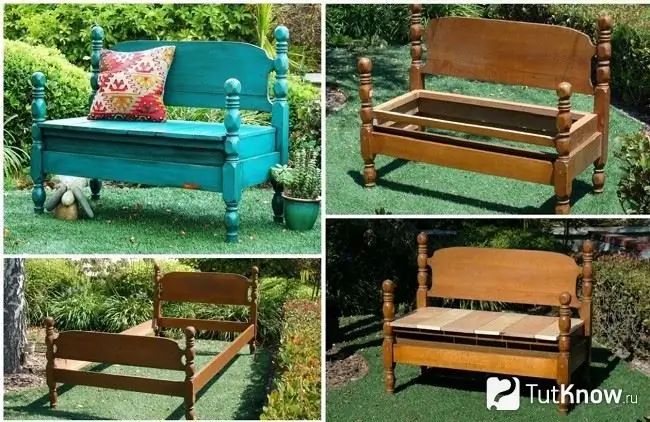
See how else you can craft it. The idea is almost the same. The large back will also become a bench; from the small one you only need to take carved legs. Cut the base of the bed with a saw, knock down the bench around the perimeter, use thick boards. Stuff small boards parallel to each other to make a seat. Painting in the desired color will complete the job.
An old door leaf from an array can also be transformed, and the question of how to make a bench with your own hands, so that it is also a small architectural form that decorates the site, can also be solved.
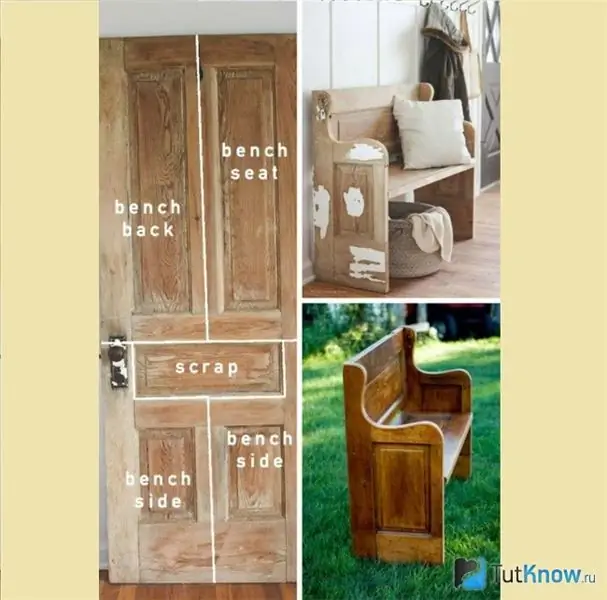
You can see the principle of dividing the door into segments. The two parts are almost identical, one of them will become the seat, the other the back of the bench. The sides are made of two lower parts of the doors, the upper edge is figured, made out with a jigsaw to get beautiful curved lines. You need to fasten this entire structure with self-tapping screws, then cover it with yacht varnish.
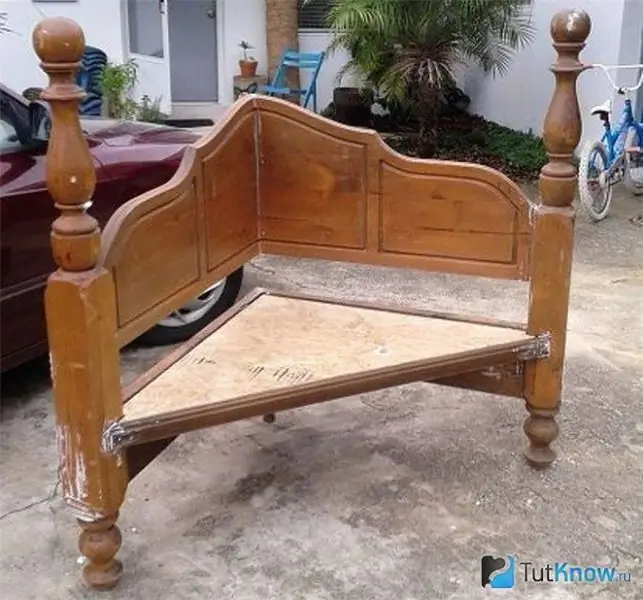
If you want to make an original bench, then cut the headboard in half, fasten these parts together at an angle. Cut a triangle out of thick plywood, attach it to the base.
An old bedside table in skillful hands will become a worthy decoration of a summer cottage. As you can see, the left drawers and compartments for them are removed, here you need to nail the lining. On the other hand, a small row of boxes was left to store all sorts of country trifles here. The paint will help to give the product a wonderful look, so that it is not only comfortable to sit on it, but also to admire such perfection.

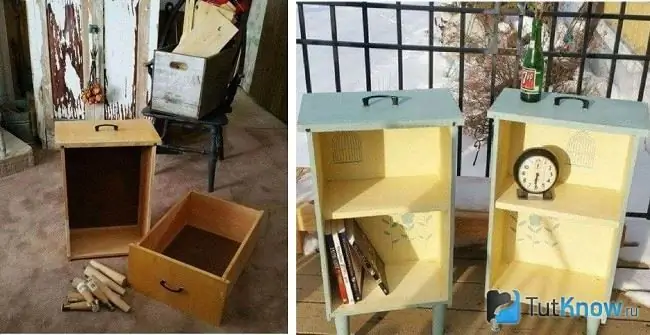
By the way, there is absolutely no need to throw out the vacated drawers. Place them vertically, attach them to the bottom of the legs, fasten them in the center along a horizontal shelf. It remains to paint these products and you can put the small items you need in these beautiful bedside tables.
And if you cover such boxes with paint intended for outdoor work, then you can place them in the garden, put small garden tools here, or put figurines.
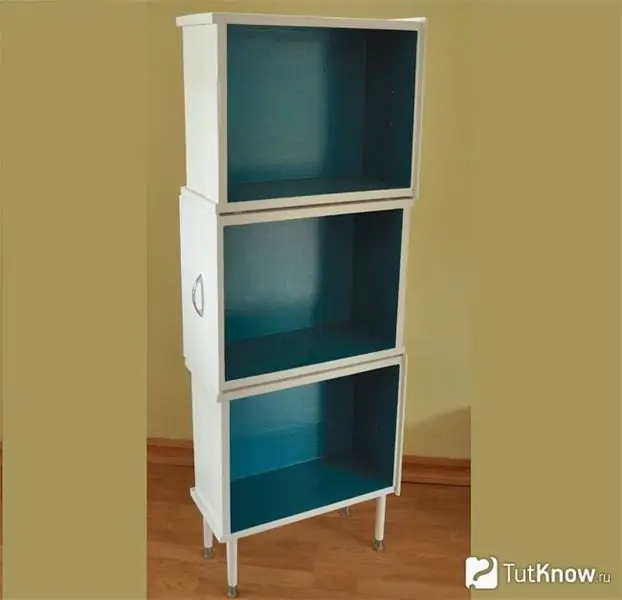
It is also easy to convert leftover drawers into shelving. To do this, put them sideways one on top of the other, attach them with screws and screws.
If you like original architectural forms, then check out the next idea.
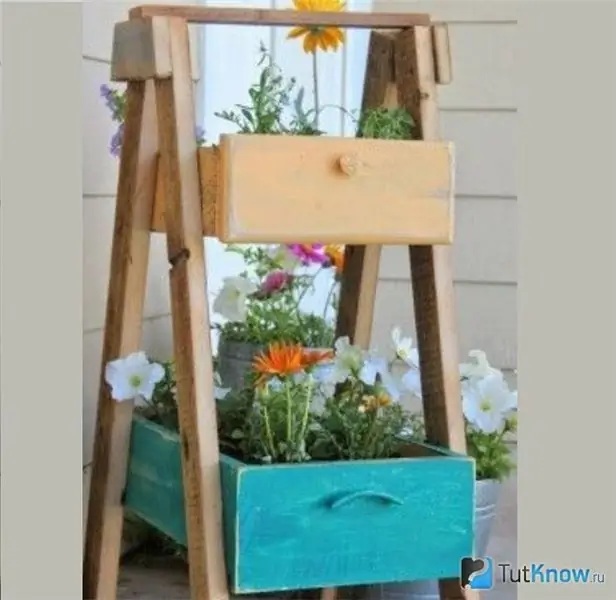
Making a flower girl is not difficult, take:
- wooden bars;
- two drawers from a wardrobe or chest;
- board;
- paints;
- brush.
Manufacturing:
- Place two beams at an angle, connect them on top with two boards. As a result, the two bars will look like a large L.
- Collect two more flower girl legs in the same way. Connect these blanks using a cross-punched bar.
- Attach a couple of boxes to this structure to be painted over.
- It remains to wait until it dries. Then you can pour earth here and plant seedlings of flowers.
Even if you don't have these boxes, you can make beautiful wooden flower boxes. When walking in the woods, take strong branches home with you. Here you will cut them to collect the four legs of the decorative bench. Connect them with a box of boards. Also make the back from the branches.
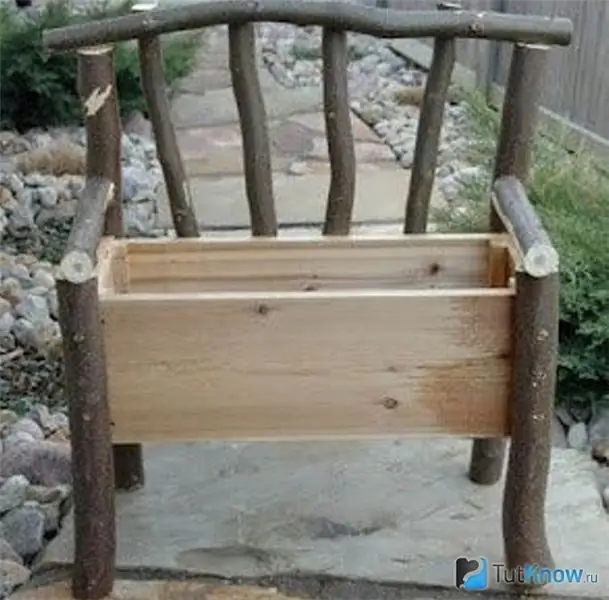
Only you will have such an original floral decor, which will make your summer cottage unique. If desired, old chairs will also quickly turn into both a flower girl and small architectural forms at the same time. Remove the padded seat, paint the chairs. Attach the high density nonwoven fabric to the seating position using a furniture stapler or nails, it is best to fold it in half. Pour soil here and plant flower seedlings.
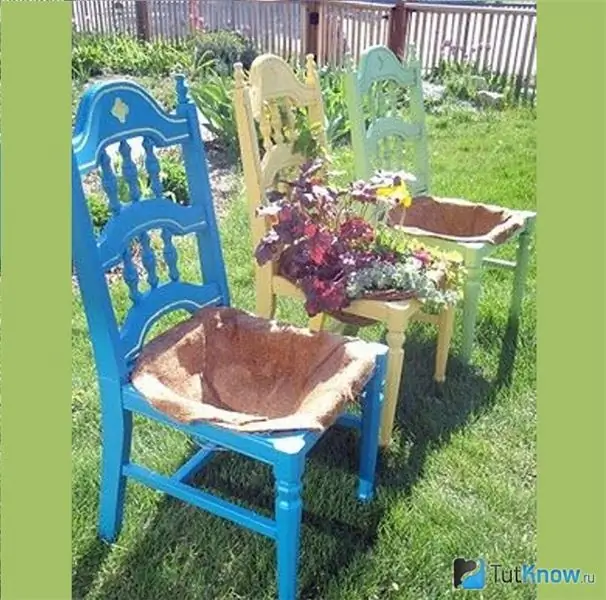
You can also place a planter with flowers here, firmly fixing it on the seat.
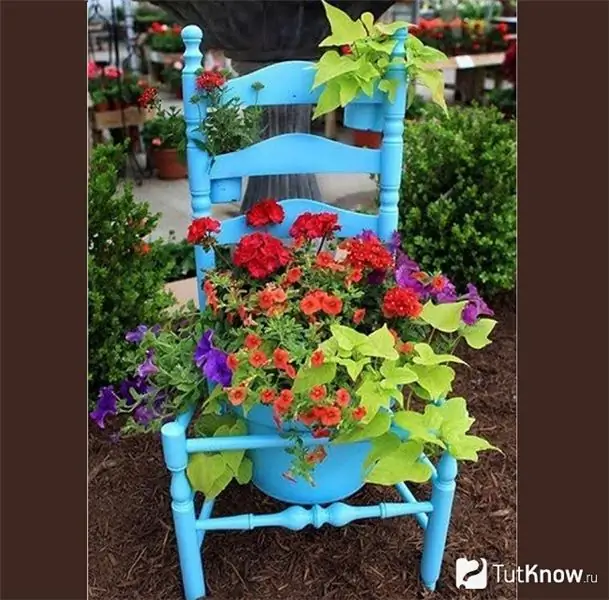
This is how you can give a second life to old chairs, beds, doors. Such small architectural forms, as well as decorative wells, windmills belonging to the same category, will help to decorate the cottage, make it unique, a paradise for the whole family.
To make it possible for you to make something from the proposed, we suggest watching the training videos. Having opened the first one, you will learn how to make a decorative mill with your own hands.

The second will show you how to make a decorative well.


