
- Author Arianna Cook cook@women-community.com.
- Public 2023-12-17 14:23.
- Last modified 2025-01-23 09:40.
Advantages and disadvantages of a granite floor, features of using this stone, methods of processing the material, the process of laying slabs with your own hands - step by step instructions. If natural granite is too expensive for you, then you can reduce repair costs by replacing natural stone with porcelain stoneware. Also, in order to save money, you can make floors from granite chips.
Types of processing of granite tiles

There are several ways to process this stone. Depending on the grinding technology, you can achieve unique effects, interesting textures and combinations of granite floors.
Let's consider in more detail the methods of processing granite:
- Bush hammering … This is a method in which the stone is processed using a special grinding device. After that, the polished surface turns from slippery to rough. The bush-hammer machine removes the top layers of the stone, and the resulting granite surface then resembles asphalt. Allowable relief differences can be up to five millimeters. By adjusting the number of teeth in the bush hammer, the graininess of the resulting material changes. This granite processing technology is used to create non-slip tiles for floors or steps, most often outdoors.
- Glazing method … Granite slabs are processed by hand. When using this technique, the resulting stones will have a matte smooth surface. And at the same time, natural patterned patterns on granite will not be erased, they will be clearly visible, but traces of work with an abrasive tool will not. The tiles will be smooth, but no mirror shine. These glazed elements are often used for indoor flooring, for laying on garden paths or for cladding exterior facades of buildings.
- Shot processing … Saw-type surfaces are most often manufactured in an industrial environment. With this type of processing, granite becomes rough, traces of metal shot in the form of longitudinal grooves can be seen on it. The maximum difference in tile height is no more than five millimeters. If steel shot is used for stone processing, then it turns out to be more decorative and textured, with additional relief bends. If a reinforced plate is used, the material is smoother.
- Polishing … The most common way. After such processing, the granite becomes smoother and more even. The surfaces of the stone are obtained with a mirrored sheen, the designs and patterns of the tiles will stand out clearly. And interior items will be reflected in the granite flooring. Tiles of this type are used for tiling floors, stairs, walls and even fireplaces in rooms.
Materials and tools for installing granite floor

When choosing a stone for laying on the floor, be careful: there should not be even small cracks in the material, because over time they can destroy natural granite. It is recommended to use treated solid plates for flooring. They are often sold in standard sizes. In order for the finishing with granite tiles to be successful, a special set of tools is needed for the work process, since this material is very durable. You definitely cannot cut it with a tile cutter. This requires a grinder or angle grinder. Tools must be powerful. For the grinder, you will also need a special disc nozzle for cutting granite, which will greatly simplify the process of work. In addition to the grinder, you also need: several building levels, a trowel, rubber spatulas and mallets, a construction mixer, threads, a large-volume container. To make calculations for material consumption, prepare a long ruler and tape measure.
There are many solutions for laying tiles, and their variety is due to the constituent components and the price. The cheapest solution is Portland cement, diluted with water, lime and sand. The purchase of glue will cost more than the solution, but the consumption of this material will be less.
Preparatory work before finishing the floor with granite

Usually, granite is laid on a "rough" version of the coating, which is prepared in advance. It should be perfectly flat. Before starting the installation process, it is necessary to make some preparation, since the arrangement of the granite floor is quite peculiar. Granite tiles are much thicker than ceramic tiles, do not forget to take this feature of the material into account when calculating. Before the cladding process, it is necessary to measure the height of the threshold. For normal laying of granite tiles, you need about 50-60 millimeters. Debris and dust must first be removed from the floor. After that, you can start priming. The next stage is carrying out calculations for laying and cutting granite. Usually, the tiles begin to be laid on either side of the end wall, it is better to line them from left to right. Depending on what area of the room and the size of the material, it can be laid whole, and in halves, and even one third of the part. The best way of finishing is "rambling". Cut the tiles into pieces according to the calculations.
An important final step in preparation is calculating the level of the floor covering. To determine it, you need to place beacons in the corners of the room. You can also use levels designed for long distances. From each beacon or level, a thread is pulled along the perimeter.
It often happens that some of the corners are not at the right level. And if the deviation is not more than 60 millimeters, then you can save the situation by simply adding a small amount of solution here. If the levels, on the contrary, are higher than necessary, then it is better to lay the granite tiles on glue instead of mortar.
Instructions for finishing the floor with granite tiles

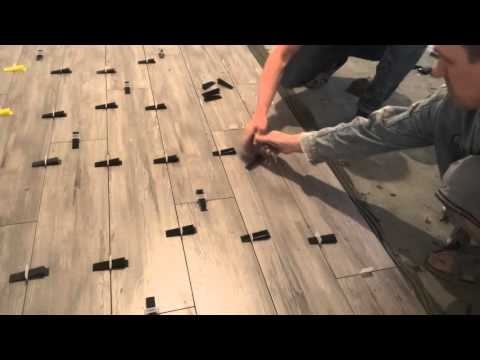
There are three ways of laying tiles: it can be done on mortar, glue or on a metal frame. Often, granite elements are installed in the first or second way. The metal frame is used for finishing vertical surfaces. Installation work scheme:
- The laying of the first row of granite is a very important point. Since it is on him that the next rows of material will be oriented. The tiles themselves can be used as beacons in the first and last row.
- Apply the solution with a trowel. Then we put a tile on it, on which it is necessary to tap it with a rubber mallet to fix it. Do not forget to keep track of the beacon threads.
- Please note that there is no empty space under the tiles.
- In order not to knock off the patterned composition of the floor, remember with which tile you started the previous row. We check the evenness of the masonry with beacons and levels for greater reliability.
- If you see a defect on an already laid tile, then you can replace it only within 24 hours, until the solution has dried completely. After that, it will be impossible to correct mistakes in finishing.
- As soon as you move on to laying each new row, do not forget to rinse the tiles from any glue or mortar. This can be done with a simple damp cloth. If you pour a little water into the joints between the tiles, don't worry. The quality of the masonry will not suffer from this.
- You can immediately tile the entire floor surface with tiles, after which you will need to give time to dry - at least two days.
- After the solution is completely dry, small gaps form at the joints between the tiles. It is easy to get rid of them: they are treated with a special grout, which must be matched to the color of the granite. Grout is moisture and frost resistant, and also has sufficient strength.
- The final stage is to make the tiles attractive. This can be done using silicone paste or liquid wax. Surfaces can be polished by hand (with a felt or felt cloth) or using a machine.
After the polishing process, the stone begins to shine, and all cracks and irregularities will disappear from its surface. How to make a granite floor - watch the video:
A granite tile floor is the most durable and durable flooring. Granite is a hard natural material with excellent performance characteristics. Practical and reliable, it will add a touch of sophistication and individuality to the interior of any room.


