
- Author Arianna Cook cook@women-community.com.
- Public 2023-12-17 14:23.
- Last modified 2025-01-23 09:40.
Armstrong ceiling design, advantages and disadvantages, types of plates and advice on choosing, assembly technology. Suspended ceilings made of Armstrong mineral fiber boards are in great demand due to their simple design and the possibility of using them in any interior. Products are available in various modular solutions, and choosing the right model is not easy. The variety of types of Armstrong ceilings and installation rules will be discussed in the article.
Advantages and disadvantages of Armstrong ceilings

The suspension system has numerous advantages that explain its advantages over other ceiling finishes and ensure its popularity among consumers.
Main positive qualities:
- Fast installation … The Armstrong system is assembled in a very short period of time. A team of assemblers can assemble up to 200 m per day2 ceiling, and further surface decoration is not required. Products are often used for arranging large areas.
- Installation without preparation of floor slabs … The system can be attached to any reliable surface. There is no need to align the building panels, all adjustments are made by adjusting the suspension length.
- Light weight … The heaviest frame element weighs 0.5 kg, so the product is easy to install, and the ceiling does not require reinforcement.
- Ease of assembly … The frame is assembled from various profiles that are adjusted to each other at the manufacturing stage. Only the overall dimensions of the product have to be corrected.
- Sound and heat insulating qualities … The overall insulating properties of the slab are increased by 20% due to the properties of the panel core.
- Saving money … Cost of 1 m2 Armstrong ceiling - only $ 7 excluding installation work, only wallpaper costs less.
- Disguise communications … After assembling the product, there is a gap between the panels and the ceiling for placing pipes, cables, etc.
- Convenience for renovation … The panels are easily dismantled for access to utilities located above the system. This allows you to quickly repair hidden equipment, stretch communications, sewer pipes. If the plates are damaged, they can be easily replaced.
- Fire safety … Armstrong suspended ceiling frame and panels are made of non-combustible material.
- Unification of panels … The dimensions of Armstrong ceiling cells are standardized (600x600 mm), they can accommodate any equipment for suspended ceiling systems with appropriate dimensions, for example, lamps, fans, heaters.
When choosing ceilings, consider the disadvantages of Arsmstrong ceilings that limit their scope. The disadvantages include:
- Reducing the height of the room … The products should be installed in rooms with high ceilings, because after installation, the height of the room is reduced by 15-25 cm.
- Poor moisture resistance … Filler made of mineral fiber material does not withstand moisture. If water often leaks from above, it is better not to install Armstrong ceilings. The stove should be replaced after it gets wet.
- Limited design solutions … Ceilings in appearance differ only in the pattern on the surface.
- Low board strength … Work with mineral fiber boards should be very careful, they break easily. For this reason, small fiber elements may appear in the room, which then enter the body.
This system is suitable for rooms with rectangular ceilings.
Armstrong ceiling material selection

The Armstrong ceiling device is simple: a metal frame, which is attached to the ceiling panels on suspensions, and panels. The frame for all Armstrong ceiling modifications is the same, the properties of the product depend only on the composition of the slab fillers. Plates are produced with the following characteristics: width - 600x600 or 600x1200 mm, thickness - from 0.8 to 2.5 cm, weight - from 2.7 to 8 kg per kg / m.
The basis of all panels is made of stone wool processed using a special technology (otherwise - mineral fiber). During the manufacturing process, latex, starch, gypsum, cellulose are added to stone wool in various proportions. Expensive slabs contain a high percentage of latex, which gives the material good moisture resistance. Cheap panels have a lot of starch.
Depending on the acquired properties of the filler, the following types of panels are distinguished:
- Economy class slabs (OASIS, CORTEGA) … Versatile and therefore the most demanded. They are not distinguished by any special properties and are used under normal conditions. Manufactured with high quality.
- Functional slabs (PRIMA ADRIA, PRIMA CASA) … Fire-resistant and moisture-resistant, have enhanced acoustic performance, shock-resistant. A characteristic property is that they do not change shape at high humidity. They have a decorative structure.
- Moisture resistant slabs (NEWTONE Residence, MYLAR) … Designed for installation in rooms with high humidity, such as swimming pools, saunas, laundries.
- Acoustic plates (FREQUENCE, MYLAR) … They have excellent sound insulating characteristics. They are installed in rooms with claims to noise absorption - cinemas, hotels, schools.
- Medical plates (BIOGUARD) … Used in medical institutions, canteens and restaurants. They have an antibacterial coating. Such ceilings can be washed with aggressive detergents.
- Designer ceilings (CELLIO, VISUAL) … They differ from classical samples in their original design, for example, a beautiful pattern. They are used for stylish decoration of offices, restaurants, discos.
Armstrong slabs are made not only from mineral fibers. To create functional areas or improve decoration, modules from other material are used:
- Wood slabs … Used to improve the appearance of the floor. They have a hidden fastening system, so they can be fastened at different levels and at angles to the plane.
- Cellular polycarbonate … Slabs of various colors are used to enhance the design of the room.
- Metal plates … The main difference from other types is that the shape can be convex or curved, used to create original floors.
- Aluminum cassette ceilings … They are not afraid of moisture, therefore they are often installed in pools and kitchens. They are made with a beautiful decorative finish and are very common in shops and shopping centers.
Do-it-yourself Armstrong ceiling installation
All ceiling elements are supplied as a set, disassembled, therefore, you cannot do without instructions for installing the product. Typical instructions for the assembly of Armstrong suspension systems involves the implementation of installation work in several stages. The works are carried out in the following sequence.
Armstrong ceiling design

Calculate the Armstrong ceiling, it is necessary to calculate the required amount of materials:
- Measure the dimensions of the ceiling with a tape measure, and then draw its drawing. Show in the picture the location of the ceiling and wall profiles, taking into account the requirements of the ceiling manufacturers.
- Designate the bearing profiles that are attached to the hangers and are placed parallel to the long wall after 1, 2 m.
- Designate the longitudinal profiles that are fixed to the load-bearing ones at intervals of 0.6 m between themselves and with the same distance from the wall.
- Designate the transverse profiles, which are placed perpendicular to the longitudinal with a step of 1, 2 m and are attached to them.
- Mark on the drawing the points of attachment of the hangers, which fix the bearing profiles and are installed after 1200 mm. The first suspension should be placed at a distance of 0.6 m from the wall.
- Draw the wall profiles on the drawing and determine the amount of fasteners to fix them, taking into account that the dowels are installed after 40 cm.
- Mark the locations of the fixtures.
- Apply routes of cables, pipes, fixing points for heavy equipment that is fixed to the ceiling.
The standard suspension system is designed for a load of 3.5-6 kg / m2 from the weight of the frame and panels. For heavier structures, reinforced suspensions must be used. The developed scheme will make it possible to determine the main dimensions of the Armstrong ceiling: the footage of the profiles, the number of panels and fasteners to form the ceiling. Calculations are made taking into account the partial overlap of the profiles, for each square meter of the ceiling, the following amount of materials is required: load-bearing profiles - 0.8 m, longitudinal profiles - 1.6 m, transverse profiles - 0.8 m, corner profiles - 0.5 m, hangers - 0, 6 pcs.
Examine the scope of delivery for the ceiling. The standard set includes: panels 0.6x0.6 m, bearing profile L = 3.7 m, longitudinal profile L = 1.2 m, transverse profile L = 0.6 m, wall corners, hangers, fasteners. Compare the estimated number of ceiling elements and those supplied in the kit, buy the missing elements. The profile length should be 10% longer than the calculated value.
Strictly adhere to the pitch of the profiles, otherwise panels with dimensions of 600x600 m cannot be installed in the cells.
Preparatory work before installing the Armstrong ceiling

For ease of installation on ceilings and walls, draw baselines for placing hangers and profiles. Also perform operations that are difficult to perform after the Armstrong ceiling is installed.
The preparatory stage is as follows:
- Complete all construction work indoors.
- Determine the center of the ceiling, which is necessary for symmetrical placement of profiles and panels. To do this, draw the diagonals of the ceiling, the intersection point will be the desired location.
- Draw two lines across the middle of the ceiling parallel to the walls of the room.
- Transfer the grid of profiles and hangers from the drawing to the ceiling.
- Using the water level, find the lowest point of the ceiling near the walls, mark it. Measure 15 cm down and put a second mark - this is the level of the wall profiles. In this case, the gap between the ceiling and the false ceiling tiles will be equal to the difference between the value "15 cm" and the thickness of the false ceiling panel.
- Fix all communications, lamps and other appliances to the ceiling. Calculate the distance between the most protruding part of the suspended equipment and the surface of the panel. There must be a guaranteed gap between them, equal to the thickness of the slab. It will provide quick dismantling of panels when repairing interceiling equipment. To ensure gaps, lower the wall profile location mark to the required distance.
- Using a water level, transfer the marks to all walls, and then draw a horizontal line across them.
- Lead wires to the installation locations of the lamps.
Note: Heavy luminaires and air conditioners must be mounted on their own suspension elements.
Fastening elements of the Armstrong suspended ceiling

After acquiring the estimated number of suspended ceiling elements, you can start forming the ceiling. Do the work on assembling the Armstrong ceiling with your own hands in the following sequence:
- Fix the corner profiles to the walls with dowels, placing them every 40 cm. After fixing, the corner profiles should form a shelf on which the frame slats will rest.
- Fasten the hangers with ears to the ceiling according to the markings using anchors or hammer-in dowels.
- Check the length of the support profiles. Cut the long slats with a hacksaw for metal. Extend the short ones, connecting them to each other on the ground with special locks.
- Fasten the bearing profiles to the hangers. To do this, pass the hangers with hooks through the holes in the profile and hook them onto the ears of the upper halves of the hangers.
- Install the longitudinal and transverse profiles. Armstrong ceiling slats have special hooks, thanks to which the ceiling elements are connected quickly and reliably.
- Make sure that the support profiles lie on the shelves of the wall corners. Adjust the height of the hangers if necessary.
- After installing all the slats, check the dimensions of the cells, they should be free to accommodate the ceiling slabs.
- Place the panels in the cells. If the cells of the panels extreme to the walls are smaller, cut them in place.
- Lift the panels for installation in their original places diagonally above the frame, then align them in a horizontal position and lower them into the base.
- Leave blank the cells in which the panels with fixtures will be installed.
- Install the ceiling luminaires.
Notes:
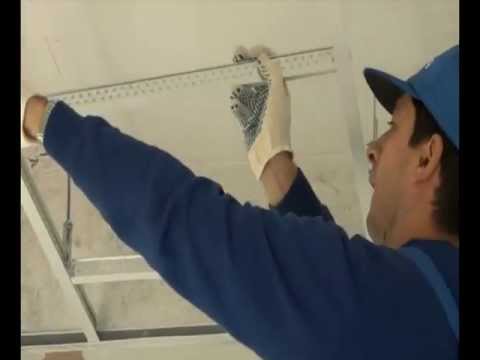
- Install the Armstrong ceiling with gloves so that the mineral fiber of the boards does not irritate the skin.
- Start laying the slabs from the middle of the ceiling.
- Lay the boards at an indoor air temperature of + 15 … + 30 degrees.
How to make a ceiling Armstrong - look at the video:
The Armstrong ceiling is considered the simplest suspension system among such structures. It takes several hours to assemble and can be completed by one person. The coating will turn out to be smooth and attractive if the work is done with all the installation rules.


