- Author Arianna Cook cook@women-community.com.
- Public 2023-12-17 14:23.
- Last modified 2025-01-23 09:40.
Concrete fence: its types, advantages and disadvantages, installation of the fence, the ebb of its sections and decorative design. The disadvantages of a concrete fence can be called its high cost compared to fences made of wood or metal, as well as the need to use lifting equipment when installing heavy elements of such a structure.
Installation of a concrete fence from ready-made panels

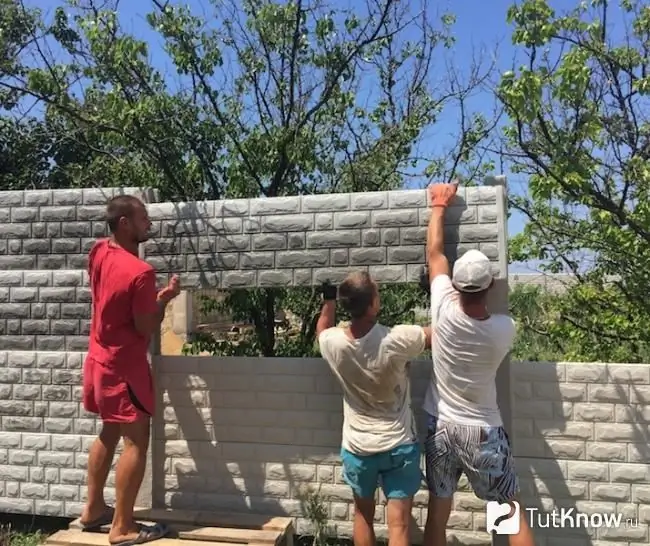
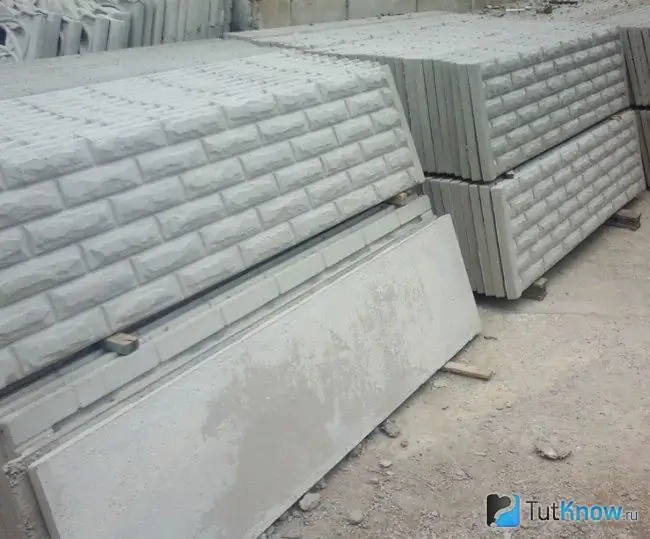
Such a fence consists of sections, each of which includes support posts and concrete panels. These elements are interconnected by the “thorn-groove” method, for the implementation of which special recesses and ridges are provided in the structure of the fence. The work on installing a concrete fence from factory panels should be performed in the following order:
- Draw up a diagram of the location of the fence on the site, linking its main points to the terrain, indicating the places for the gates and the entrance gate.
- Clear the area for the building, remove unnecessary trees, shrubs and hemp from it.
- According to the scheme, determine the perimeter of the fence on the spot, hammer in the pegs at its corners, at the locations of the future supports and pull the cord over them.
- Run holes under the pillars of the concrete fence with a drill. On heaving soil, their depth should be 1.2 m. If the soil is normal, 50-75 cm will be enough.
- Install the fence posts, strictly observing the distance between them. Otherwise, it will be impossible to mount the concrete slab sections. The verticality of the supports during the installation process should be controlled with a plumb line or a building level. Before installing them, 10 cm of sand and crushed stone should be poured on the bottom of the pits. The final position of the pillars must be fixed with wooden supports.
- Pour the cavities between the supports and the walls of the holes with a concrete mixture and carefully compact it with a vibrator or manually with a shovel. After pouring the pits with concrete, leave the pillars for 2-4 days for the mixture to set. It must be prepared in the ratio of cement, crushed stone and sand 1: 2: 3.
- Insert the fence panels into the grooves of the supports. This must be done carefully. First, you should mount the bottom row of panels around the entire perimeter of the structure and check its horizontal alignment with a building level, applying it to a long rail. If no violations have been identified, you can install the second, and, if necessary, the third row of panels.
- Install protective caps on the fence posts.
Installing a concrete fence from self-cast sections

When choosing concrete panels or pillars for fencing a plot, many owners of private houses want them to meet modern requirements and have an original look. However, such products are far from affordable for everyone. There is a good way out of this situation - the use of molds for self-casting of the main parts of the fence.
With the help of templates, you can cast embossed concrete fence slabs with your own hands. They can be with various curls, patterns, and also imitate materials of natural origin - stone, wood, etc. Factory molds for casting are inexpensive, so everyone can buy them. Prices for these products may vary in one direction or another, depending on the material of the template.
Types of templates for casting concrete fence sections, depending on their material:
- Polyvinyl chloride … The forms made from it are the cheapest and can withstand about a hundred fillings. The drying time of the product in such a template is more than a day. Therefore, for quick work, you will have to buy several PVC molds or perform casting in one template, but within several weeks. But when working with such a template, dye and decorative elements can be added to concrete when pouring it.
- Fiberglass … Molds made of this material have a wall thickness of 8-10 mm and a metal frame to which handles are attached, which serve for convenient and quick removal of the cast product onto the pallet. It takes little time to create concrete fence parts using these molds. Therefore, many templates are not required for normal operation. At the same time, it is important to know that it is impossible to make a colored panel in fiberglass, since instant stripping of the product will prevent the paint from remaining on its surface.
- Polyurethane … Concrete mix in molds made of this material hardens within 12 hours. The template can withstand up to a hundred pours, but the percentage of scrap in finished products extracted from polyurethane molds is quite high. Therefore, such templates are rarely used.
- ABS plastic … For forms, this is the most demanded material. It can withstand up to 200 castings and does not require special processing before each of them. It is very easy to remove the finished panel from the plastic mold, despite the fact that the quick ejection method does not work here. The hardening time of the mixture in this form is a day. In this case, you can add dyes and decorative elements to the composition.
You will need a large vibrating table to cast the fence sections. With its help, you can easily remove air from the working mixture and distribute it evenly over the casting mold. If there is no such table, you can try to compact the liquid concrete by hand.
If casting and quick stripping of a significant number of sections are planned, it is recommended to use a concrete mixer for preparing concrete. In addition to her, you will need cement, reinforcement, crushed stone, sand, a plasticizer and a hardening accelerator of the mixture.
To obtain a finished concrete panel, you need to perform five steps:
- Take a mold for casting and process it from the inside with a special paste that prevents adhesion between the concrete and the walls of the template.
- Prepare a working mixture of sand, Portland cement M500, crushed stone with a fraction of 5 mm, a plasticizing additive, a hardening accelerator and water. Sand, cement and crushed stone are taken in a ratio of 3: 1: 3, additives - according to the instructions of their manufacturers.
- Lay reinforcement d = 4-8 mm around the perimeter of the form, and then pour concrete.
- Switch on the vibrating table motor and begin compacting the mixture in the poured form.
- Leave the product to dry for the required time, given that a day is the setting time for concrete at t not less than 5 degrees. The product is ready for installation or transportation only after 14 days.
Fence support posts can also be made using injection molds. In this case, the reinforcement is laid in the middle of the products.
As for the construction itself, the installation of a concrete fence from self-cast elements is no different from the technology described above.
Decorative design of a concrete fence

If the appearance of a gray concrete fence seems boring, many design fantasies can be realized on its surface - the universal properties of the cement coating allow you to do this. After all, it is not at all necessary to do so that the fence performs only a protective function. There are many examples when such structures become works of art.
If the concrete panels purchased or cast with your own hand already have a relief and pattern, you just have to periodically take care of their coating - tint, where necessary, clean, etc. But if the fence is a blank sheet for creativity, this should definitely be used.
It is up to you to decide whether the fence will be strict or brightly colored. Its decor can be forged elements and painting, tiled or stone cladding, curtain panels that imitate natural materials, graffiti or art exposition, images of cartoon characters, climbing living plants - roses, ivy, etc.
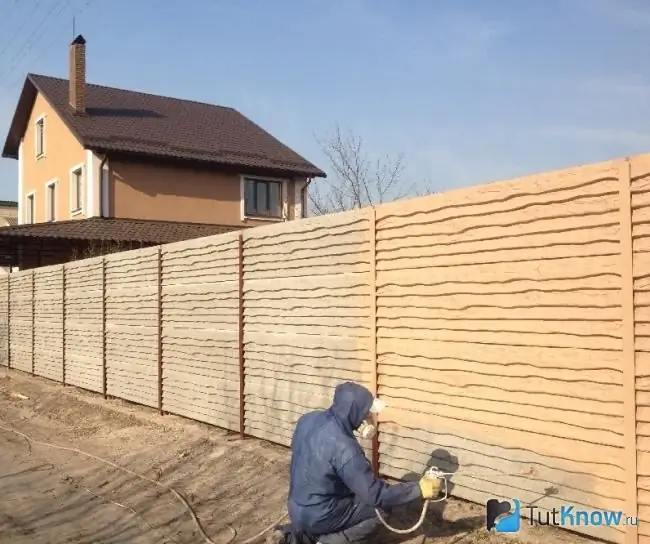
The most popular way to improve a concrete fence is, of course, painting. Moreover, the paint coating, in addition to decorativeness, also has a protective function, preventing the gradual destruction of concrete from the action of precipitation, wind and temperature extremes.
Many paints are good for concrete. Acrylic enamel, for example, is considered the best because it is hygroscopic and durable in its original form. Rubber based paints are flexible and therefore ideal for outdoor use. Latex compounds are attractive for their price, although less durable. Many people choose textured paint for a concrete fence. The surface painted with it looks spectacular and is associated with natural stone.
In order to paint a concrete fence, you need to consistently go through several stages:
- Cleaning the concrete surface of the fence … If it is old, this procedure is very important. Plates and fence posts must first be cleaned with a brush using detergents. Then rinse the sections of the structure with a hose with plenty of water, and then treat the places where mold was found with an antifungal agent.
- Padding … Its purpose is to fill the pores of the concrete and remove dust from it. The primer applied to the fence should be suitable for the paint in chemical composition. The substance must be applied twice, allowing time for each layer to dry. Usually it is indicated by the manufacturer on the packaging with the product.
- Coloration … It is recommended to apply the first layer of the composition with a roller, which is capable of delivering paint to every pore of concrete, creating the basis for reliable protection of the fence. The second coat of paint can be sprayed on. This is usually done the next day. Using readily available enamels, it is quite easy to create the effect of masonry and even volumetric images on a concrete fence.
How to make a concrete fence - watch the video:
[media = https://www.youtube.com/watch? v = tEkMkrf0RNA] For the installation of a concrete fence, apart from shovels, a garden drill and measuring instruments, nothing is required. Such a procedure, even without the involvement of lifting equipment, can be performed by a team of 2-3 people. The result of quality work will be an absolutely reliable and inexpensive fence that will delight you with its appearance for a long time.


