- Author Arianna Cook cook@women-community.com.
- Public 2024-01-12 17:55.
- Last modified 2025-06-01 07:38.
Beautiful and simple pencil drawings, watercolors and even stone paintings. Decorating the cake using the skills learned. Knowing how to draw simple drawings, adults will be able to teach their children how to create them and plunge into this exciting activity themselves.
How to create simple drawings step by step?
Learning to portray animals is useful knowledge for children and adults. For the first, it will be useful in kindergarten, school, and for the second - for creating knitted patterns, fabric appliqués, decorating cakes.
How to draw a penguin?
See how to create this flightless bird.
For this you will need:
- simple pencil;
- eraser;
- paper.
They create such beautiful drawings with a simple pencil. Since then it will be possible to erase unsuccessful and auxiliary features and draw new ones. Therefore, do not press hard on the pencil.
- Draw a small circle for the penguin's head. It is crossed by the oval body of this animal, but at the bottom, make this figure straight.
- In the next step, draw 2 rounded lines - the first is almost parallel to the back of the head, and the second is to the left side of the body. If you then want to paint the drawing in color, these features will help keep the face and tummy white, and the individual elements black.
- Next, we draw the underdeveloped wings of a penguin bird, two small ovals at the bottom of the body, which will soon turn into the paws of this animal.
- You will make them more realistic in the next step. To do this, draw 3 toes on each paw. A small circle on the face will become the eyes of this bird, and it will also acquire a beak.
- It remains to show that his fur is fluffy enough. To do this, make a few small lines on the tummy, back, back of the head. Draw a crest. Add the eyelid and pupil to the eye.
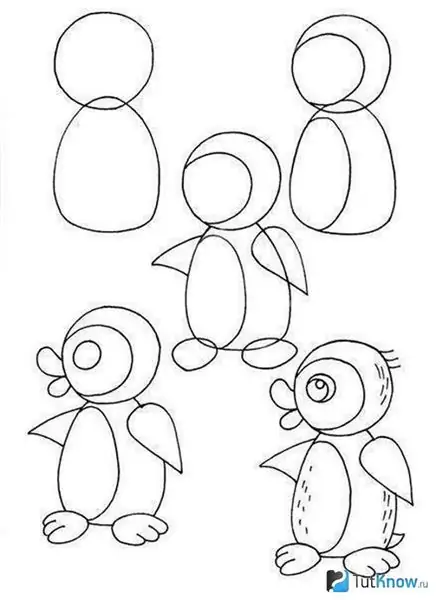
Here's how to draw a penguin simple and easy. You can also create other animals using the same technology without any problems.
How to draw a pig?
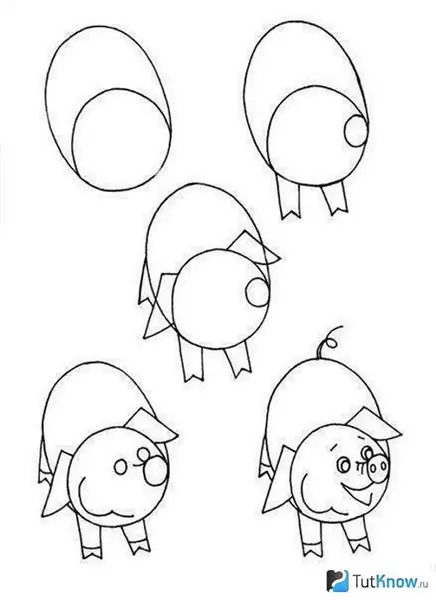
- Draw an oval shape. At its bottom, draw a circle that will become the pig's head. His patch is depicted on the right side of this circle.
- Draw 2 of his front legs, one back, lop-eared ears.
- Outline the hooves, cheeks of the animal, draw out the outlines of its eyes. In the next step, depict the pupils in them, as well as the eyebrows, mouth, nostrils.
- The twisted tail completes the image of the mischievous pig.
Here's how to create simple drawings. For children, such work will not be difficult and exciting. Therefore, right now, move on to the image of another animal.
How to draw a donkey?
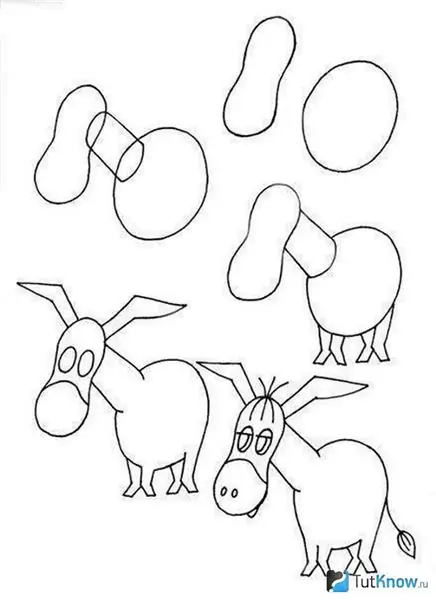
Having learned this, you and the children will be able to do the illustration of the cartoon about Winnie the Pooh.
- First draw a figure that looks like the number 8 - this is the head. The circle will soon become his body. An elongated neck connects these parts.
- Draw the ears that look like small wings as follows. The two oval eyes will acquire pupils and eyelids in the next step. Then draw the nose and nostrils.
- It remains to depict the bangs, crest, legs of the donkey and its tail.
This drawing can be left in pencil or colored. If you want to sew a fabric applique on your child's clothes, you can use the image of this donkey. And make the tail out of rope, fluffing its tip.
How to draw a lamb?
The image of this animal can also be used for applique work. But make a fur coat out of fur or glue curls from segments of threads onto the base by twisting them.
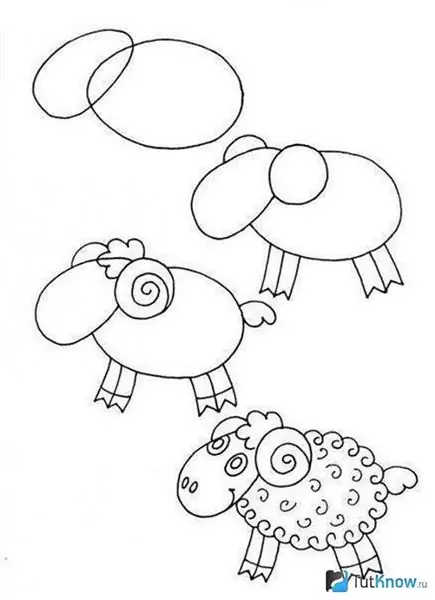
The photos show how such simple drawings are created in stages.
- First, draw a small egg-shaped shape that will become the head of the lamb. And the body is a slightly larger oval.
- To make it easier to draw the horn, first draw a small circle on the side of the head. And then draw a spiraling horn in it. The second is located in the background and is not fully visible.
- Four rectangular legs end with hooves. Curly bangs will add charm to the animal.
- Draw his dreamy eyes, curly fur, nostrils, tail.
Such a picture will decorate any home or become an applique pattern, like the next one.
Small fish
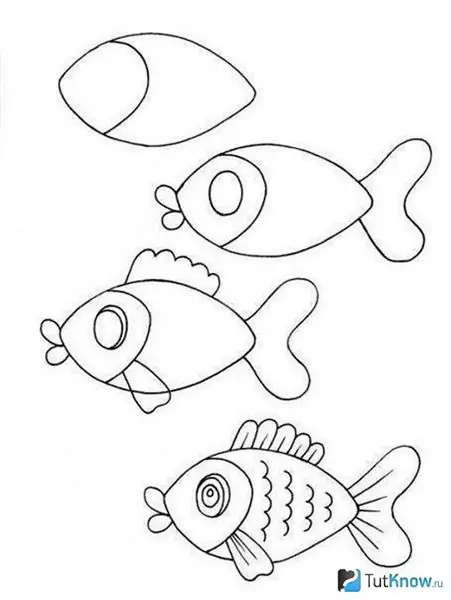
If you are thinking how to teach a small child to draw, then show him how this sea inhabitant is created.
- Draw a semicircular line at the top and bottom, connecting them to the right and left. Draw the lips on one side and the tail on the other. Separate the junction of the face with the body with a semicircular line, draw a round eye on the muzzle.
- In the next step of the phased drawing, add an eyelid to the eye, depict two fins.
- It remains to draw the pupil, the scales using wavy lines. Use small dashes to make the fins and tail look more realistic.
How to draw a cat?
You will learn this in 5 minutes.
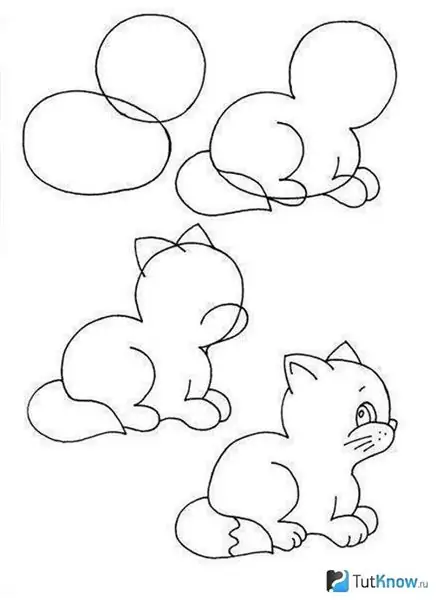
Draw a circle - this is a blank head. It is crossed by the ovoid body. Erase the intersection of these two parts with an eraser.
Draw the front and hind legs. Also, with the help of an eraser, remove the places where they intersect with the body. Draw the tail.
At the third stage, add the ears to the cat, make the muzzle more protruding by drawing an oval at the bottom of the circle.
You already practically know how to draw a cat. It remains to erase the auxiliary lines, draw a small triangle inside the right ear, depict the eyes, nose, mustache, toes and the tip of the tail.
Winnie the Pooh
The hero of the cartoon of the same name and the book is quite simple to draw.
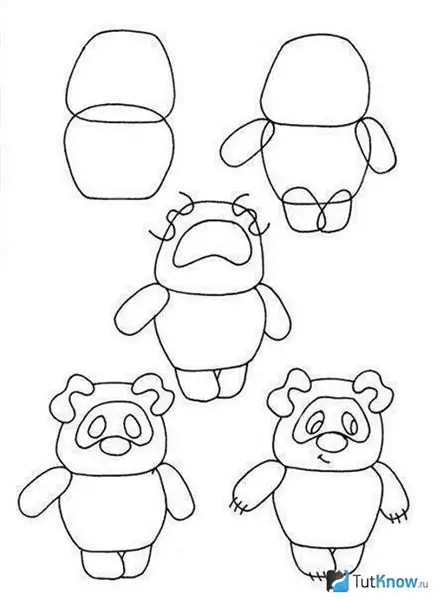
- First, draw 2 identical shapes - they are a cross between a square and a circle.
- In the next step, erase the place where they intersect and add the front and hind legs to the hero.
- It's time to draw Winnie the Pooh muzzle and ears. Draw eyes, nose, claws. The mouth, like that of the cartoon character, is slightly on its side. Which adds to its charm and originality.
Now you know how to create beautiful drawings with a simple pencil. See how this skill can come in handy in cooking.
How to decorate a cake with a patterned fondant?
To do this, you can use the image of any hero whom you just learned to draw or portray another character, for example, an owl.
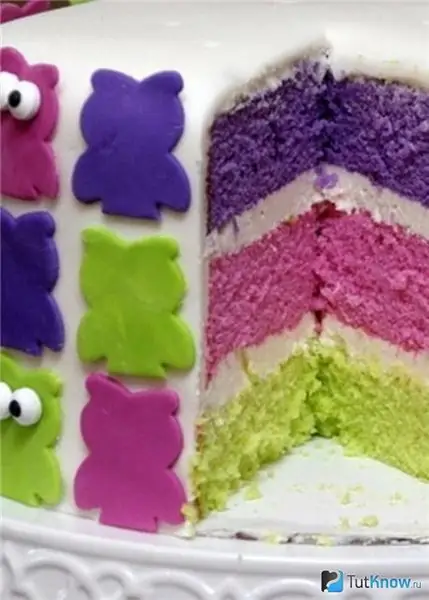
To collect such a cake, take:
- biscuit cakes;
- butter, custard, or whipped cream;
- white cake paste;
- food colors in three colors;
- black currant or raisins;
- water;
- silicone rolling pin;
- knife.
If you want the cake to be the same tricolor, then dilute each color in water, in a separate container. Saturate a specific crust with syrup of your color.
You can make your own food coloring using blackcurrant, spinach, and beetroot juice.
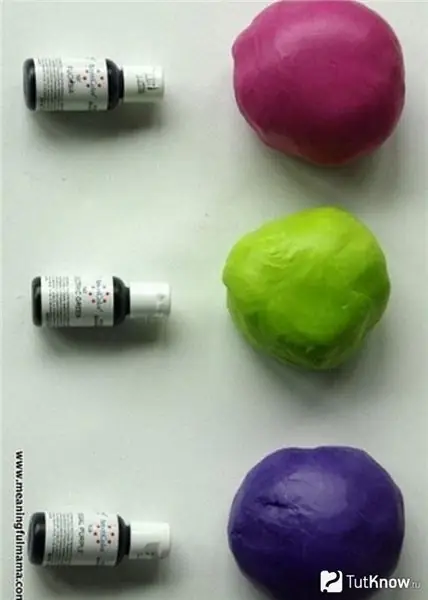
The same dyes will be needed to give the desired shade to the mastic. But first, you need to assemble the cake. Layering the cakes with cream, lay one on top of the other. Place the cake in the refrigerator for an hour, then roll out the white mastic, cover the cake with a sheet of this sweet flexible material.
The mastic will stick to it better if you grease the cake with butter cream beforehand.
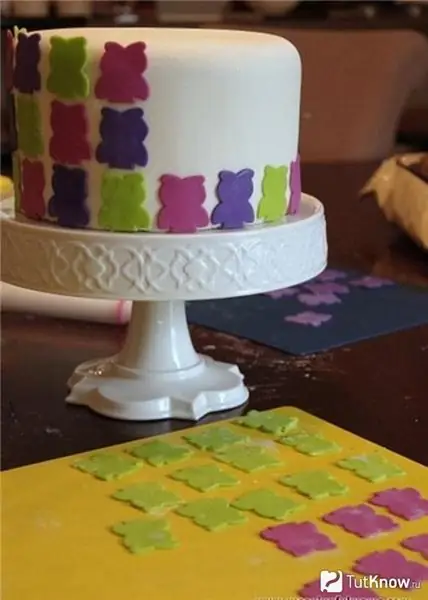
Cut off excess mastic, add more. It needs to be divided into 3 parts, in each add a little food coloring. Roll the mastic into a layer. Attach a template for an owl or any other character to it, cut out according to this pattern.
Dip a culinary brush in water, moisten some of the mastic on the cake, attach an owl blank here. Glue them all in the same way.
Roll up round eyes from the remains of the white mastic. Place a blackcurrant or one raisin in the center of each to make the pupils. But first soak the raisins in warm water for 20 minutes to soften.
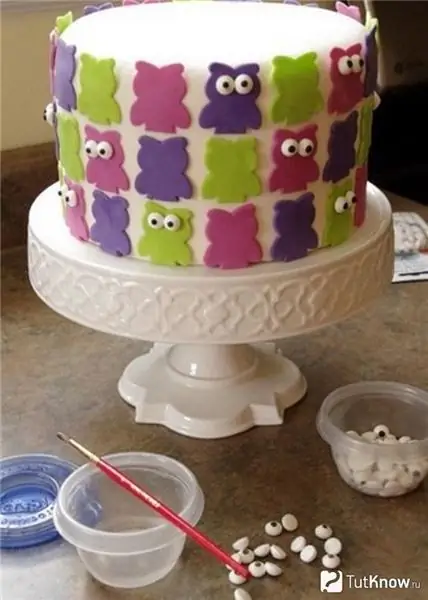
It is not necessary to make eyes on all the blanks, perhaps some owls have their backs turned to the viewer.
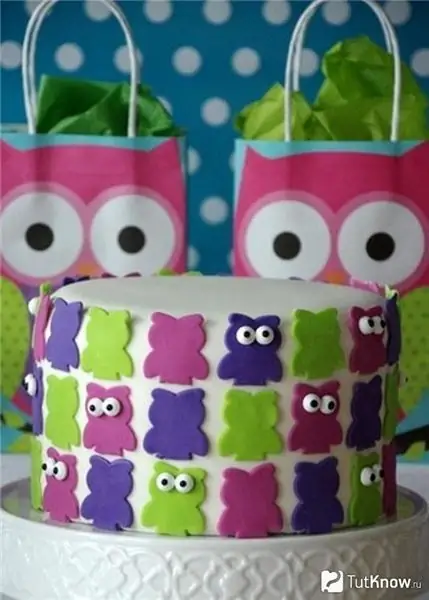
Usually, the cake with mastic should be left in a cool place for a day to dry, after which it can be served.
Here are some simple drawings to help decorate the cake. If you want to be the designer of your home, don't forget about accessories. And you don't have to buy expensive paintings. You can make them yourself, a master class will help with this. Such canvases are very simple to create, but they look impressive.
Diy stone paintings for beginners
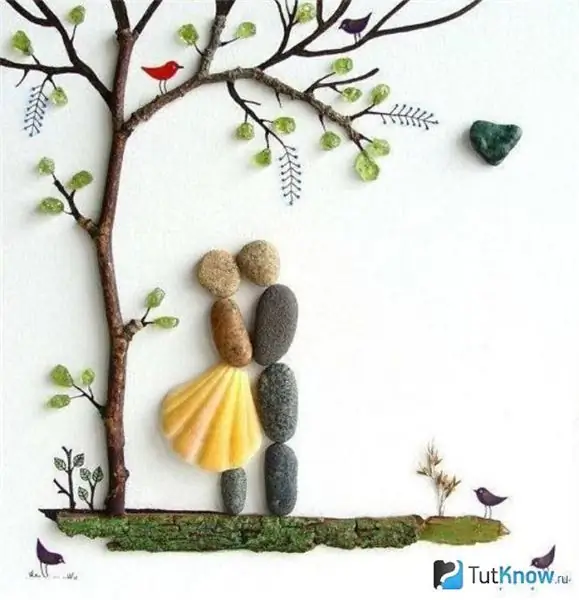
To create such a man-made masterpiece, use:
- smooth pebbles;
- shell "king";
- artificial moss;
- transparent titanium glue;
- thin branches of a tree;
- plywood;
- colored paper;
- paints.
The base should be dense, use plywood, hardboard or similar materials for it. Cover the surface with 2-3 coats of white acrylic paint. When they are all dry, proceed to create a picture of stones.
If you are doing this for the first time, then it is better to first outline the locations of the elements with a simple pencil.
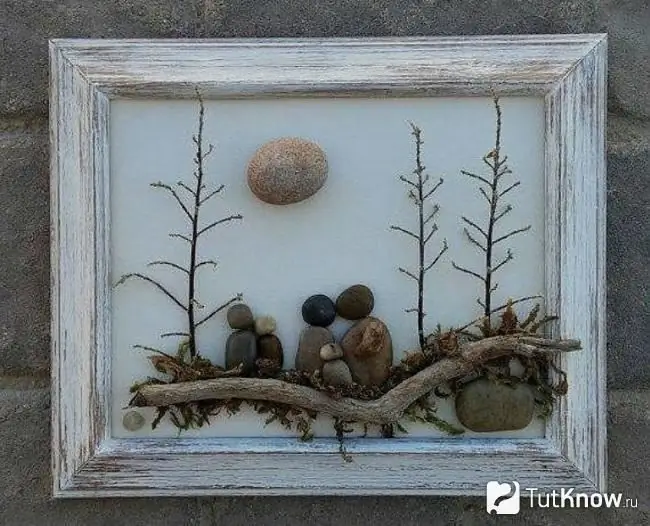
Indicate where the lovers will be. Glue 3 nearly identical flat pebbles to create a guy, and his head with light pebbles.
For the body, head and legs of the girl, use one pebble at a time, make a skirt out of a shell "king", having previously broken off the "antennae" with pliers.
Such a picture is perfect for those who are vacationing at the sea or have brought some seashells and smooth pebbles from there from vacation. Such a panel will be a great reminder of a vacation on the seaside. And you can take twigs from a tree growing in the yard, but it is better to use dry ones. Treat them with pliers, removing excess.
Attach a relatively flat trunk to the picture of stones with Titanium glue. In the same way, glue the small twigs that will become the branches of the tree. Cut the leaves for him from green paper, and the birds from another colored one.
Draw the elements of the tree, plants with paints. Glue the moss as grass, then you can frame the work and start a new one.
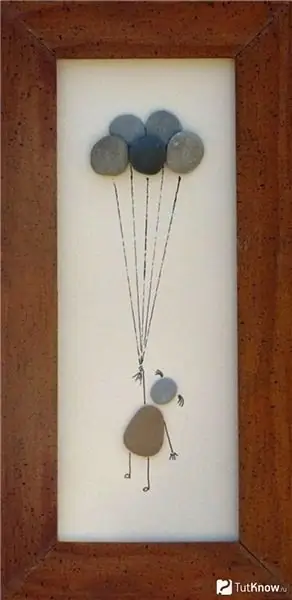
This simple picture is also created quickly. It will require:
- plywood or thick cardboard;
- frame;
- threads;
- flat stones;
- glue.
The girl's body is one larger, and the head is a smaller stone. Make her arms, legs, fingers, hairstyle from threads by gluing them.
The girl holds the balloons by the strings, and they themselves are made of round pebbles.
If you are relaxing on the sea, walking along the beach, look for a heart-shaped stone, you will need it for the next romantic picture.
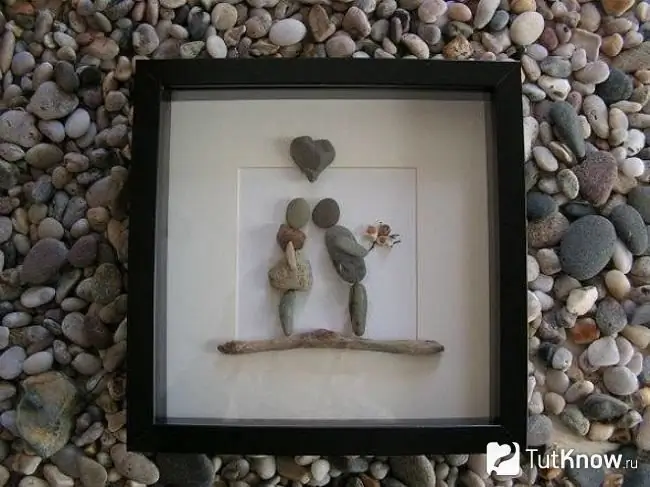
The oblong pebbles will become the arms and legs of the characters, the round ones will become their heads, and the oval ones will become the torso. Glue a fancy dry branch down the panel - it will become the path on which the lovers stand.
Put a sprig of dried flowers in the guy's hands or make them out of colored paper. Such a picture of stones will be another pleasant reminder of a wonderful summer vacation on the south coast, like the other.
For each cat, you will need a pair of pebbles of the same color, but different in size, to make the body and tail. If you cannot find an identical color scheme, simply paint the stones in the desired color. When the coating dries, glue the blanks on a dense base, having previously painted it or gluing a sheet of light cardboard.
Draw the ears and grass for the cats. Glue the twigs that will become a tree and a couple of small pebbles that have turned into birds.
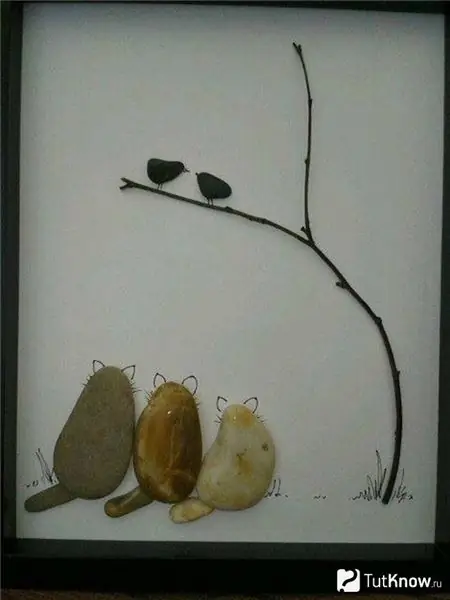
By the way, you can dwell on their creation in more detail. After all, creating simple drawings in stages, you will also depict birds.
How to paint watercolor birds?
In just a few minutes, you will be able to draw a jay. To do this, take:
- a sheet of thick paper;
- simple pencil;
- watercolor;
- brush.
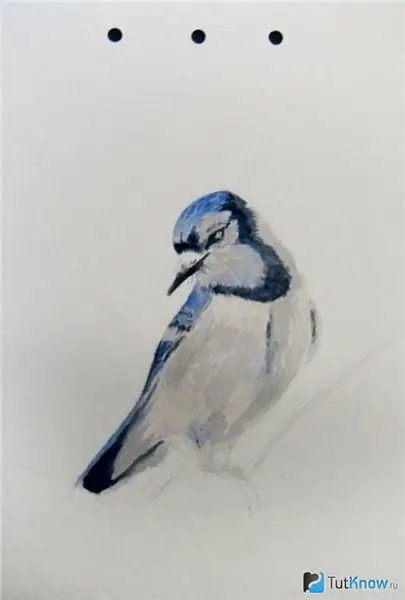
For beginners, it is advisable to first create the outlines of the bird with a simple pencil. More experienced ones can immediately paint a jay using white or pearl paint.
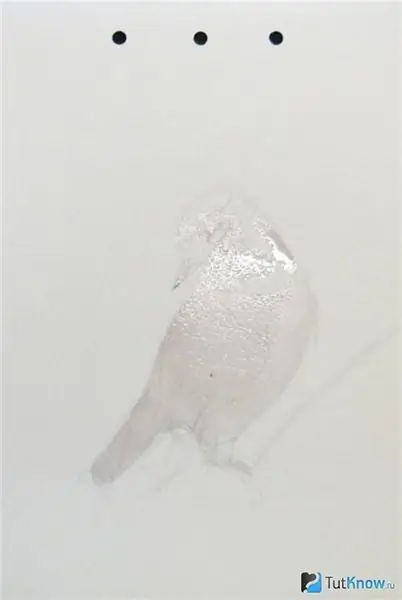
This step-by-step watercolor painting assumes the use of blues and blacks in the second step. With paint of these colors, highlight the eyes, chest, outlines of the back, tail, head of a jay.
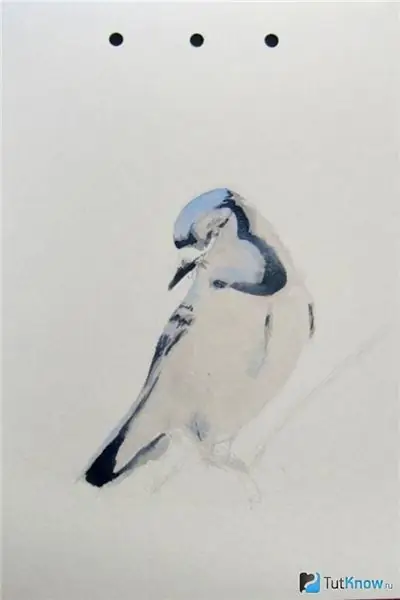
Before that, you need to barely mark these fragments, at the next stage, highlight them more confidently. Draw the plumage of the jay with a light gray color.
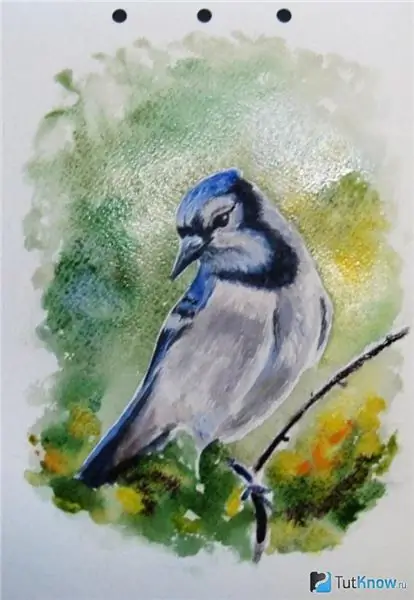
In the next step, act even more confidently, because everything is working out for you! Create a background with green bushes in the background, yellow flowers, the sky and a branch on which the bird is sitting.
The last stage is the final one. Make the bird more realistic by painting a few strokes of black and gray paint on its chest, side, and head. Highlight the background by adding green, yellow watercolors. You can also depict the blue sky behind the jay.
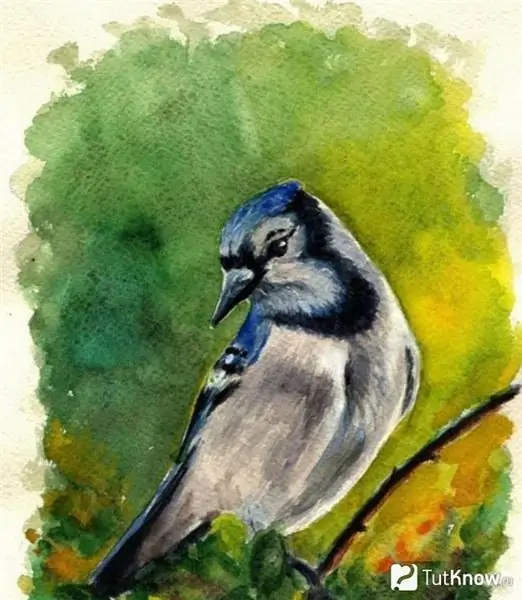
Here's how to paint in watercolor step by step. Now you can create simple canvases with a simple pencil, paint and even using stones. Be creative, dare, and you will certainly succeed!
How to draw simple drawings for beginners, see here:


