- Author Arianna Cook cook@women-community.com.
- Public 2023-12-17 14:23.
- Last modified 2025-01-23 09:40.
Creation of a pond at a summer cottage: types of artificial reservoirs, the choice of their location and size, the materials used and their features, the technology of arrangement. The pond on the site is a cozy lake designed to caress the eye and calm the nerves. When contemplating it, a person moves away from the bustle of the world and recovers his strength. Our story today is about how to create such a miracle at your summer cottage.
Varieties of artificial ponds

Before the device of an artificial reservoir as one of the many elements of landscape design, you should know its main feature. Unlike a regular pool, where water is periodically exposed to ozonation and disinfection, a garden pond needs a natural balance. Otherwise, the water in it will become cloudy, bloom, and the plants will wither. After that, the invasion of midges and the appearance of frogs is unlikely to please the owner of the pond.
There are two main styles for creating artificial reservoirs - regular and landscape. The first one is recommended for choice when there is a desire to decorate a pond in the same style as the house. This design is characterized by a consistent geometry of shapes with regular lines. Smoothly trimmed bushes, clear outlines of flower beds, straight garden paths, a neat frame of the reservoir - all these are characteristic features of the regular style. When used, the suburban area becomes like a miniature palace park.
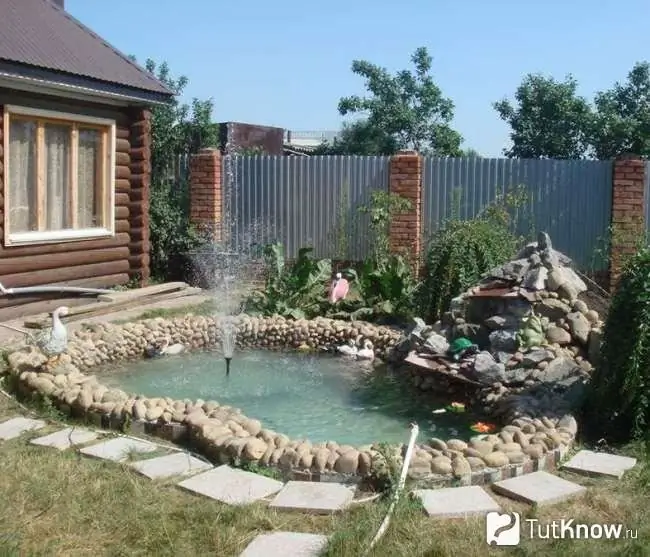
Artificial ponds created in a regular style can be located above ground level. This minimizes the amount of excavation work on the construction of pits, the risks of falling into the finished pond for young children and makes it easy to care for the home "lake". The sides of such a reservoir that rise above the surface of the site are quite suitable for arranging a flower garden and installing seats. In the very water area of the pond, you can install a fountain.
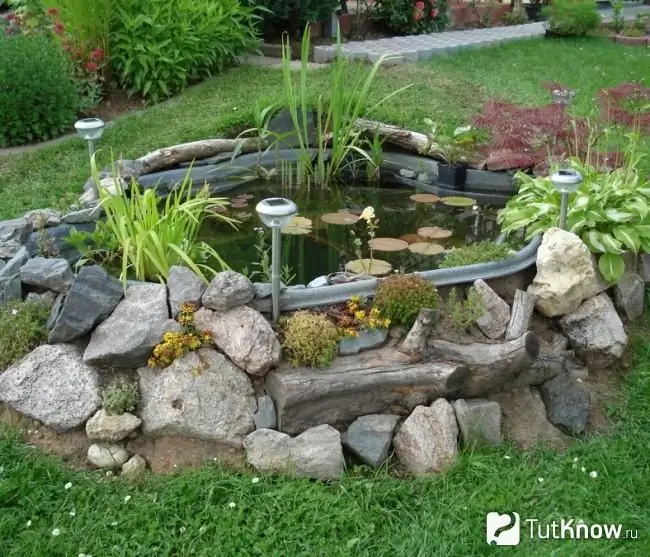
The landscape style of an artificial pond at a summer cottage assumes a rejection of symmetry and complete naturalness. Such a body of water can have a coastline of any shape. Along its edges, planting of plants characteristic of the flora of bogs is arranged, a smooth descent into the water is covered with cobblestones. Ponds designed in a landscape style, designers try to place in the back of the garden or near a green lawn.
Planning the location and size of the country pond

It is indisputable that the size of any artificial pond depends on the area of the personal plot. And if we talk about creating an ecosystem of a reservoir, then large ponds are more suitable for this than small ones, since they are more convenient. It is easier to find the necessary balance between the flora of the pond and its inhabitants in a wide area than in a small one. In addition, large areas are easier to care for. A small reservoir often needs to be cleaned, since the tightness between its inhabitants is unlikely to create a full-fledged ecological balance in it.
The best place for a pond is open space. It should not be blown by strong winds, this does not contribute to the development of plants on the shores of a man-made reservoir.
In addition, the lighting of the object should be taken into account. Under the rays of the sun, it should not last more than ten hours. With prolonged exposure to bright light, green algae such as ooze will grow. If there is insufficient light in the pond, the development of plants may slow down.
The location of an artificial reservoir near trees may lead to the need for its constant cleaning during the leaf fall season.
If the home pond is supposed to be illuminated at night, you should consider its location from the point of view of electricity supply.
The choice of materials for the pond on the site

A bowl of a reservoir can be made of reinforced concrete, a waterproofing film, you can buy a ready-made container made at the factory from fiberglass. The last option is the fastest. To realize it, it is enough to dig a pit suitable for a purchased container and mount a product in it, often having a bizarre shape or simply resembling a huge plastic basin.
However, it will not be possible to make a large pond with a bowl made of plastic, since the containers subject to mass production have an area of 3-4 m2 and a depth of up to 80 cm. Large containers are also produced, but they are used for swimming pools and therefore are quite expensive. However, a small pond for a small plot is quite suitable, the price of a bowl is 1000-8000 rubles. and depends on its capacity, color and shape.
When working with your own hands, a pond on a site can be arranged of any size and arbitrary layout, using a pit dug in the ground and a waterproofing film that covers the bottom and walls of the excavation. The price of this material is quite affordable and depends on its quality.
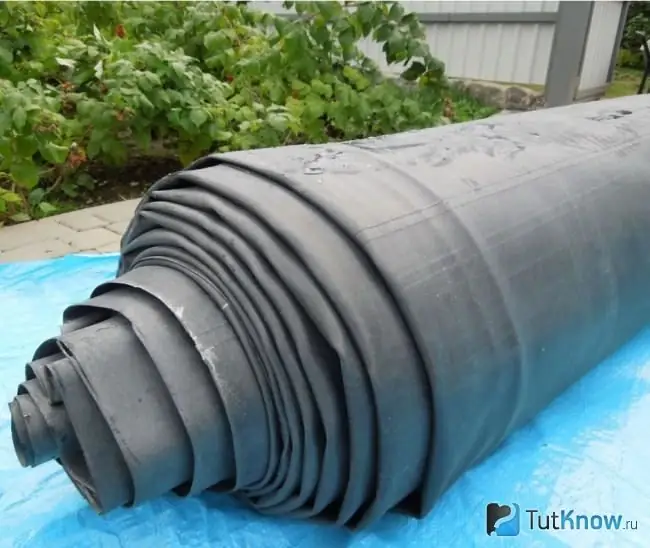
For a pond, PVC film is suitable for a cost of 160 rubles / m2 or thin butyl rubber costing from 280 rubles / m2… The film has a high-quality structure, it is elastic and strong enough. The reservoir obtained with its help will serve for more than 15 years. Rubber is highly resistant to UV rays, all weather temperatures and is not prone to cracking. Its disadvantage is the high price, but also the service life of such a pit coating is more than 50 years.
The main advantages of film insulation are the ability to shape or change the pond bowl, make simple repairs in case the material breaks. But in winter, the liquid will have to be removed from such a reservoir: when it freezes, it will expand and break the waterproofing. This is its disadvantage.
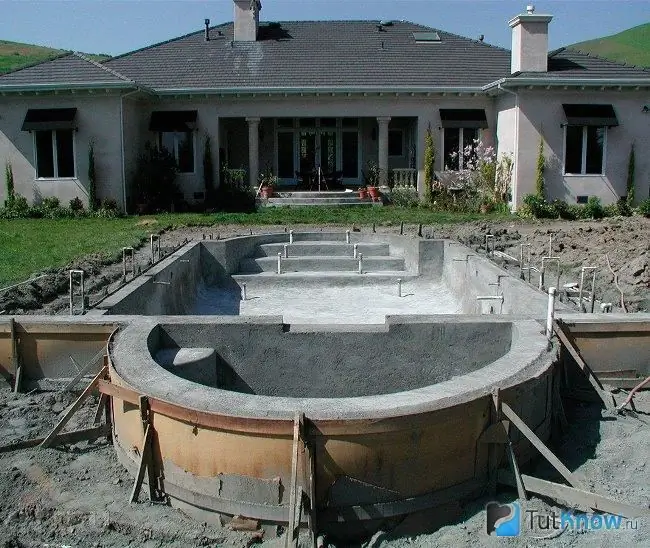
If we talk about special reliability, then only one material is suitable for the construction of a pond - concrete. You can walk along the bottom of a concrete bowl without fear for its safety. But working with it is much more difficult than with film, rubber or cast products. This will require the manufacture of formwork, reinforcing cages and double-sided waterproofing of the casting. All this must be done with careful observance of the step-by-step technology. Due to the high labor intensity of the work, the construction of ponds with a concrete bowl is not particularly popular, since film or rubber is much easier to use for the same purpose.
When buying materials for your pond, you should make sure that they are environmentally friendly, otherwise plants or fish will not survive in a harmful environment.
Pond technology on the site
Let us consider in detail the construction of a pond on a site using a rigid cast form of bowls, film insulation and a raised form.
Pond with a hard bowl

For its construction, you first need to outline the contour of the pit. This work is not difficult to do: the purchased container should be put in its proper place and circle it with the tip of a shovel.
After that, in the shape of the bowl, you need to dig a pit. The depth of the pit should be 40 mm greater than the height of the tank in the lying position. If the reservoir for the pond has a stepped shape, each step in the ground must be marked and dug out, starting from a shallow terrace, gradually moving to a deeper area. When digging, do not forget to add 40 mm to the depth each time.
After the end of the excavation work, the bottom of the pit should be covered with sand and tamped down. A thin sand cushion will prevent the bowl from sagging after filling with water. Before installing the container in the pit, it is recommended to check the horizontalness of its bottom with a building level.
If the result is positive, you need to put the bowl in its place, fill it with water and repeat the test, placing a flat board on opposite edges of the container. The horizontalness of the board is checked at the same level.
All cavities that remain between the walls of the bowl and the pit must be covered with sand. You can seal your sinuses with water. The main thing is to achieve that there are no voids under the pond bowl and around it. Otherwise, the reservoir may crack after pumping water. If the installation of the container went well, its edges must be covered with bricks or decorative tiles.
Insulated pond

To create a pond on the site using film insulation, you will need: a line for marking and a building level, pegs and a shovel, sand, a rubber hose and geotextiles, which will protect the insulation from plant roots and stones.
First you need to find out the desired shape of the water area. For manipulation, you will need a long hose and pegs. With their help, it is necessary to change the position of the fragments of the hose lying on the ground until the outlines of the bowl of the reservoir become pleasant for execution.
After completing the marking, you can dig a pit. Pond banks must have a 45-degree slope. In the process of excavation, stones and roots must be removed.
First of all, you should tear off the terraces of the pit, and then proceed to the formation of a deep place in the pond. The minimum required depth for a garden pond is 600 mm. In winter, such a reservoir will not completely freeze through, and in summer, fish living in a pond will always find a place at the bottom where you can hide from the hot sun.
After the completion of the excavation, its bottom, terraces and banks must be covered with clean sand with a layer thickness of 40 mm. If after this procedure all the irregularities have disappeared, geotextiles must be laid on the sand.
At the next stage of work on the excavation, it is necessary to freely position the insulating film. Along the banks, its canvas should be leveled, pressing down the edges of the material with stones.
Then it is necessary to organize the water supply from the garden hose to the center of the film sheet. Under the weight of the water, it will slowly sit down, taking on the relief of the walls and bottom of the artificial pond. The sagging of the film must be constantly monitored, in time moving the stones holding it on the banks.
Now you need to make a blind area. The material for its manufacture can be natural stone, clay brick, tiles. The blind area should be more than 60 cm wide and laid on mortar.
Raised pond

For a reservoir of this type, you need at least a wall and a foundation, which is required. The arrangement of a reservoir above ground level is carried out in the same way as laying a garden wall: first, you should determine the location and parameters of the planned reservoir, dig trenches for the foundation.
When building a semi-buried pond, it is necessary to make a foundation pit in the deep part and form sites for plants at the level of the foundation. After that, you should get rid of all the stones, and then arrange a sand pillow at the bottom of the excavation.
Then you need to build support walls around the perimeter of the summer cottage. After a couple of days, the masonry solution will harden. After this time, the film should be laid so that the ends of its canvas hang evenly from all parts of the wall.
Temporarily the insulation must be pressed against the top of the walls with bricks. Then, slowly filling the film located above the bowl with water, it is required to remove or move the stones pressing it, correcting the folds in the corners.
After filling the bowl with water, the excess film must be cut off from the edges, keeping an indent of 1-2 wall sizes.
Then the water from the pond should be removed and ridge stones installed to protect the edges of the film. That's it, the pond is ready, you can fill it up with water again and invite the fish.
How to make a pond on the site - watch the video:

If you have a small plot of land or do not know how to make a pond on the site, first practice at home. A miniature pond can be made even in an ordinary cup, and then, if everything works out, feel free to move on to a large project to build a full-fledged reservoir. Good luck to you!


