- Author Arianna Cook cook@women-community.com.
- Public 2024-01-12 17:55.
- Last modified 2025-01-23 09:40.
Do you know how easy it is to make home decorations from pumpkin, crafts for kindergarten and school? Learn how to sew pillow pumpkins with our step-by-step workshops. Pumpkin is a unique vegetable. Delicious and healthy dishes are prepared from it, and home decorations are made. This round-faced beauty has a long shelf life, so it can be used in winter and even spring.
How to easily make pumpkin decorations for your home?
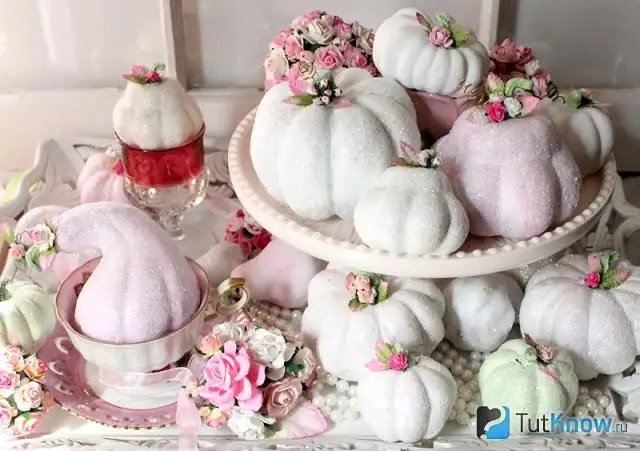
Here are some exquisite decor items for you. To make the pumpkin so irresistible, you will need:
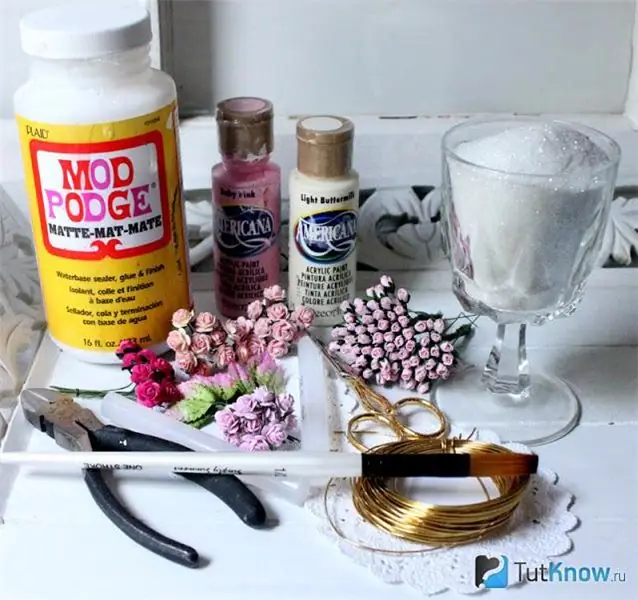
- dye;
- artificial flowers;
- wire;
- pliers;
- scissors;
- primer;
- shine;
- brush;
- pumpkins.
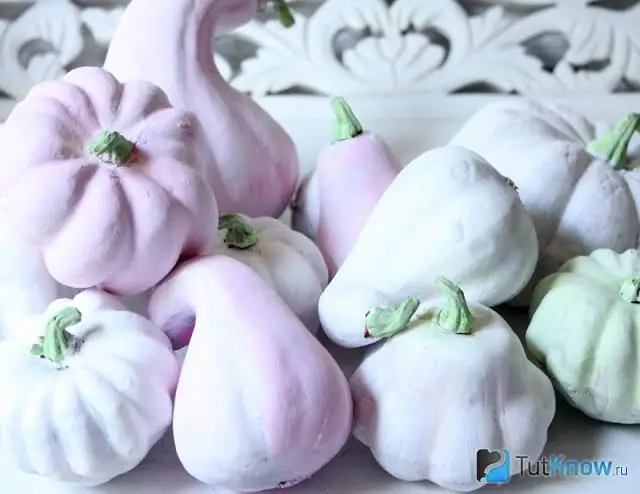
Better to buy a small vegetable, now they sell portioned varieties. Having purchased such pumpkins, you will need to paint them with a primer, let them dry.
Wind a wire around a pencil or a branch, cut off the excess with pliers. Screw fake flowers that can even be cut out of paper onto the back end. Fix this decorative element on the tail of the vegetable, cover the rind with glitter.
Decorate several fruits like this and place them in beautiful flowerpots.
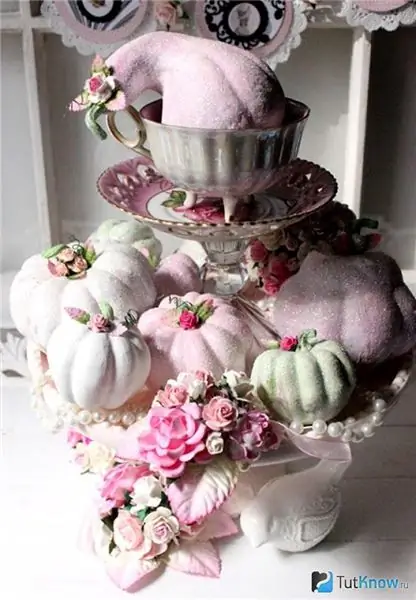
Such pumpkins will be a great gift, an unusual present. You can give it to your friends on Halloween when this vegetable is in the spotlight.
It's so easy to make an elegant souvenir from a pumpkin. This is a great gift for Halloween or any other holiday.
Decorative pumpkin pillows on the sofa
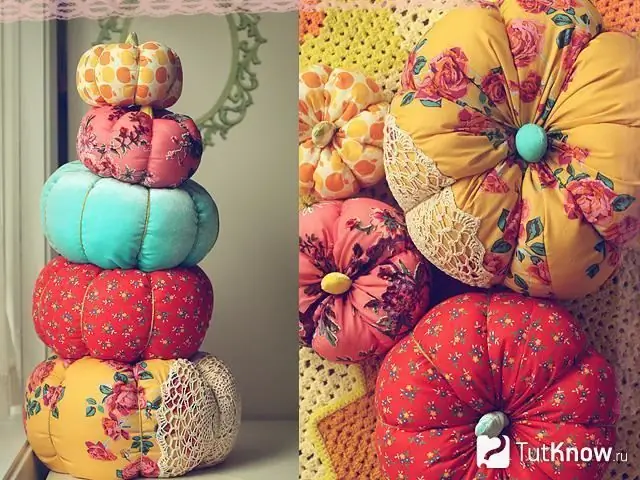
To create this piece of furniture you will need:
- the cloth;
- scissors;
- threads;
- filler;
- a thread.
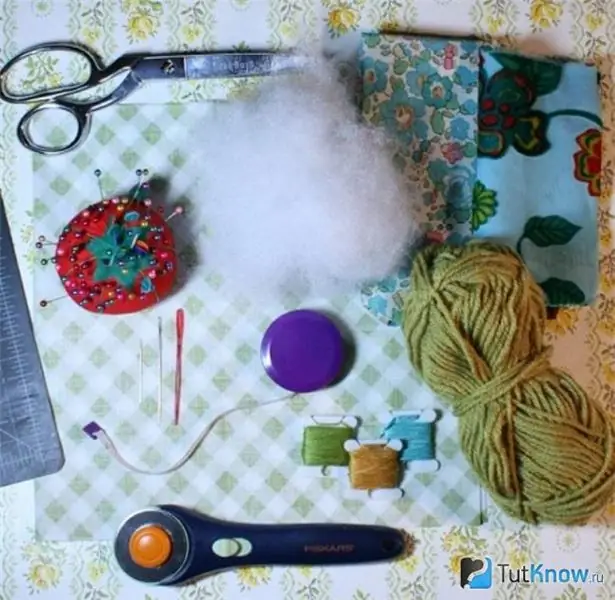
Cut out a rectangle from the prepared fabric, the length of which is 2 times the width. Fold it right sides, sew the sides on the wrong side.
Turn the resulting bag on the front side, fill it with filler. Make sure that the inner contents are uniform. Sew around the edge with a basting stitch using strong thread. Tighten and secure in the center of the product.
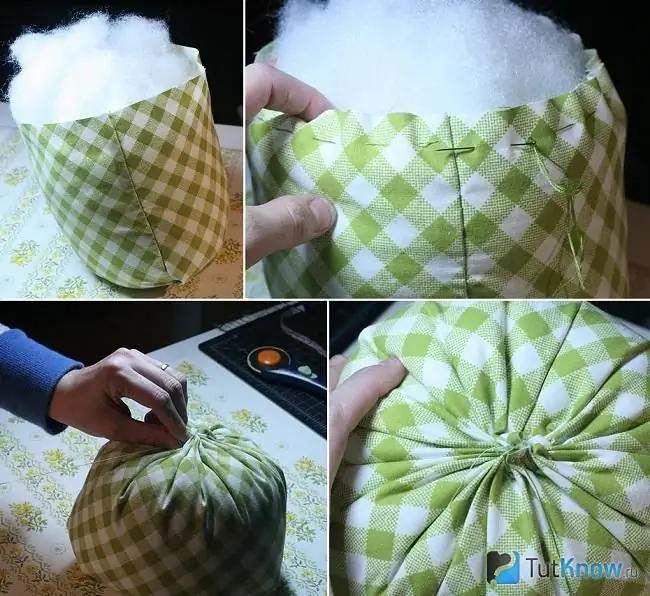
Take a needle with a large eye, insert the thread into it. To sew a pumpkin-shaped pillow further, pierce with a needle from the bottom up, giving it a flattened shape. Then, using the same thread, divide the resulting workpiece into 6 or 8 segments.
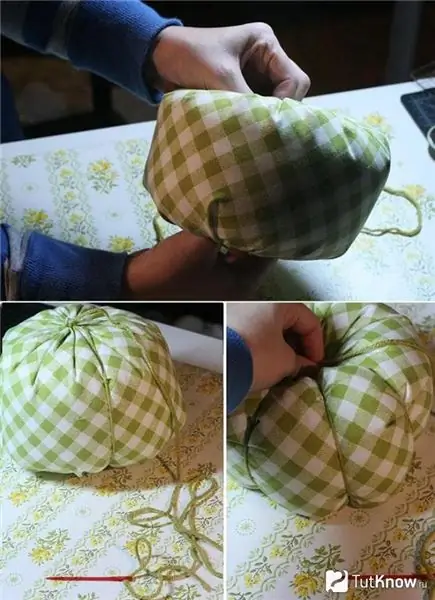
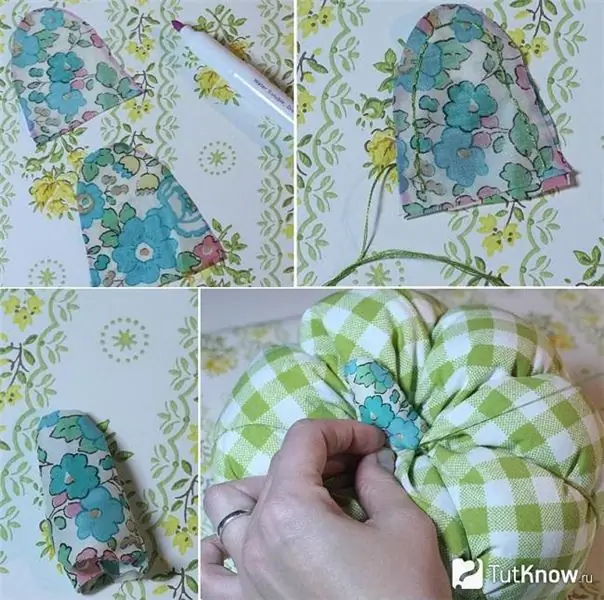
Fix the thread well by tying it in 2 knots. Make a cutting to this vegetable. To do this, cut out two identical oval-shaped pieces from the fabric and fold them with their front sides to each other.
Cut the bottom edge of these blanks, it should be straight. Sew these two elements together, leaving a straight edge free for now. Fill the shape with filler through it and sew to the pumpkin.
You will get such beautiful decorative pillows on the sofa.
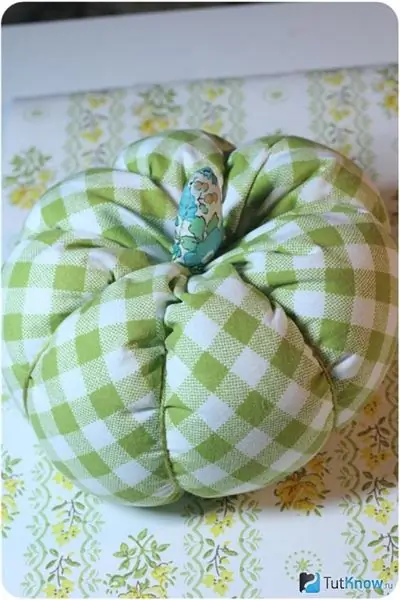
This vegetable can be used to craft amazing items.
Crafts from pumpkin - master class
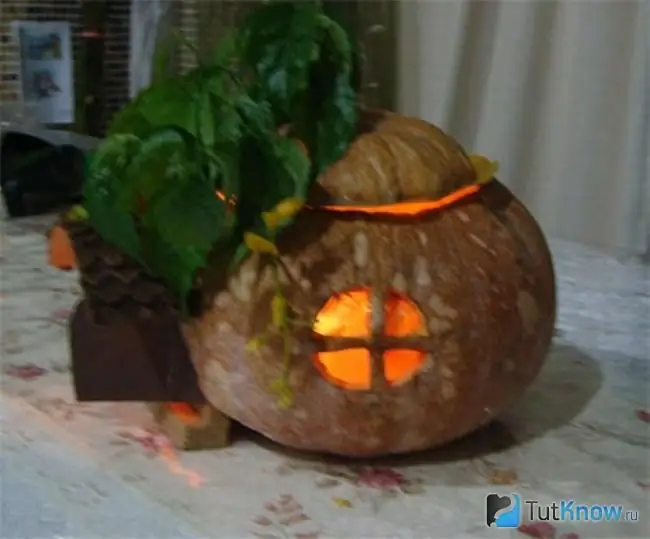
To make such a beautiful house for a toy mouse, you will need:
- spacious pumpkin;
- knife;
- newspapers;
- spoon;
- marker.
Carefully cut the lid off the pumpkin. Remove the pulp with a spoon and hand. Draw a window on the outside of the vegetable with a marker. Also mark the place of entry. Carefully cut out its elements with a clerical knife.
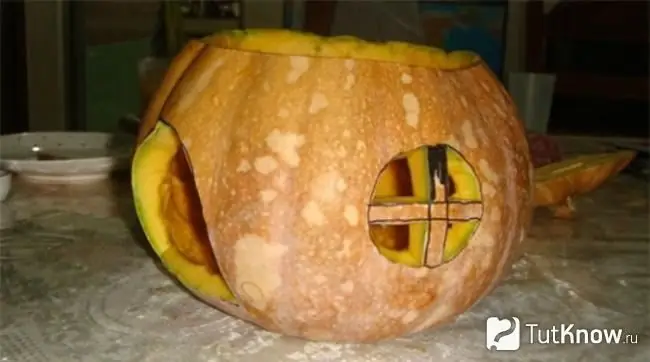
Now fill the pumpkin with newspapers, they will absorb excess moisture, allowing the vegetable to dry faster. When this paper becomes damp, remove it and put in other crumpled sheets. Thus, you need to act until the pumpkin inside dries out.
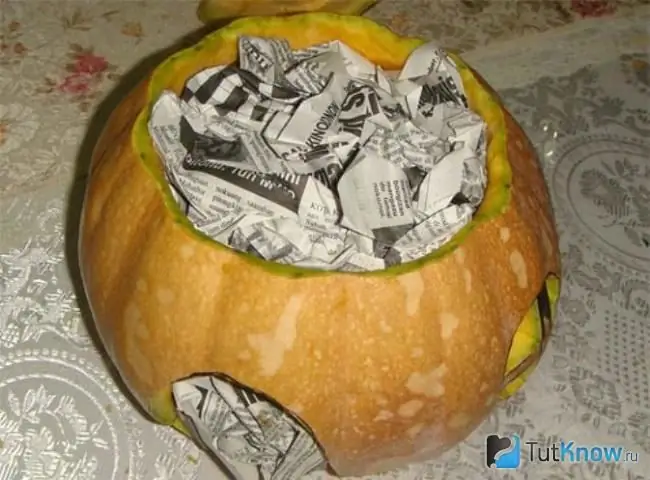
Put the dry lid back on. Glue a porch made of thick cardboard where the entrance is. It remains to sew just such a funny mouse or other animal, and you can send the craft to the competition or decorate your room with it.
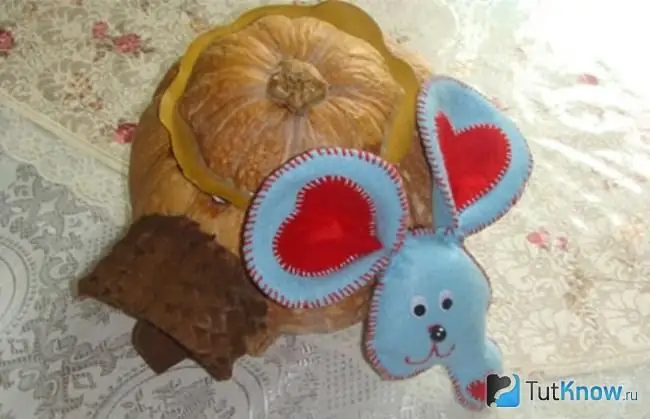
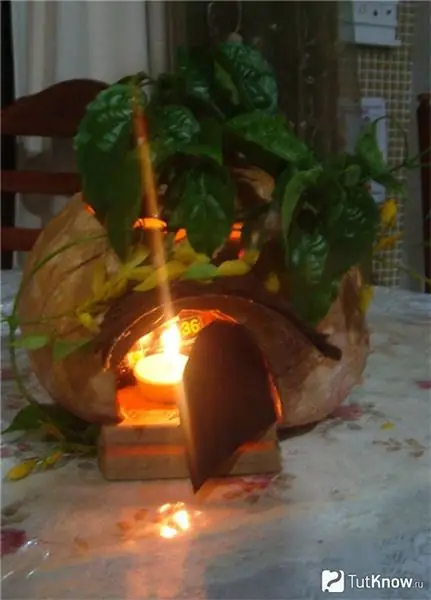
If you want the fairy house to look like a real one, then place a candle inside. But the flame must not be left unattended.
See what other pumpkin crafts you can make.
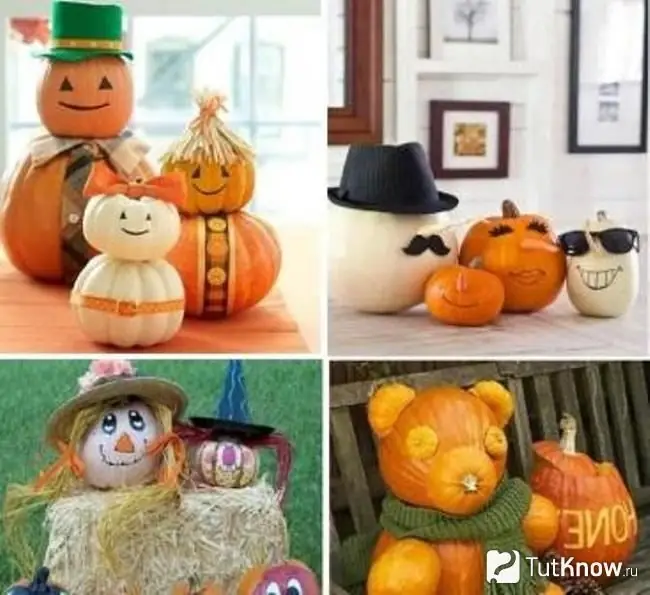
In the top left photo you can see the figurines, each made from two pumpkins of different sizes. With the help of pieces of wooden skewers, the small pumpkin is attached from above to the large one. It turned out to be a whole family. For dad, you need to make a hat out of cardboard, for mom - hair from straw or yarn, and for a daughter - a bow that is tied to the tail of a pumpkin.
All characters need to draw eyes and a smiling mouth, paint their clothes or glue decorative stickers on these places.
No less funny characters are located in the top right photo. Some need to wear a hat or glasses, glue on a mustache, and attach a long carrot nose.
For a pumpkin craft (bottom left photo) you will need:
- straw;
- old hats;
- pumpkins;
- acrylic paints and brushes.
From the straw, you need to form cubes or triangles, which will become the bodies of the characters. Put pumpkins on top of them, after applying makeup on them, putting painted straw as hair, wearing a hat on top.
For the next do-it-yourself pumpkin craft (photo on the right below), you will need several of these vegetables of different sizes. From one you will make a head, from the other a body.
- Turn small pumpkins or squash into bear paws. Its eyes, ears and nose can be made from pumpkin scraps or squash. All this is fixed with toothpicks or wooden skewers.
- A keg of honey is also made from this vegetable. Better to create an inscription on the surface so that it is clear what is inside. To do this, you first need to write the word "honey" in block letters on the pumpkin with a marker on the pumpkin, then cut out the peel in this place using a clerical knife.
- Cut off the top of the pumpkin and remove the pulp. Dry the pumpkin with newspapers, you get a great craft, and a container for storing honey.
Halloween pumpkin
If you need a decoration for this holiday, be sure to use this traditional fall vegetable. For a pumpkin craft (top left photo), you will need these vegetables. The lid is removed from each, the pulp is removed, the upper edge is cut into wavy lines.
You can cut it out in squares, as for a pumpkin craft - top right photo.
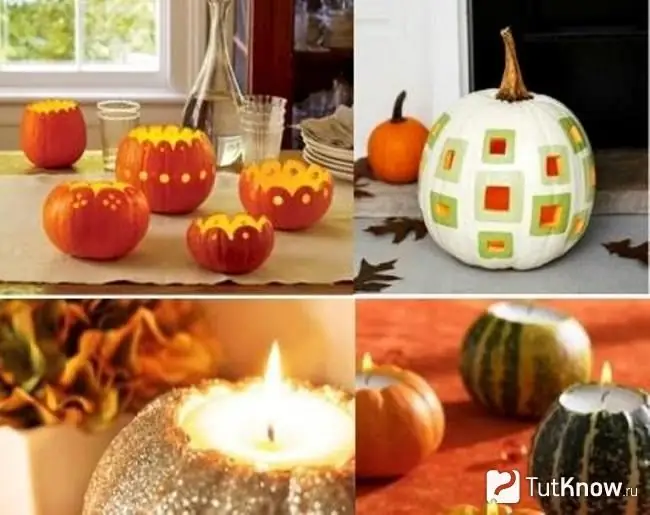
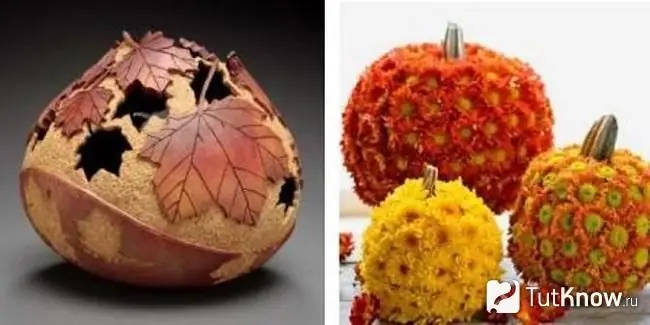
To make the house look cozy in the evening, put a candle inside the vegetable and light it. If you liked carving on a pumpkin, then you will definitely love carving from vegetables and fruits. Armed with special knives, with practice, you can carve maple leaves or such amazing chrysanthemums on it.
But a funny cat can be made without even having experience. The main thing is that you have two pumpkins of different sizes. Attach the small to the large as a head. To make the cat Matroskin, you need to remove the skin from the pumpkin in strips. Also use a sharp knife to cut out his eyes and smiling mouth. The pupils will become raisins or buttons, and the straws from the cocktail will turn into his mustache. Cut the ears from pieces of pumpkin, attach them to the head with toothpicks.
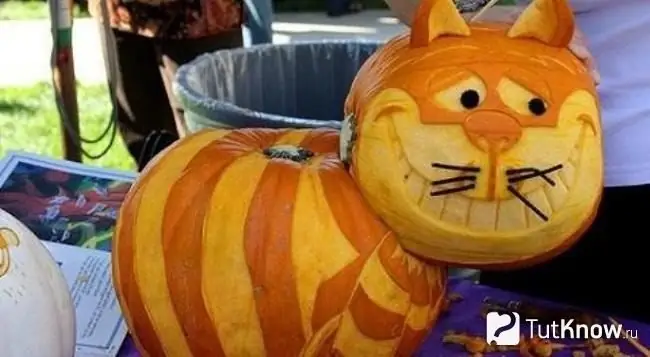
Here is a list of what it took to get the job done:
- two pumpkins of different sizes;
- sharp knife;
- buttons or raisins;
- cocktail straws;
- toothpicks.
You can do it yourself and a lamp. To do this, take two pumpkins, cut off the tops, remove the pulp. Two holes for the eyes are cut on a small pumpkin, and ears are cut out of the remains of the vegetable.
All parts are dried, then covered with black varnish. When all this is dry, the ears are attached to the head with toothpicks. On the upper part of the body, in a circle, metal rods with threads or self-tapping screws are attached. A bowl of candles is placed between it.
When it is necessary for the lamp to give light, it is lit, and the cat's head is put on top.

These beautiful lamps do it yourself, or you can simply cut out its mask from a pumpkin and hang such a decoration on the wall.

This vegetable can also be used when making fall-themed crafts. Now this is very important, since they are asked to bring such hand-made works to kindergarten and school.
If growing pumpkins in your garden has become your usual business, then there will be no problems with the source material. But even for the residents of the metropolis, it will not be difficult to get a pumpkin, since these vegetables are sold in stores and markets.
Pumpkin box

As planned, a toy mouse will live in it, but at the same time all sorts of little things can be stored in this vegetable. For this DIY pumpkin craft, you need to prepare:
- pumpkin;
- cardboard;
- paints;
- brushes;
- varnish;
- wire;
- a twig or wooden skewer;
- dense green fabric;
- scissors;
- glue gun.
First, cut off the top of the pumpkin, remove the pulp and dry the inside of the vegetable with newspaper. While this process is going on, get busy making jewelry.
To help the pumpkin dry out better, when you remove its top, immediately make holes for the door and windows.
- Cut out a large leaf from a dense green fabric, and a small one. Glue a small one to the side of the vegetable, and a large one to its lid.
- To make a canopy over the porch, cut a strip of cardboard, roll it up with an accordion. Now straighten it a little, you will get a wonderful roof, to which you need to glue the decorative elements of the sidewall.
- Cut out porch decorations from cardboard. If the material is thin, then glue several sheets of cardboard together. Make a door and a handle for it in the same way.
- You can make steps by taking the basis of such a form. The cardboard is wetted in a mixture of water and PVA, taken in the same proportion. Now this soft pliable material is placed on the mold. When it's dry, peel it off and paint over with brown paint. When it dries up, cover the steps with varnish.
- Paint the other elements of the porch in the same way, and bend the wire in the form of a railing. Stick it with one side of the two sides of the step.
- Make a flashlight out of cardboard, attach a wire to it on one side. Make shutters, cut out curtain tulle.
- Wrap a wire on a wooden stick or skewer, remove from it and paint it yellow. Attach these tendrils to a large pumpkin leaf.
- While you are making the elements, the inside of the vegetable is dry, you can start decorating it. Attach the steps by driving the other ends of the wire railing into the pumpkin. Attach a flashlight to the side in the same way.
- Using a glue gun, glue the shutters to the windows, attach the tulle here.

Place a ladder in the back if you wish. For steps, you can use wooden skewers or twigs, cut them into equal lengths. On one and the other side, tie them with a rope, also paint with brown paint and varnish.

But this is a pumpkin-box, you can put various objects in it. To add strength to it, a well-dried vegetable must be varnished and allowed to dry. To make the pumpkin shine better, cover it on the outside with the same transparent varnish. The lid will fit better if you fold a strip of cardboard in half and glue it on the inside of the lid, resting on the end.

These are such wonderful pumpkin crafts you can make. If you want to quickly create a masterpiece, then make a vase out of these vegetables. To do this, you just need to cut off the top and take out the pulp, dry the inside of the vegetable, and varnish. When it dries, pour water here and put flowers.

And the pulp is used in cooking. Take out the seeds, wash them, dry them and you will have a tasty healthy treat.
See what original gift you can make if you dream up a little. Then the pumpkin will turn into a clock.

Also prepare its shell, cover the inside with varnish. Place the clockwork here and attach the hands to the outside. Put artificial flowers in the upper hole of the round-sided beauty, and an extraordinary present is ready.
After such inspiring labors, it's time to have a delicious snack. Cook pumpkin puree soup. It is very easy to do.
- Remove the seeds from the pumpkin along with the adjacent fibers. They need to be thrown away, and the seeds should be washed and dried. Carefully remove the pulp from the pumpkin and cut into cubes. Place in boiling broth or plain boiling water.
- Cook for 20-30 minutes - the pumpkin should be soft. Then turn off the heat, wait for the soup to cool and turn it into puree with a blender, salt. To prevent it from being too liquid, it is better to remove excess liquid in advance.
- Heat the creamy soup. Pour it into the pumpkin. Place a lump of butter or some milk in the center. Decorate with herbs.

After such a delicious snack, there will be a desire to make other crafts.

You can carve flowers on the surface of this queen of the beds or decorate it by taking:
- pumpkin;
- bush chrysanthemums;
- toothpicks;
- knife.
Cut the flowers off the stems. Stick a toothpick on the back of each flower. Then attach them to the pumpkin skin. Cover the entire surface of the vegetable in this way, it will turn out just amazing!
It's pretty easy to make a flower basket out of a pumpkin. You need to cut the vegetable as in the photo, remove the pulp, dry the pumpkin. Now flowers are placed inside the basket, and if you wish, then fruits.

How easy is it to make a pumpkin carriage?
If Cinderella knew what kind of carriage can be made from a pumpkin, she would certainly want to ride in such a carriage.

Take:
- pumpkin;
- marker;
- knife;
- spoon;
- gold paint;
- wire;
- foil.
Follow this plan of action:
- On the pumpkin, draw the outlines of the doors of the future carriage, cut along these markings with a knife. Remove the pulp with a spoon and knife.
- When the pumpkin is dry, paint the monogram in gold paint.
- Twist the wheels from the wire, wind foil around them. Pierce the pumpkin with a metal rod, fix these connecting elements on the wheels with a wire. This is how you need to make the front and back pair.
If you have metal parts in your workshop, make wheels from round ones. Turn others into a door, window and other elements of the carriage.

Here are some great pumpkin crafts you can make. The main thing is desire and fantasy. And to inspire you even more, we have prepared useful master classes on this topic in video format:

And here is a video on how to make an autumn pumpkin vase:


