
- Author Arianna Cook cook@women-community.com.
- Public 2023-12-17 14:23.
- Last modified 2025-01-23 09:40.
Well drilling methods and recommendations for their selection. Tools and materials for work. Technology for creating vertical mines. Drilling a well is the execution of a narrow cavity in the soil with a length from the surface to the aquifer. For these purposes, special tools of various designs are used, fixed on a collection device made of pipes. All information about drilling a well with your own hands can be obtained in this article.
Choice of well drilling technology

The purpose of the drilling is to create a vertical shaft with a small diameter from the surface to the underground aquifers for the installation of the pump. To prevent the walls from collapsing, metal or plastic casing pipes are installed in the barrel. A filter column is placed in the lower part of the shaft, consisting of an elbow, a sump and a filter.
Well drilling is a complex process involving heavy physical labor. But today it is the most affordable way to provide your property with drinking or industrial water without large financial investments.
Before starting work, always find out the depth of the aquifer, which determines the method of drilling and the type of well. If the distance is from 3 to 12 m, an Abyssinian well is drilled, up to 50 m - a sandy one, more than 50 m - an artesian one. In the latter case, professional installation and special permission from local authorities will be required. It is a valuable natural resource.
Top water is most often used for watering. You can drink it, but only after checking in the sanitary and epidemiological station. Most often, moisture is extracted from a gravity reservoir consisting of sand soaked in water, bounded at the top and bottom by a clay shell. Debit of fluid in the barrel - about 2 m3 per day, which is quite enough for housekeeping. The well is called sandy, even if the useful layer consists of pebbles, gravel, etc. At this depth, the water is not sufficiently filtered, therefore, it is necessary to carefully choose a place for drilling, and the liquid must be submitted for verification to a laboratory. If chemical and organic compounds harmful to humans are found, it is not recommended to operate the well.
At a depth of more than 10 m, pressure strata are sometimes found that squeeze water to the surface. They consist of fractured or loose rocks: limestone, loam, gravel and pebble. The purest water, which does not require purification, is extracted from limestone, therefore all such wells bear its name. The debit is very large - from 5 m3 per day.
There are several ways to drill wells:
- Rotary … The tool enters the soil as it rotates and squeezes the crushed rock upward.
- Percussion … The device deepens after being hit on it.
- Impact-rotary … The barbell with the tool is raised, released, and then rotated. The crushed soil is removed to the outside.
- Rope-percussion … The tool is lifted and released. When entering the soil, soil is packed into the cavity of the device, which is then removed to the surface.
When choosing a drilling technology, pay attention to the following information:
- In the European part of the country, free-flow plates lie up to 20 m from the surface.
- Drilling on your own is profitable to the same depth. For the construction of deeper mines, it is cheaper to invite a team that has mechanized installations at its disposal.
- Well life depends on the intensity of water pumping. With a massive uncontrolled withdrawal of fluid from the free-flow layers, soil failures may occur.
- Free-flow wells with a small volume of pumped water will last at least 15 years, and with intensive operation - no more than 5 years. Therefore, if you find moisture at a depth of 10-15 m, try to dig further to get to the limestone rocks.
Preparatory work

Before drilling a well, make a tripod - a special device for lifting and lowering casing pipes and working tools. Its dimensions depend on the way the work is done. For auger penetration, a structure with a height of 4 m or more is made, for an Abyssinian well and percussion rope drilling, a height of 2 m is sufficient.
The tripod is made in the form of an equilateral triangular pyramid of pipes or logs. From workpieces with a length of 6 m, you can get a very strong rigid installation with a height of 4.5 m. Such dimensions will allow you to lower knees with a length of 3 m.
To assemble the structure, do the following:
- Secure the logs between themselves with bars or slats, which will not allow them to disperse. Connect metal pipes by welding.
- The second option for ensuring the stability of the device: dig each leg to a depth of 0.7-0.8 m, placing boards or logs 1 m long under them. Install the pits in the pits at the same time.
- Set up a tripod in the place where you plan to dig the well.
- Attach the block to the top.
- Pull a rope through the block and connect to a winch or gate.
- Attach a heavy object to the rope and lower it to the ground. It will indicate the center of the hole.
- Dig a hole measuring 150x150cm and 100cm deep around the marked location.
- Reinforce the walls with shields.
Well drilling tools and accessories

Before drilling a water well, prepare special tools:
- Metal auger … The most common tool for building mines. It is used for work on non-loose soils. The auger auger of factory production is two-way. This design will not allow the tool to be pulled to the side and skewed. The lower base is made in sizes 45-85 mm, blade diameter - 258-290 mm.
- Drill bit … Designed for work in hard rock. With its help, the rock is loosened. The tip can be cross and flat. It can be used with a shock bar.
- Boer spoon … It is used for digging wells in sandy soils, because sand will not stick on a regular auger. Used for rotary impact or rotary drilling.
- Drill glass (Schitz projectile) … With its help, mines are created in viscous, highly sticky soils, in which a conventional rotary tool will get bogged down. It is used for wire rope drilling.
- Bailer … It is used for passing quicksands during percussion-rope drilling.
- Well-needle … Used to create an Abyssinian well. In this design, the nozzle, rod, and casing are a monolithic structure that remains underground after reaching the aquifer.
It is not necessary to buy special equipment for digging wells. An ice screw can be used as a working tool. The main requirement for a working device is its reliability. The product must be made of high strength steel.
Often, for the construction of one well, several types of tools are used in turn. For example, an auger, a bailer and a drill spoon are used to work on clay soils. For the passage of pebble layers - a bailer, chisel and casing pipes.
How to drill a water well
The essence of drilling is to create a wellbore by extracting crushed layers of soil to the surface using special tools. They are "screwed" or driven into the ground and then removed along with the loosened soil. Let's consider the most popular ways to create wells with an indication of the main and auxiliary equipment.
Nuances of using casing when drilling

The casing protects the barrel from collapse. Products from various materials are installed in the wells, the advantages and disadvantages of which are shown in the table:
| Pipe material | Dignity | disadvantages |
| Asbestos | Cheapness, long service life | Contains substances harmful to humans |
| Galvanized metal | Cheapness | The presence of zinc, which is harmful to the human body; the appearance of corrosion that pollutes the water |
| Stainless steel | Durability, long service life | High cost, difficulties with welding of individual elements |
| Steel | Durability, long service life | Corrosion that pollutes water |
| Plastic pipes PVC and HDPE | Cheapness, light weight | Cannot withstand heavy loads, not all pipes are perfectly flat |
To connect to each other, a thread is cut at the ends of the products. The very first segment serves as a filter, therefore, holes or grooves are made on the walls, and wire is wound outside. The diameter of the casing must be large enough to accommodate the pump of your choice. The technology of work performance depends on the method of its installation in the well.
The easiest installation of the product is lowering it into the finished shaft, so the diameter of the drill must be greater than the outer diameter of the pipe. In a similar way, they equip a trunk up to 10 m, made in dense non-loose soil. However, there is no guarantee that the shaft will not crumble during pipe installation or drilling. Installation of the casing after drilling is done as follows:
- Attach to the bottom (filter) of the gate (clamp with handles) and lower it into the hole. The handles will prevent the element from falling to the bottom of the barrel.
- Attach the second collar to the next elbow, place on the filter and secure. Usually casing pipes are threaded and for connection it is enough to screw the upper part into the lower one.
- Dismantle the handles on the bottom element, after which the casing will sink. 10-15 cm should remain above the surface. If it is long and heavy, it is lowered using a tripod. To do this, an eye is screwed onto the threaded part of the product, and a winch, hoist, gate, etc. are attached to the tripod.
- Repeat the operations until the bottom reaches the aquifer.
This method is not suitable when working on loose soils, the wall will constantly crumble. In this case, use a tool with a smaller diameter than the inner pipe size. The underside of the pipe should have a cutting skirt or crown to assist in lowering.
The sequence for installing the product is as follows:
- Drill a well to a depth of 1 m.
- Take out the working tool and clean it of soil.
- Install the pipe into the hole and siege with blows from above.
- Install the tool in the product and walk another 1 m, then repeat the operations to settle it.
- Repeat the operation until you reach the water.
Auger drilling

Drilling wells with a spiral tool is considered the most affordable of all possible methods.
The work is done as follows:
- Dig a hole several bayonets deep at the location marked with a tripod.
- Place the tool vertically in it.
- Attach to it at the top of the handle and start rotating.
- When turned, the tool will begin to sink into the soil.
- Lift the drill from time to time and clean it of soil. For such procedures, you will need a tripod with a winch.
- After moving 1-2 m, remove the tool and install the casing in its place.
- As you lower it, lengthen the fixture with a drill rod and the casing with pre-prepared blanks.
- Check the verticality of the barrel during operation. Avoid skewing the auger and touching the walls of the shaft.
- It is important to determine in time the approach of the tool to the aquifer. When the soil lifted to the surface becomes wet, stop and rest. After entering the aquifer, it will become easier to work, but you need to stop only after the drill has passed through and enters the dense soil under it.
- Dismantle the tool from the well.
- Pour crushed stone into the mine, whose fractions are within 5 mm. A layer of pebbles - 20-30 cm. It will create a natural barrier for large impurities.
- Pump water into the barrel and rinse the gravel.
- Pump the liquid out with the pump until it becomes clear. For this purpose, it is recommended to use a centrifugal pump capable of handling high density water.
- After installing a standard pump, the well is ready for operation.
If necessary, rotation can be alternated with blows to the top of the drill. To break up hard layers, it is often hoisted up and released. The tool goes deep into hard layers, after which the crushed soil is removed by the auger.
Drilling by percussion-rope method

The creation of a mine with the help of a bailer belongs to the percussion-rope drilling of a well for water. The work is carried out in the following sequence:
- Mount the tripod at the work site as described in the previous section.
- Determine the center of the hole.
- Dig a hole in this place with a garden drill to the maximum depth.
- Connect the thief to the rope and raise it as far as possible.
- Let go of the rope. The device will go to some depth in the ground and partially filled with earth.
- Lift the bailer with a winch and shake the soil out of it.
- Raise the fixture again and release the rope.
- Repeat the operation until the tool has lowered 1 m.
- Install the bottom of the casing with the filter into the well.
- Raise the tool again and release it, it should enter the ground through the cylinder.
- As it deepens, lower the barrel, screwing in an additional workpiece from above.
- After reaching the aquifer, do not stop and go right through it to the lower clay layer. The bailer should even go into it a little.
- Dismantle the device.
- Plant the pipe.
- Equip a bottom filter depending on the type of soil.
- Lock the barrel in position.
Driving hole drilling

In this way, an Abyssinian well is created, which is also called a driven one.
Drilling is performed in the following sequence:
- Install the tripod.
- Determine the center of the hole.
- Drill a shallow shaft in the marked location with any hand tool.
- Insert the first piece with a tip and a filter into the hole. Set it upright and lock it temporarily.
- Attach a flat weight about 30 kg to the chain on a tripod.
- Fix a cap on the pipe, which will protect the cut from impacts.
- Raise the headstock to its maximum height and release the rope. After the impact, the pipe will enter the ground for several centimeters.
- Repeat the operation until 10-15 cm remains above the surface.
- Attach the next one to the bottom with the help of the connecting sleeve. Seal the joint carefully. The absence of gaps is the main condition for the functioning of the Abyssinian well.
After passing the aquifer, you can install the pump and operate the source.
Well Drilling Pump Application

This method is used for well drilling depths up to 10 m.
Operations are performed in the following sequence:
- Dig a 1.5x1.5x1 m hole and sheathe the walls with wood or other material.
- At one end of a steel pipe with a diameter of about 120 mm, cut the teeth and bend them in different directions, like a hacksaw.
- On the opposite side, cut the threads to connect to the upper elbow. On other workpieces, make only the thread for the connection. After the end of drilling, they will remain in the well.
- Attach a clamp with handles to the fixture, with which it will be rotated.
- Place a large barrel of water next to it. Lower the pump with a long hose into it.
- Install the device in the hole and, rotating, deepen it into the ground as far as possible.
- Turn on the pump and use a hose to supply fluid to the inside of the pipe. It will erode the soil and speed up drilling. After the maximum deepening on top, screw the following blanks, and move the handles up.
- The water can be reused after straining.
- After reaching the aquifer, dig a hole around the pipe.
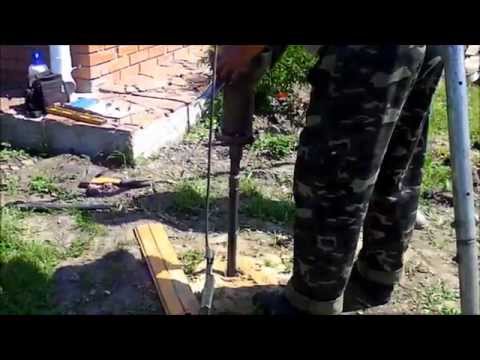
How to drill a well - watch the video:
The above examples show that it is realistic to drill a well with your own hands without using heavy equipment. The mine is dug in various ways, without expensive equipment and hard physical labor. But in order to obtain a positive result, it is necessary to comply with all the requirements of the well drilling technology.


