- Author Arianna Cook [email protected].
- Public 2024-01-12 17:55.
- Last modified 2025-01-23 09:40.
Useful tips and technology for growing gladioli both outdoors and at home. The content of the article:
- Preparing gladiolus bulbs for planting
- Preparing the soil for gladioli
- How to plant gladiolus bulbs
- Gladiolus flower care
- Pest control of gladioli
- Digging up gladiolus bulbs
- Growing miniature gladioli at home
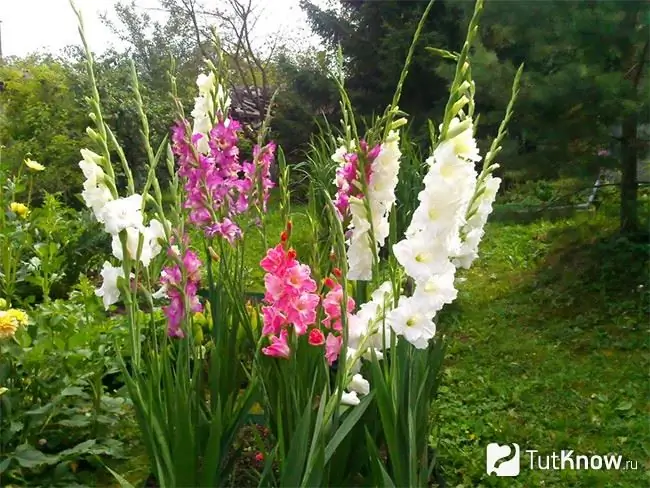
Gladiolus is a beautiful, majestic flower. In order for it to grow as such, you need to know the basic techniques of planting, caring for the plant. You can grow it not only in the country, but also at home.
Preparing gladioli bulbs for planting

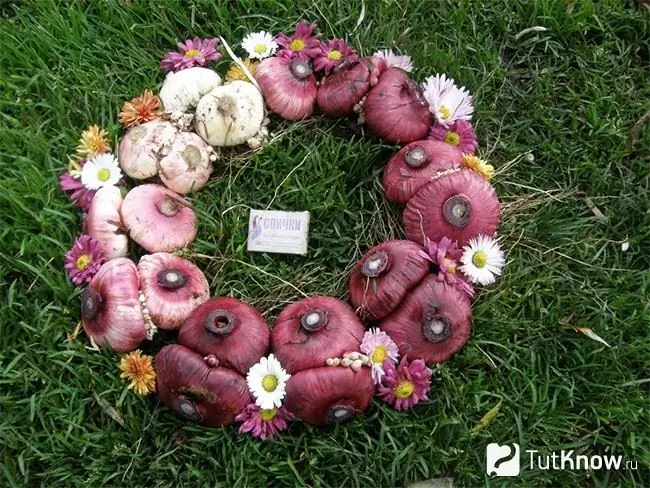
First of all, you need to carefully consider the bulbs. This is done 3 weeks before their disembarkation. To do this, peel and inspect the bulbs. If there are spots, then the bulb is sick with fusarium or bacterial scab. This can be treated. To do this, cut out the damaged areas with a sharp knife, cover them with brilliant green, let it dry to form a crust. If the bulb has significant damage or is completely dry, it is better to discard it. Carefully remove the leathery film from each sprout.
Now the planting material must be laid out on a flat container in one row and left in this form for 18 days at room temperature. After all, it was stored in a cool place, this technique will allow the plant to awaken.
After this time, you can start pre-sowing treatment. To do this, dilute the foundation or potassium permanganate in water according to the instructions. The latter should be red. Soak the bulbs in a solution of potassium permanganate for 30 minutes, and in a solution of foundation - 20. Then put a layer of cotton wool in an almost flat container, moisten it well with water. Place the bulbs upside down on damp cotton wool for 3 days. As the water dries, add it periodically. During this time, roots will appear on the bottom, which means it's time to plant gladioli in the ground.
Preparing the soil for gladioli
The place for gladioli is prepared 2 weeks before planting. It should be sunny, protected from cold winds. It is good if trees, shrubs or a fence cover the flower bed from the north.
Dig up a piece of land where you plan to grow gladioli. If the place is low, make a high bed, as the bulbs cannot tolerate stagnant water. They love loose soil, therefore, if it is heavy, clayey, add peat, sand, humus in a ratio of 1: 1: 3. Level the area with a rake. Leave the flower bed like this for 2 weeks. After this time, you can start planting.
How to plant gladioli bulbs
Planting work is carried out from the end of April to the first ten days of May, when the soil at a depth of 12 cm warms up to +8 - +10 ° С. Make holes in the prepared bed, for small bulbs the depth is 7, for large ones - 8-10 cm. It should be equal to three heights of the bulb. The distance between the grooves is 30-35 cm. If during the summer you do not want to feed, pour mineral fertilizers directly into the trench - one third of a teaspoon under each bulb. To do this, you can use nitrophoska or a special fertilizer for flowers with trace elements, mixing it well with the soil.
Pour sand on the bottom of the trench with a layer of 2 cm, spill the depression with lukewarm water, put the bulbs in it with the root bottom down. Small ones at a distance of 10, and large - 20-25 cm. Carefully, so as not to damage the sprouts, sprinkle the grooves with soil. After a few days, a stalk will appear above the surface of the earth, which will begin to grow intensively.
Video about the landing of gladioli:

Gladiolus flower care

After sprouting, for normal growth, they need evening watering. In the heat, the aisles are spilled after 1-2 days, well wetting the earth so that moisture penetrates to the roots. On cool days, plants are rarely watered - once a week. In this case, it is important to ensure that water does not fall on the leaves, otherwise the plants may undergo a fungal disease. If cold dew is coming, spill the earth near the gladioli with a weak solution of potassium permanganate.
The soil near gladioli should be loose. Therefore, the next day after watering, they loosen it, at the same time picking out the weeds. If you did not fertilize the planting hole, feed the gladioli 3-4 times a season using a solution of nitrophoska or Kemira for flowers. In mid-July - early August, the plants will bloom, at this time keep the soil around them moist. If the weather is cold, reduce watering to avoid fungal infections on the plants.
Pest control of gladioli

There are few enemies from the fauna of gladioli, but they are. Slugs negatively affect the appearance of plants, they eat away part of the leaves, which damages decorativeness. In addition, these pests can gnaw the tubers and thereby destroy the plants. Therefore, it is necessary to weed out the weeds, because they take away some of the nutrients and in such places slugs find refuge for themselves. Good results are obtained by the use of drugs against these pests. Spread "Thunderstorms" or "Meta" granules around the plant, spending 1 sq.m. 3 g. Can be processed no more than 1 time in 20 days. Attention! The drugs are toxic, so it is better not to use them where there are pets and children. In this case, slugs must be dealt with by other means.
Sprinkle salt or mustard powder around the flowers. These spices have a scalding effect on the delicate skin of pests and will become a serious obstacle in their path.
Dark beer will also help with this. Not very deep containers, such as bowls, are buried in the ground (their edges should be at the level of the soil), and beer is poured into them. Slugs love this drink. Coming to the smell, they fall into a trap, and they can no longer get out. In much the same way, they fight the bear. This pest is dangerous in that it gnaws not only the roots, but can bite into the young stem. To do this, water is poured into a bowl dug into the ground. Feeling thirsty, the pest will fall into the container and also will not get back.
Preparations created from this pest can help get rid of the bear. Their granules are buried in the soil, at a distance of 50 cm from each other, during the planting of the bulbs. If you see the passages when the plants have already sprung up, put 3-4 Medvetox granules into the course. Pour water over them and cover them with soil. The pest, having tasted the bait, will die.
Digging up gladiolus bulbs
As soon as the gladiolus fades, cut off the peduncle with a sharp knife or pruner, leaving the lower leaves and a 7-10 cm "stump". If this is not done in time, the plant will direct its power to the formation of seeds, and not to the formation of a large bulb.
From now on, reduce watering of gladioli, making them every 5-9 days, depending on the weather. For the winter, the tubers must be dug out, otherwise they will simply freeze and die. This is done in early October. Small frosts will not harm the plant, so it is better to let the bulb ripen well and dig them up not earlier than this time.
Before carrying out this operation, do not water the soil around the plant for 10 days, dig up the bulb with a shovel. In no case should you pull it out by pulling the rest of the peduncle, in which case it may break off and the bulb will be damaged. The root bottom may also break, such planting material will not be able to be stored for a long time until spring and will die.
Having dug out the gladiolus bulb, remove the soil from it with your hands, in no case shake it at the same time and do not knock on the ground. In plants freed from soil, cut off a part of the stem, leaving a "stump" of 2-3 cm. Place the gladioli bulbs to dry for 10-14 days in a dry, warm place.
After that, carefully separate the old dried ones from the new bulbs, if they have not fallen off before, and the children. You can plant the largest ones next year, then by autumn they will turn into full-fledged bulbs. Store gladiolus planting stock in a paper bag by placing it on the bottom shelf of the refrigerator. It can be put into a dry cellar, where the temperature is +3 - +5 ° С.
Video on how to dig up and store gladioli:

Growing miniature gladioli at home

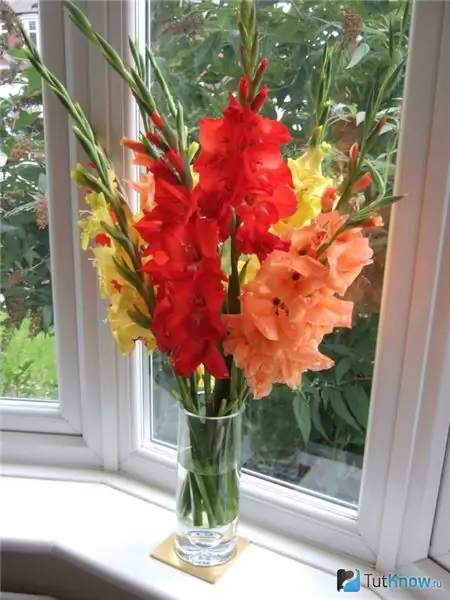
Not everyone has private plots where tall and even giant varieties of gladioli can be grown. Miniature varieties can be planted at home by placing them near a window or on a balcony.
For cultivation, you need a pot with a height of at least 20-25 cm and the same diameter. Pour drainage on its bottom with a layer of 3 cm, fill with light fertile soil. Use a narrow spatula to make a depression equal to three times the height of the bulb, pour it over with warm water.
Prepare gladioli in mid-April in the same way as before planting outdoors. Place the onion in the hole, sprinkle with soil. You can immediately fill the flowerpot with soil not to the top, place the onion and sprinkle it with soil on top.
Place the container in the lightest place in the apartment. If you will grow gladioli on a glazed loggia, it is better to hang tulle on the glass and open the windows on hot days. After all, if the temperature is too high here, the plant will stretch out and flowering will be weakened.
For the same reason, you do not need to water the gladiolus flower pot very often, do it when the soil dries up. If you have purchased ready-made soil for flowers, which contains mineral fertilizers, then additional fertilizing is not needed. If you prepared the soil yourself, feed it with Kemira's solution for flowers, diluting it according to the instructions, 20 days after germination and during the budding period.
In October, too, dig up the onion, separate the children from it, dry it and store it in the refrigerator until planting.
General video tips for growing gladioli:

Photos of gladioli:


