- Author Arianna Cook [email protected].
- Public 2024-01-12 17:55.
- Last modified 2025-01-23 09:40.
Make your own gabions. Then you can make sculptures, stone fences. Gabions will help create country furniture, a waterfall and much more.
Fascinating summer residents are looking for something new all the time. But you can combine modern and ancient developments, make gabions with your own hands. This requires only 3-4 types of material, desire and inspiration.
What are gabions, their types
Before deciding to build these structures on your site, familiarize yourself with what gabions are.
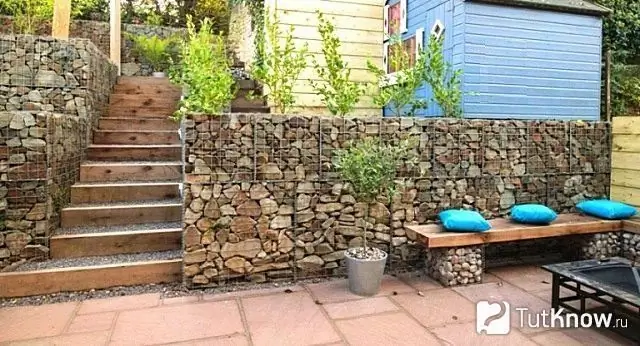
Let's fast forward to ancient times, because it was then that these devices were invented. If you translate this word from Italian, then it means a large cell. In construction, it is a metal mesh structure that is filled with stones or similar materials. Previously, gabions were used during the war to protect an artillery gun and people around it. Even in the days of Napoleon, there was something similar to modern gabions.

But then there was no modern building mesh, so wicker baskets were taken as a basis. Sacks were also often used and filled with sand.
Such devices help to strengthen the channels of canals and rivers. Such structures restrain the water element, prevent water from spilling over during floods and heavy rains.
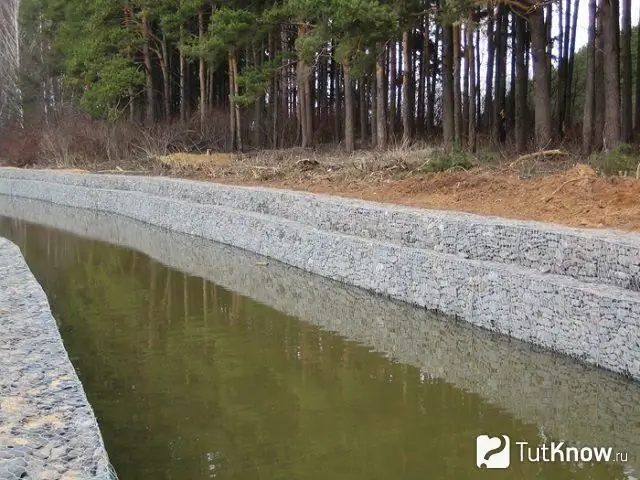
Also, gabions are used to strengthen walls in construction. You can take this idea into service if you decide to build a veranda or other lightweight structure on uneven terrain.

This idea is especially useful for people living in problematic rural areas. With such gabions, they strengthen mountainous territories so that there are no landslides here. See what types of such structures are.
Box gabions are also called "Jumbo". They are very common and have the shape of a parallelepiped. Each such container consists of a grid and stones and has a width that is 2 times the height.
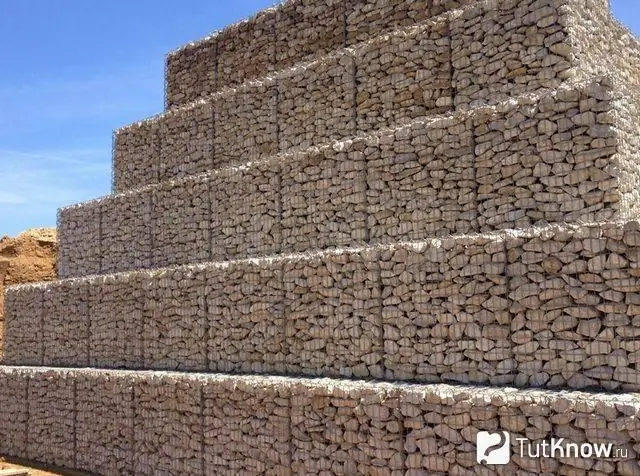
Isn't it true that such a gabion resembles an Egyptian pyramid, look what containers it consists of. It is important here that this mesh box has a rigid shape and is provided with a lid.
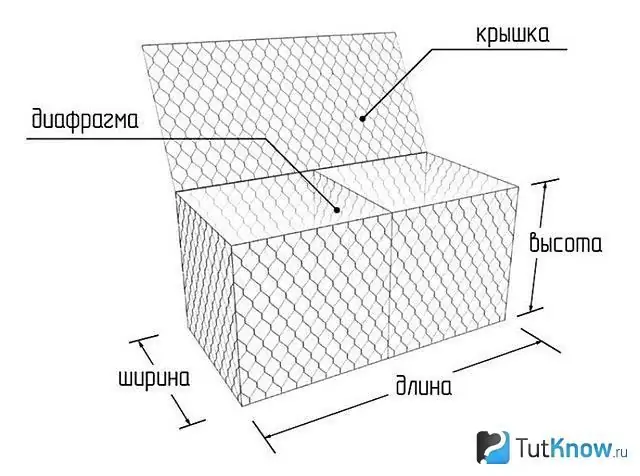
For the base, galvanized wire is used. It is from it that the mesh is made. It can then be turned into a box by welding or attached to a rigid frame with thick wire.
If your site is located on a hill, then you can strengthen the retaining walls with gabions of the "Jumbo" type. Also take this idea into service when decorating pools, for framing flower beds, for strengthening the banks of a pond, canal, river.
You can also reinforce the waterfront with gabions called Renault mattresses. These protective structures have already shown themselves in practice. So, thanks to these gabions, the city of Bologna was protected from flooding. And they are called that precisely because they resemble a mattress. Look at the device of this gabion.
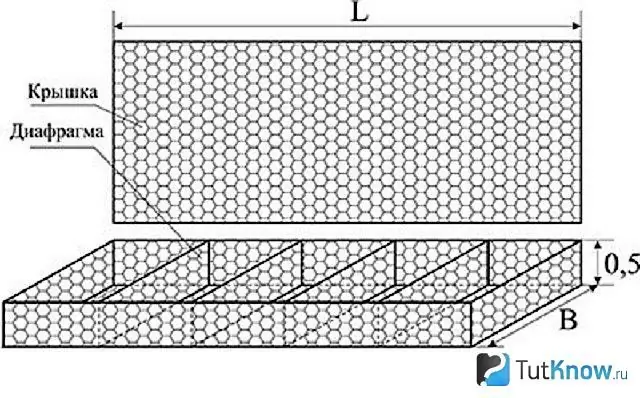
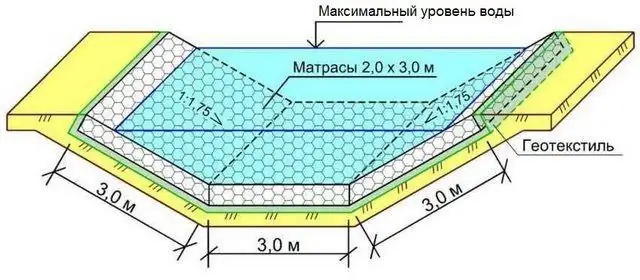
Due to the fact that the structure is low, several pieces can be fastened together in order to then form a cascade runoff, strengthen the channels of reservoirs.

Focusing on a certain landscape, it is possible to make such gabions not rectangular, but by giving them a slightly different shape. See how these metal mattresses can be lined to form a pond bed.
Cylindrical gabions have exactly this shape.
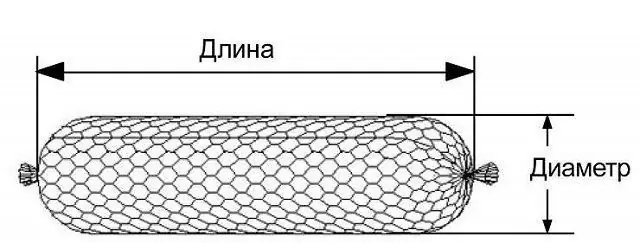
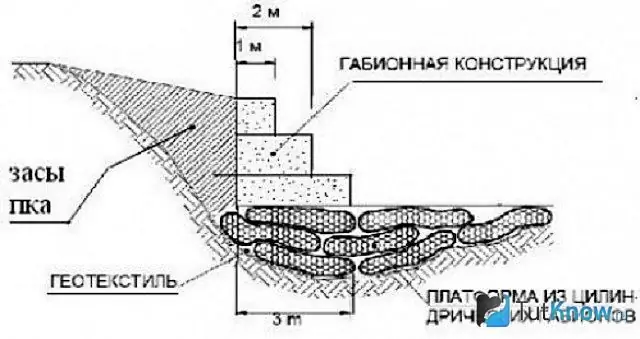
They are more flexible than the previous two types, so they can be laid on uneven surfaces. First, geotextiles are laid down, then cylindrical gabions are installed on the platform, and rectangular gabions of the "Jumbo" type can be placed on top.
Such structures are used for the construction of eastern canals, hedges, and other fences. They are also widely used in landscape design. See how you can decorate a flower bed using a similar idea.
For this, a structure is made from a mesh, and a stone is laid inside.
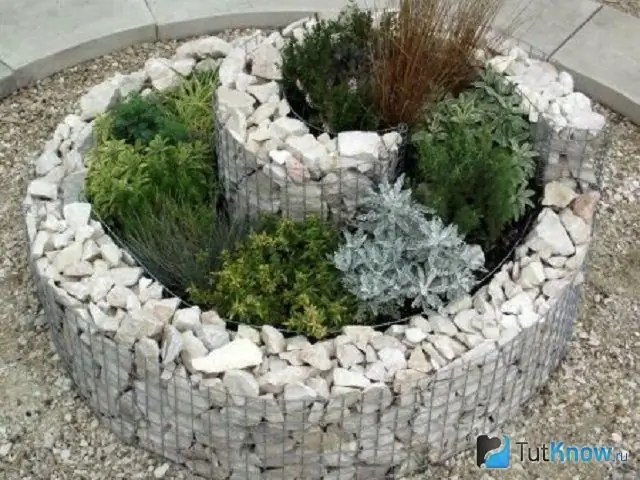
Diy gabions from the grid - step by step instructions with a photo
See which wire is mainly used. It has a hexagonal section and is galvanized. The base is made of this material. If you need to tie several elements together when using knitting wire.
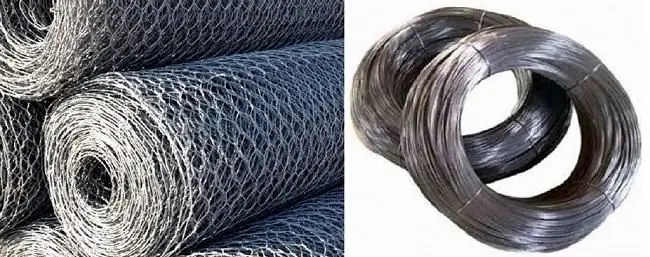
If you don't have a hex wire mesh, then you can use the one you have. From it you will need to cut rectangles for the sides and bottom, and then connect these elements with galvanized wire.
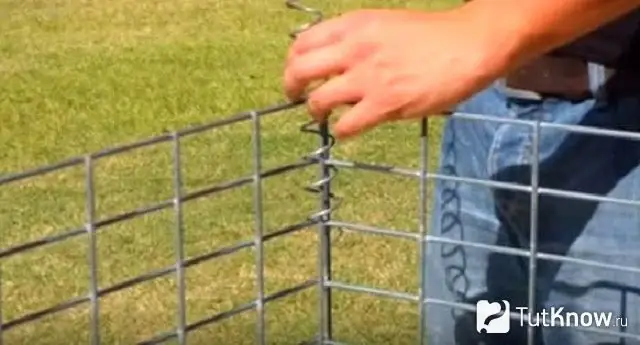
The wire is then spirally positioned to capture most of the surface to be fixed. But it is also possible to connect various elements using steel staples and a special stapler.
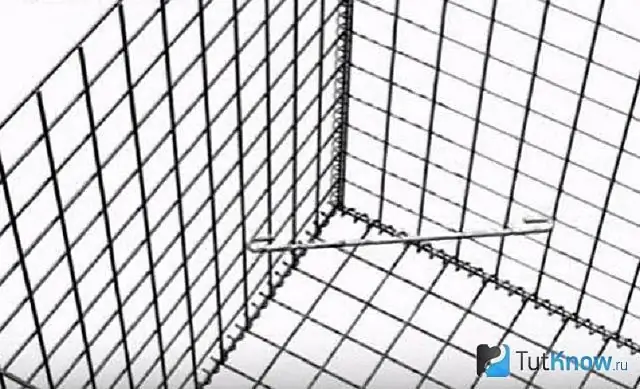
When you make the sidewalls and the bottom, you will need to put stiffeners so that the structure has a constant shape. They can be made of wire and arranged diagonally.
Why would you need to put a stone inside and close it with a metal mesh cover, but you don't need to use it. See what types of stones are commonly used to make do-it-yourself gabions. These devices can be rectangular or cylindrical. If you then plan to plant plants inside, then put stones along the edge, and inside place a round container, for example, a bucket, so that you can then decorate it and place a flower pot here.
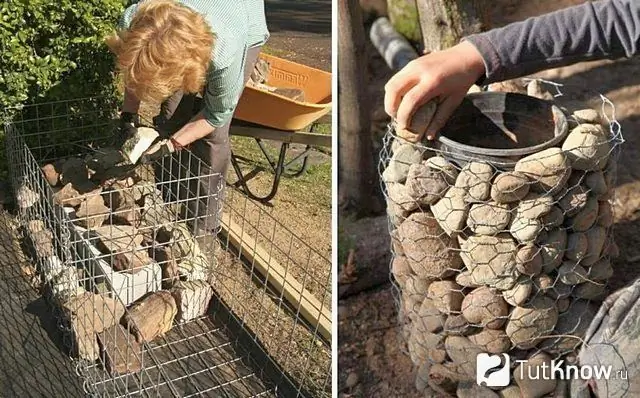
When you make gabions with your own hands, then lay the stones tightly to each other so that there are no voids. Otherwise, over time, the structure may lose its shape, as the stones will gradually sink.
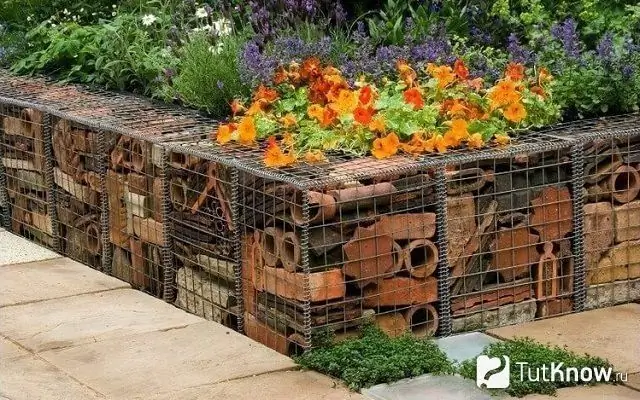
Inside the gabions, you can lay out not only stones, but also clay shards, bricks and their parts left from broken pots. These fences also look great.
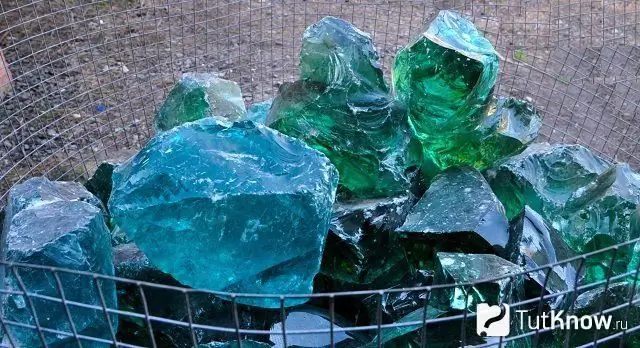
Another option is to use colored multi-colored stones. This is a fashion trend. Therefore, you can take not only slate, basalt, but also such gems, they are easy to wash with a hose jet.
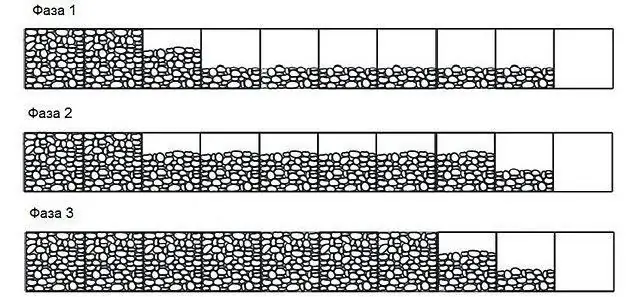
To prevent grass from growing through such a structure, use geotextiles. It will also allow you to isolate the bottom layer of stones from the ground, they will not get so dirty.
If you decide to make a vertical gabion with your own hands, then you need to provide a support. Use metal pins as it to help hold the structure in position. Take metal hairpins or hooks, use them.
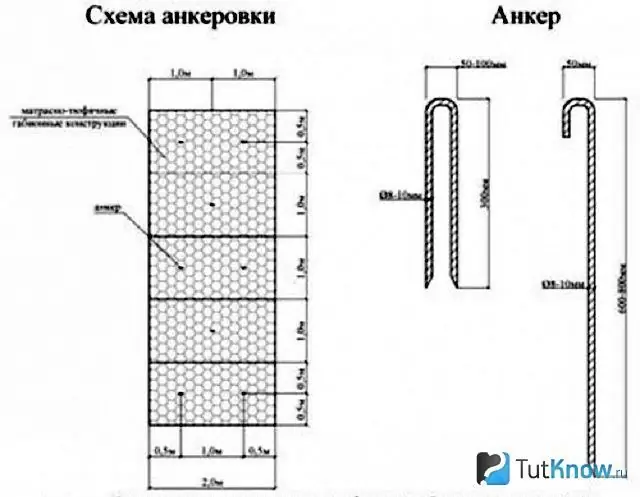
See how, with the help of such devices, you can well fix mattress-type structures on a gentle slope.
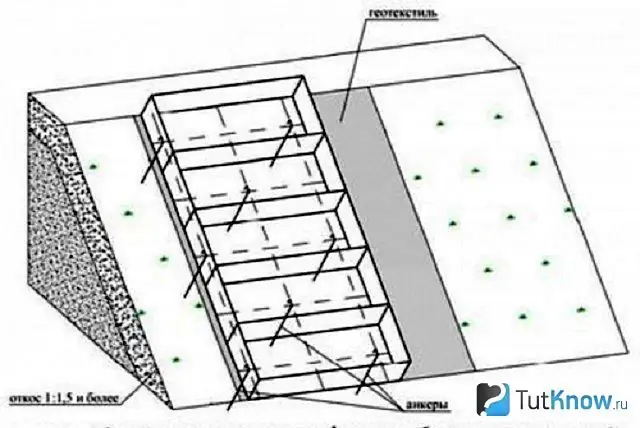
If you want to familiarize yourself with the assembly diagram of box-type gabions, then see the following photo. You can see what parts this structure consists of. And the knitting wire will help keep them together.
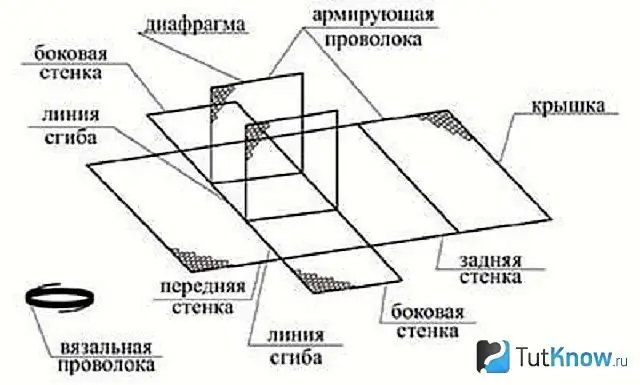
This is how such a device looks when assembled.
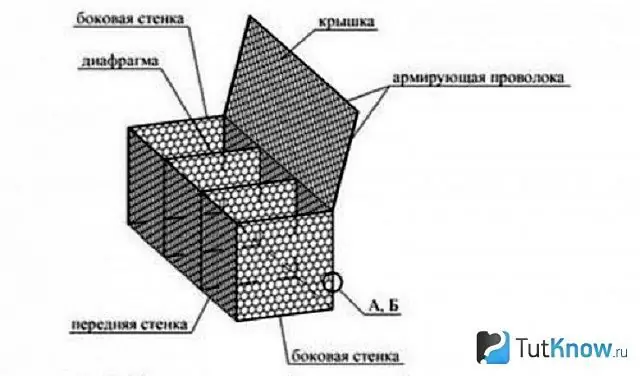
Prepare the site, line it with geotextiles, then start laying gabions here. If there are several of them, then connect with a knitting wire.
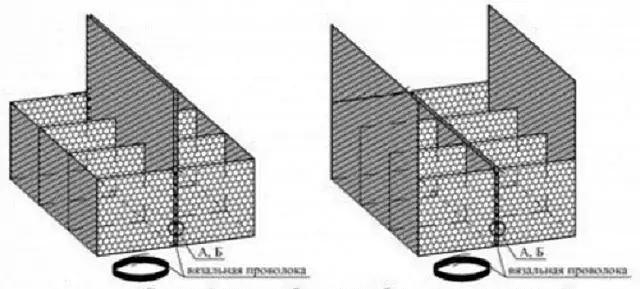
It is better to first strengthen the lower part of the box with formwork for a while, then remove it. Then the structure will have the desired shape.
To make a cylindrical gabion, you will need to cut a rectangle out of the mesh, then use a knitting wire to connect its long edges and the lower one. Then, if this cylindrical gabion stands upright, you fill it with stones, then close the top. But you can leave the so-called pocket if this design has a horizontal position. After filling with stones, you will close this gap.
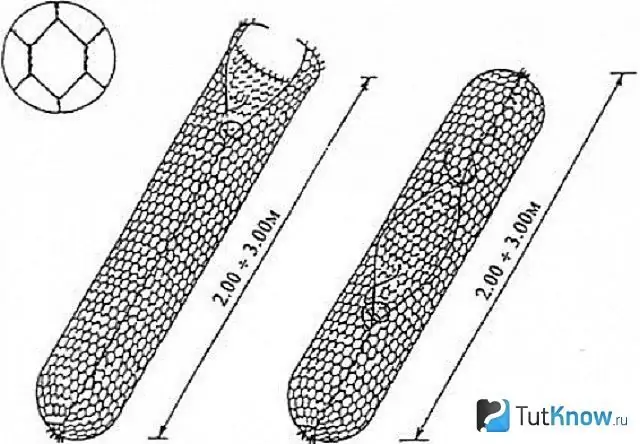
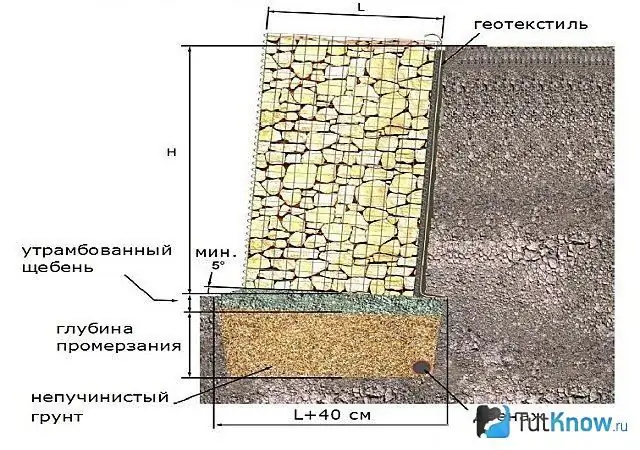
If you decide to strengthen the structure with stones, then see how it needs to be done.
Pay attention to where the non-porous soil begins, and what is the depth of freezing. Lay compacted rubble, and a gabion on top at a slight slope, not forgetting to provide for drainage, and put geotextiles on the side.
If you want to make a fence, it can be quite thin. Choose the shape of this structure, build it.
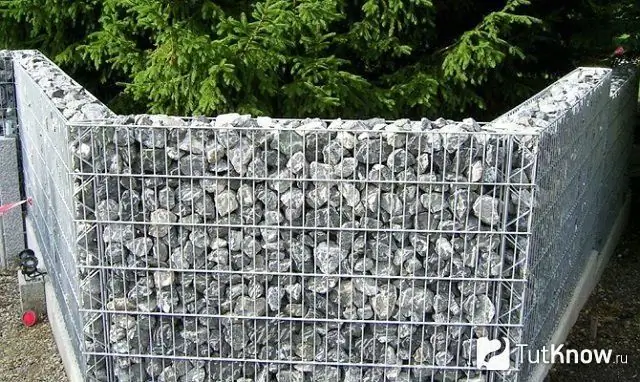
Watch a workshop to help you make this type of fence.
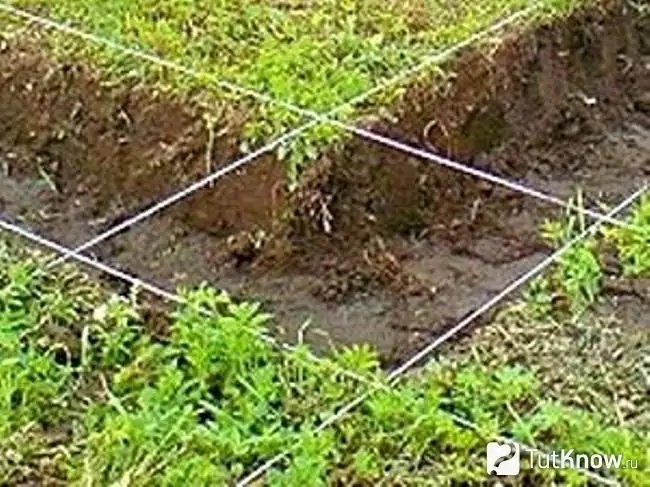
First you need to make the markup. A cord and pegs will help you with this. Drive the pegs into the intended place. Pull the cord between them. Thus, make all the markup.
Use metal posts for your work. Cords are also pulled here, and the step between them is about a meter. Fill the space around the post with concrete. When it is dry after about a week, you can continue working.
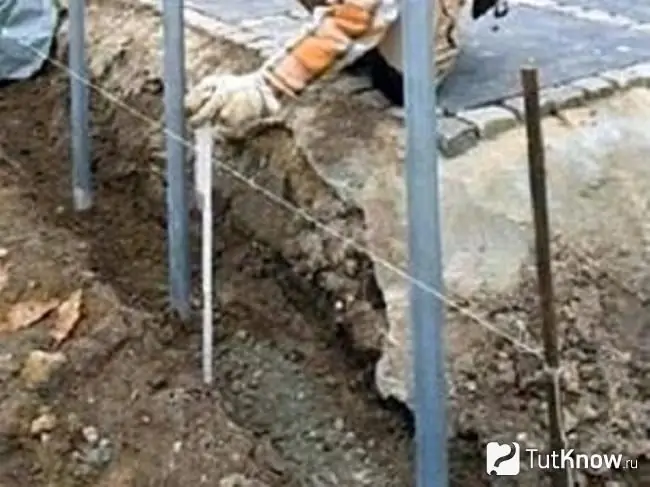
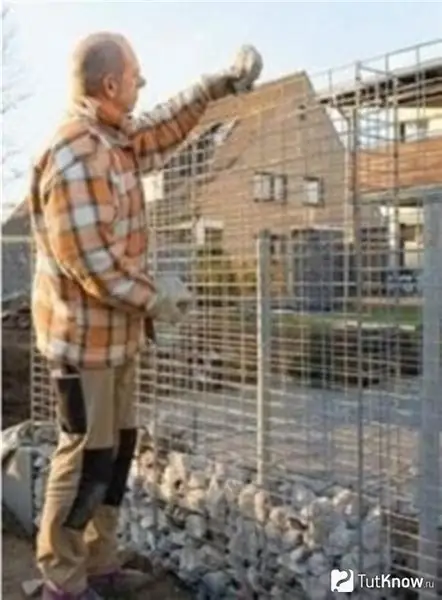
Now you need to fill the previously dug trench with sand. If you decide to install the gabion on the foundation, then you need to erect the formwork, reinforce it with a reinforcing cage and fill it with concrete. Now place a row of stones in the groove, then tie a second mesh.
If you have a welded structure, then make the internal jumpers also by welding.
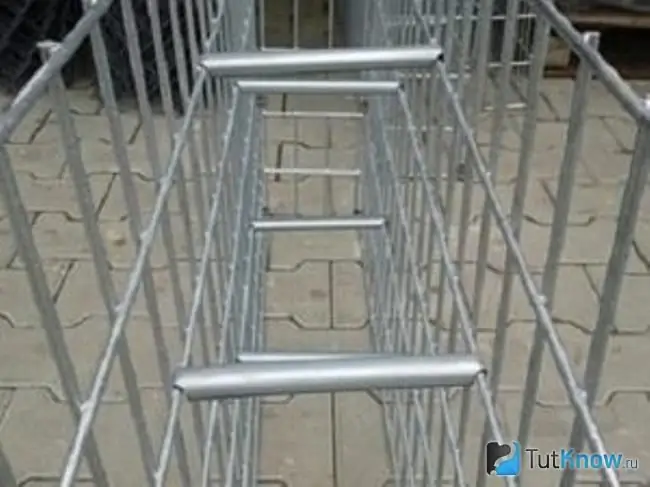
If you are making a fencing gabion, then usually this is not closed from above with a net, but the upper edges must be fastened together with a wire tie so that they are in a fixed position.
Another step-by-step master class will help you make such a beautiful gabion.
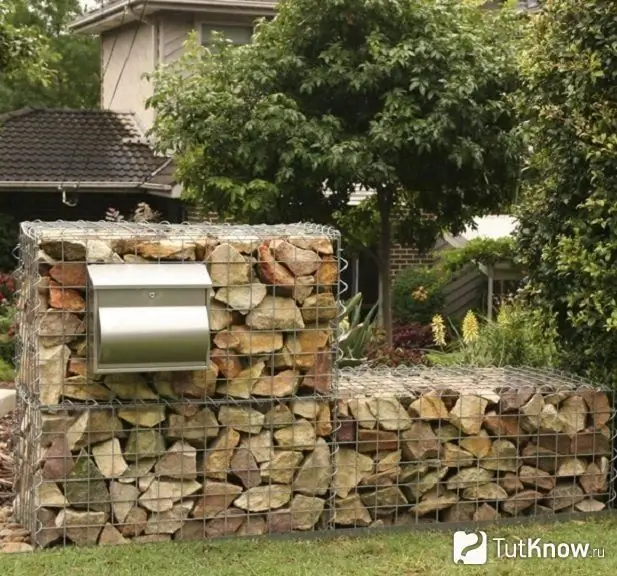
Take:
- the desired section with a welded mesh, which is 5 or 4 cm in cross section;
- knitting wire;
- filling stones;
- black film or geotextile;
- anchors.
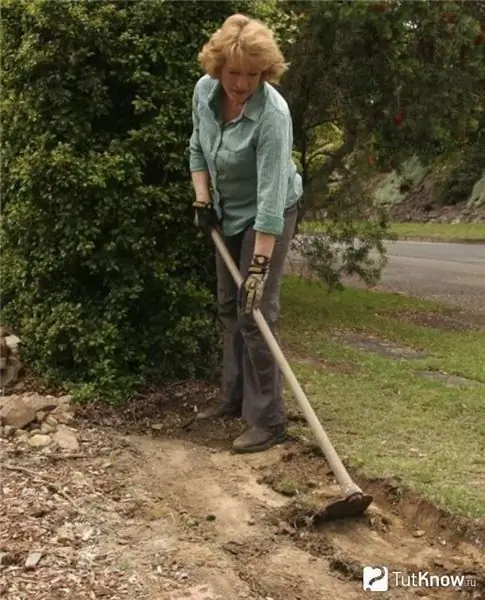
First you need to choose a place, make a markup and remove the top of the ground. Now this area is rammed and a sand and gravel pad 10 mm thick is made, not forgetting to spill it with water.
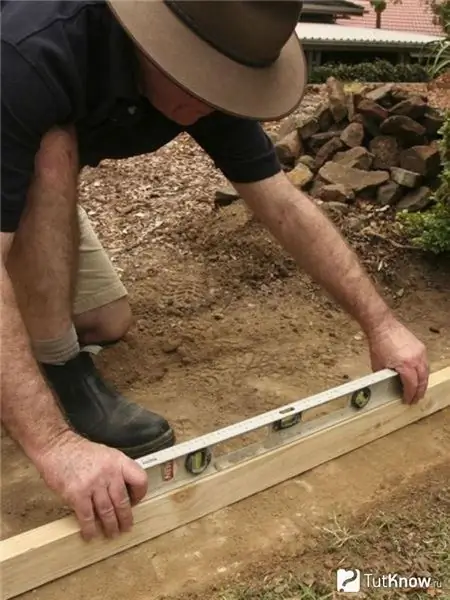
Then the gabion with your own hands is done like this. You will need to check if the area is level with a bar and a building level placed on it. If there are any irregularities, then fix them.
Now from the outside, dig a groove in which you will need to install a plastic collar. It will help protect the bottom layer from moisture. Such a ditch is small, usually 10 cm deep and 15 cm wide.
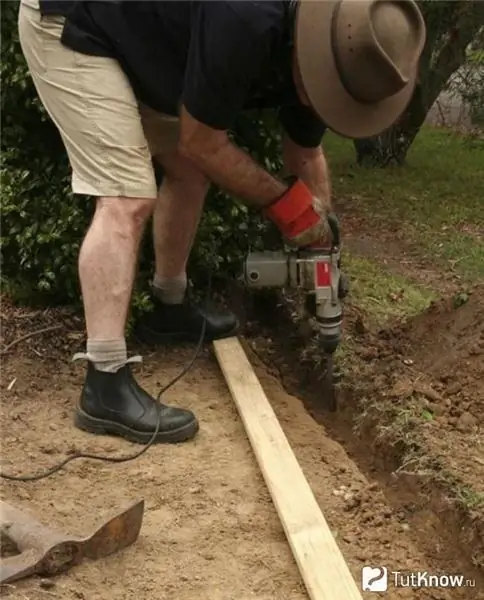
Now inside it, temporarily install a protective board made of a wooden board with a thickness of 2.5 mm. Then you remove it.
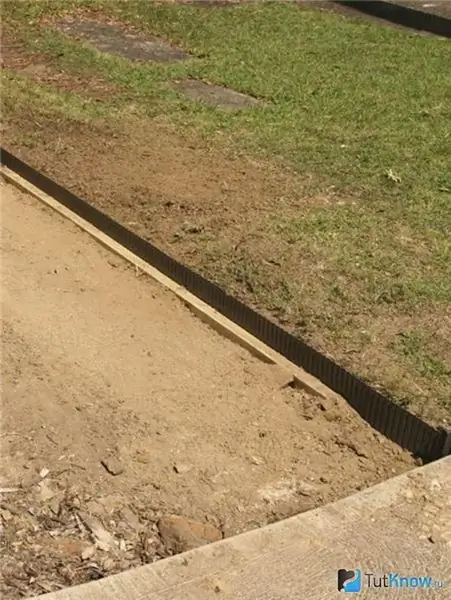
Cover the site with black foil or geotextile. Now you can assemble the prepared structure. Put its parts not far from the chosen place and start connecting them with a wire.
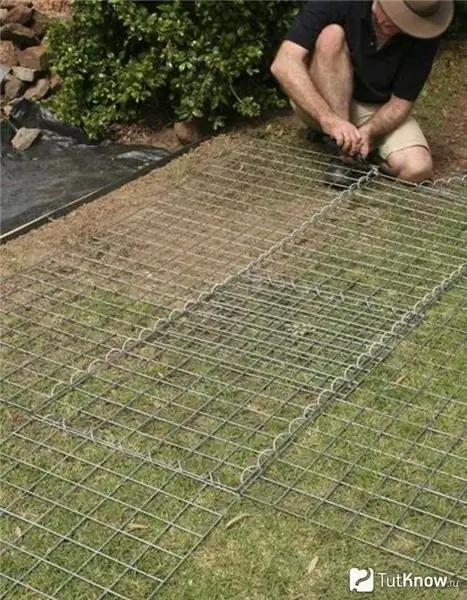
Remember to do this in a spiral motion. Now this box is installed in place, and the walls are pulled together with puffs, so that the structure is more durable due to these stiffeners.
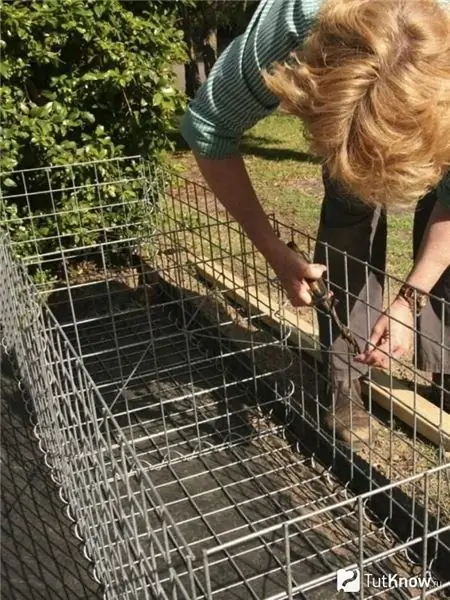
This is a pleasant moment. It's time to fill the base with stones. They can be anything. But with the smooth side, lay them out and press them against the walls. Try to compact the stones well. After filling the lower basket, place it on the upper one and fasten it with knitting wire.
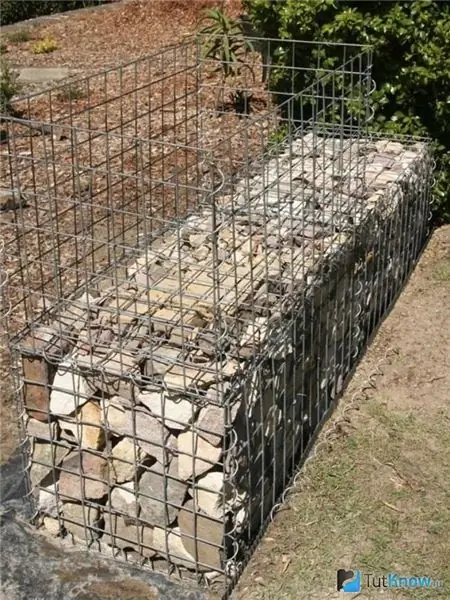
Then you can decorate gabions with your own hands. A mailbox was set up here, it was attached before the top was filled with stones.
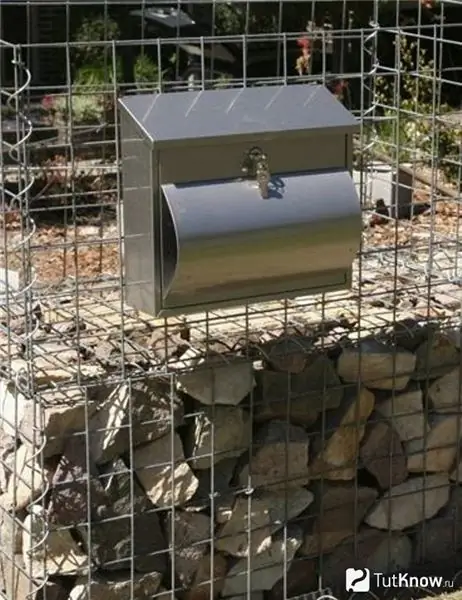
All that remains is to put stones here. Secure the tops of the walls with wire, or place a lid-like mesh here and attach it.
We decorate the cottage with gabions
If you want to make a pool with your own hands, pay attention to the following.
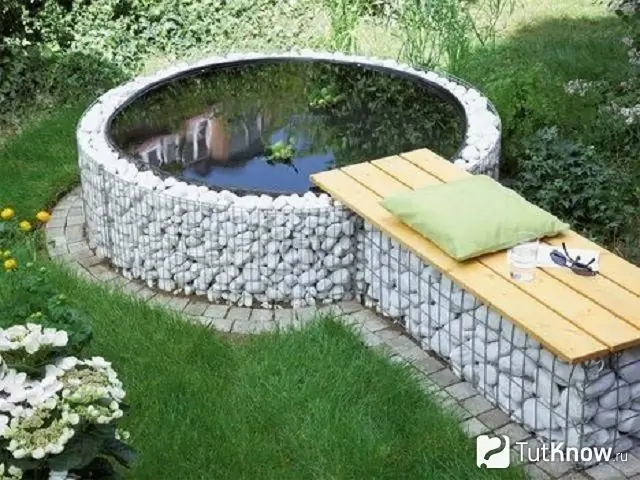
Look what a beautiful frame was made for him, such a reservoir can become a pond, in which the water will be much higher than the soil level. It's nice to sit near such a reservoir on a hot day, having previously made a bench of the same type.
To make a gabion, you first need to clean the site, then make a markup. You can draw a circle with a hose or a suitable shape. To make a pond edging, you will need to make two rings of metal mesh. To make the structure more durable, you need to make jumpers that will divide it into sections.
First, cut off the required amount of mesh to make the inside of it. Wire the ends of this ring and anchor to the ground. Now you need to cut out the bottom details from the mesh and wire them together. After that, every 30 cm, it is necessary to attach the dividing diaphragms to the full height, starting from the bottom. Measure them right away so that they are the same, then the design will turn out to be even. Attach them. Now make a frame for the bench, as in the previous master class. Connect this semicircular and rectangular piece.

The pond container will be made of polymer. To prevent its walls from rubbing, touching the wire and the metal mesh, first put a wadding substrate between the two layers of material and attached it to the metal walls with clothespins.
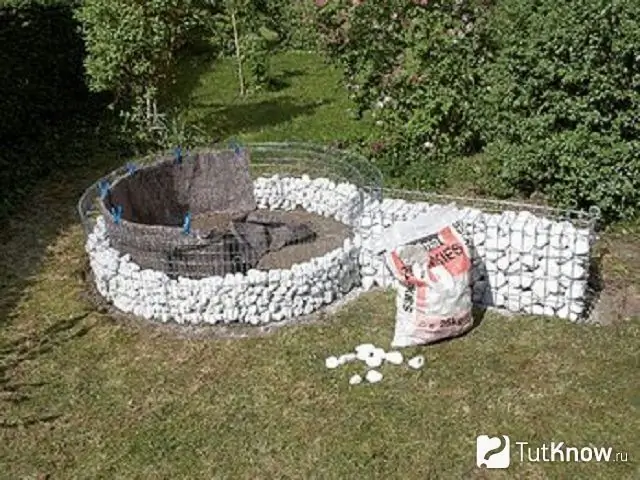
Lay the stones down, after which you can insert the polymer circle inside. To fix its edges, they were wrapped outward and also attached with clothespins.
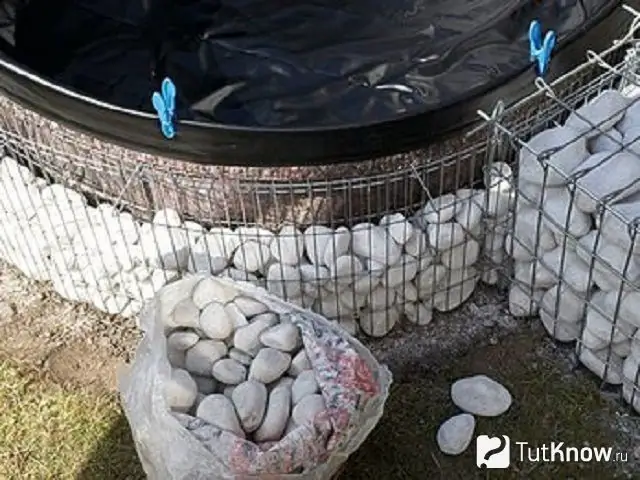
After that, you can lay the rest of the stones. On a rectangular gabion you need to put a mesh cover on top, attach it. Install a plank flooring on top. Now you can pour water inside and enjoy such a man-made cottage decoration.
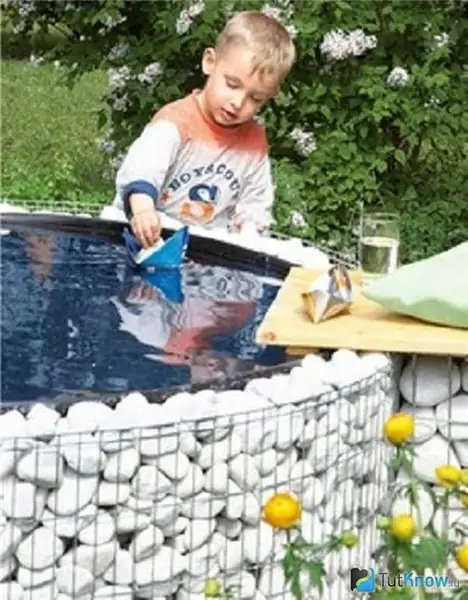
When setting up such a pond, immediately think about how you will drain the water. The most convenient way to do this is to make a hole at the bottom of the container and attach a plastic hose here. The junction is insulated. And you will pour water through the top.
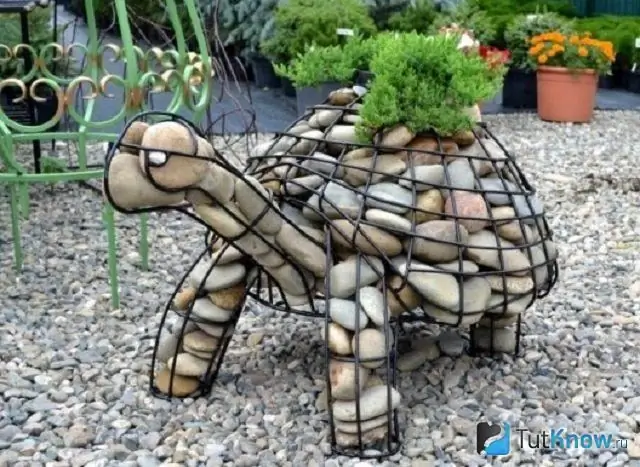
Also try decorating the dacha with figures made according to the same principle. Make several blanks for the turtle, connect them with wire. Arrange the stones inside. Such a garden sculpture will then flaunt on your site.
Having made gabions with your own hands, you can turn them into a set of country furniture.
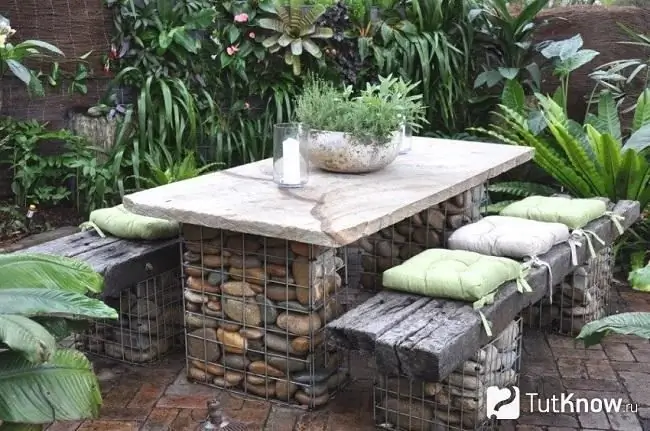
As you can see, for the table, you first need to make two rectangular bases that serve as legs. So that they are well fixed, when installing these gabions, stick metal fittings into the ground, which will become a kind of fastener. Place a wooden countertop on top. The shops need to be made in the same way. Place pillows on top of them to make it more comfortable to sit.
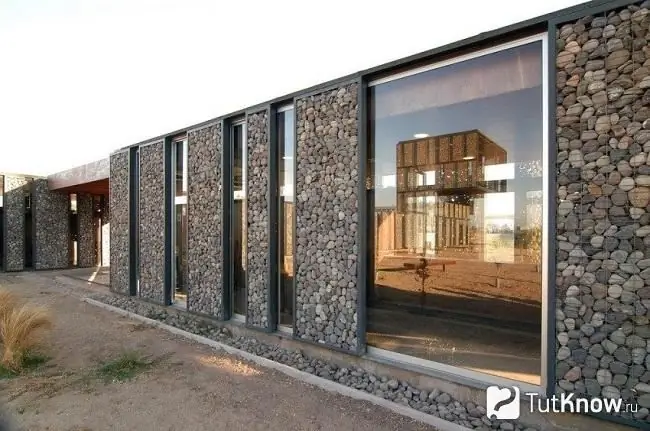
Even gazebos and summer houses are being built with the help of gabions. The combination of metal with stone and glass is a win-win.
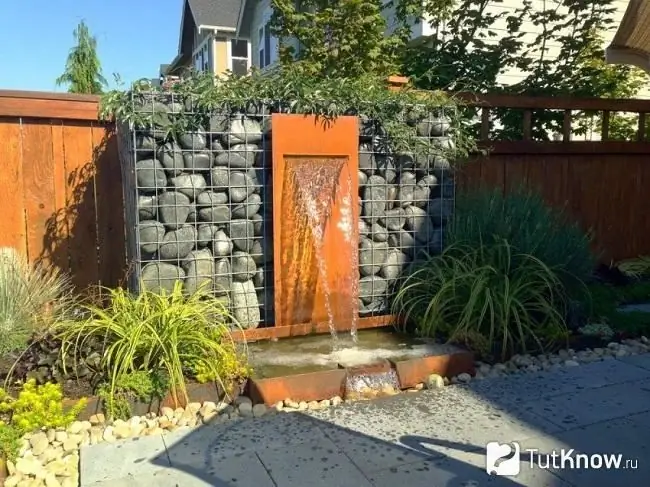
Also, such gabions go well with water. You can make a real waterfall, and the jets will go into the soil. To do this, dig a ditch and place stones in it. Plant nearby plants that will enjoy being in this microclimate.
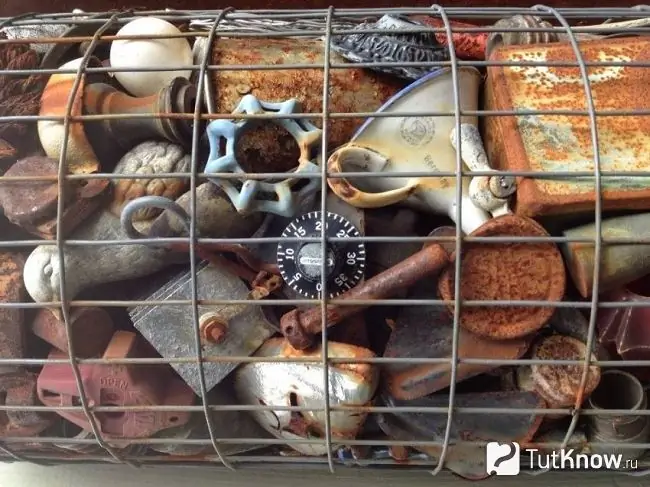
If some waterproof things have accumulated in the country that could be thrown away, but you do not want to part with them, then put it all in gabions. You will be able to look at these things and indulge in pleasant memories that are associated with them.
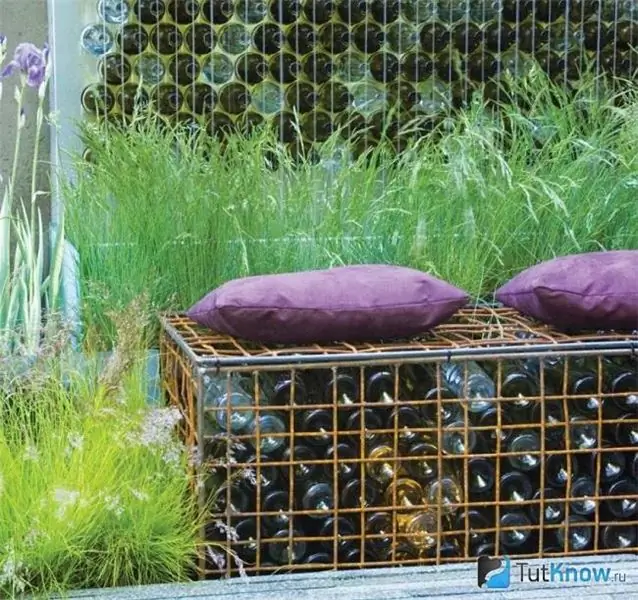
Even empty glass bottles will do the trick. Place them on top of each other, necks to one side, filling in the previously made shape. If you then want to sit on a bench like this, make sure the wire cover is strong enough.
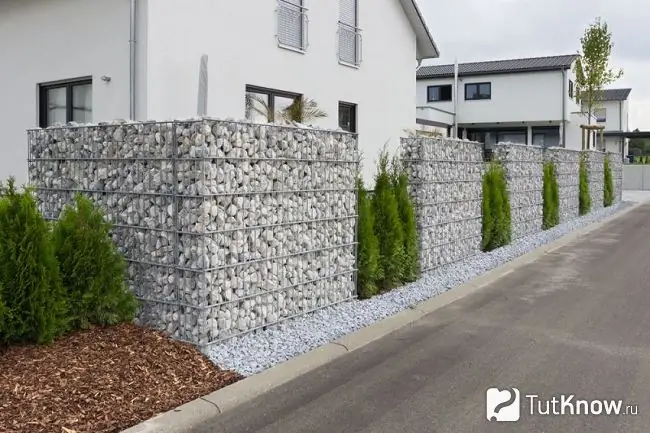
These stones go well with greenery, so you can plant thuja between the fragments of the walls.
Show your imagination, you will make various sculptures using a metal base and stones. If you want to know in detail how to make them, then watch the video. The first shows how to make a snail out of stones.

How to make gabions for a summer residence so that you have a unique landscape design, the second plot will show.

And what kind of flower beds can be made of stones, you will find out by looking at the following photo selection.


