
- Author Arianna Cook cook@women-community.com.
- Public 2024-01-12 17:55.
- Last modified 2025-01-23 09:40.
The presented master classes and step-by-step photos will show what you can do from balusters with your own hands. These are all kinds of pieces of furniture, gizmos for the kitchen, garden, as well as wooden figurines.
In suburban construction, wooden balusters are often used. Usually they are purchased with a margin. If you still have such curly elements, see how many interesting things you can create from them.
DIY baluster figures

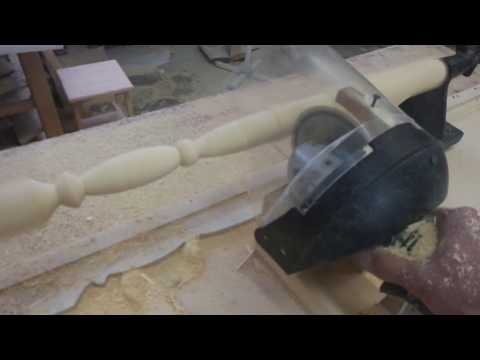
Sometimes, the first time, it is not possible to properly saw off the upper part of the baluster, in order to then put the railing on it. If the carved wooden post is low in height as a result of such actions, do not throw it away. Make wooden figurines. To create such a fun trio, take:
- three wooden balusters;
- white paint;
- brush;
- bows;
- black and pink paint;
- trimming bars;
- pieces of plywood;
- self-tapping screws;
- instruments.
Adhere to the following manufacturing instructions:
- First paint the balusters white in 2 or 3 coats. Remember to let everyone dry. Cover the large plywood rectangle in the same way.
- When the white paint is dry, take the black paint, paint the eyes with eyelashes and a smiling mouth. Then paint the noses and blushes with pink paint. If you use this decor, then you can make snowmen.
- Paint the small rectangles of the plywood and cut pieces black. First attach the plywood to the rest of the bar with self-tapping screws, then attach the resulting hat to the top of the baluster. For this, you can use metal corners, glue.
- Tie the bows, after which the wood figures are made.
If you want to create a larger group of snowmen from the remaining balusters, then also paint these wooden poles white first. Then paint the buttons, eyes and mouths with black paint.
Paint semicircular wood or plastic blanks orange, glue these noses in place.
Even old socks and gloves will work to make hats. Place them on top of each snowman, tie a knot at the top and cut the remaining top into strips.
Sew snowflakes to the headgear. It remains to tie red scarves and rejoice at how you could turn the balusters with your own hands into such wonderful wooden sculptures.

Try to make an angel out of leftover materials.

To do it, take:
- one large and two small balusters; self-tapping screws;
- white paint;
- brush;
- cardboard;
- scissors;
- decor elements.
And here is the master class itself:
- Take a massive baluster that is decorated with a wooden ball on top. This element will become the head of the angel. Take two small balusters, cut them to the desired length. In the place of attachment of these improvised hands, you need to remove the excess thickness of the tree.
- Attach these elements with self-tapping screws to the large baluster. Paint the blank with white paint. When it's dry, outline your facial features.
- Cut the wings out of cardboard, paint them and attach them in place.
If the angel is on the street, then instead of cardboard, take a piece of foamiran or other synthetic material.
Funny bunnies will help to decorate the house for Easter or simply decorate it this way. You will need to take a massive baluster with a ball on top, sew carrots and hare ears from felt.
Paint the piece of wood two or three coats of white paint. When it's dry, sketch out the eyes, mouth and nose.
Tie the carrots, glue the ears of the hare on top. To keep them in shape when you sew them, first make a wire frame, then cover it with fabric. Then you can give this blank the desired shape.

If you want butterflies to flutter on your site all year round, then also make them from a baluster with your own hands.

Even old materials are suitable for such a craft. If you dismantled the railing on the stairs in the house or on the porch, you still have curly bars, do not throw them away. Remove old paint or varnish with sandpaper, then coat the balusters with a layer of acrylic paint. And if you want to give a touch of antiquity, then erase the color in some places with sandpaper. Decorate the plywood wings in the same way. Stick them in place. Make the antennae out of wire, bending that one. But what else can be created from this material.
How to make furniture from balusters with your own hands?
By answering this question, you can also give free rein to your imagination and use the remaining materials. If you made repairs, you still have furniture boards, put them into action. First, they need to be tightly connected together. To do this, put a few jumpers and place shields on top. Secure them with self-tapping screws.

Then fix the bars around the perimeter. Attach balusters at the four corners, which will become the carved legs. Then you can varnish the item to make it the most durable and shiny.

You can also make a shelf from balusters. Chip off several different sized furniture boards to create a base. Then place the four balusters on top closer to the corners. Attach another furniture board on top. Then fix already 5 balusters. Attach the shield. The third floor also consists of five balusters, ending with a stack of furniture boards.
You can paint the bookcase after completing this work, or at the beginning. But what else can be done from the baluster, the photo demonstrates. But you will need not one, but 4 pieces.

Take:
- four balusters;
- drawer;
- boards;
- self-tapping screws;
- corners;
- paint;
- brush.
Lay two wide boards parallel to each other. Fill in the same planks perpendicularly. You will have a foundation. Using the corners, attach it to the bottom of the balusters. Fix the drawer from the table or cabinet from above with self-tapping screws. Color your creation. You can use blue and light green colors, which go well together.
If you want to make low stools, then you can cut one baluster into several parts to create several legs at once. Pay attention to how to make a three-legged stool, using one baluster for each instance.

You can also make a stylish stand for a flower pot out of a baluster. To do this, it is enough to paint the balusters, and when the paint dries, install a flowering plant here.

Also, beautiful candlesticks will be made from these wooden blocks. But you need to take care of fire safety. Set the balusters so that they are stable, place a wide candle on top. You can make not one, but several of these candlesticks.

If you have balusters at the top of a cupped shape, then these are even better for creating candlesticks. Drive a small metal dowel into the center, which you will put the candle on, so that it is stable in this structure.

Craftsmen make wonderful miniature tables from a baluster with their own hands. On such a carved block, you can attach a photo frame, at the bottom of which you first fix a rectangle of a wooden board. Don't forget to color your creation.

By the way, a wooden baluster will be an excellent holder for photography. Saw the baluster into several pieces to create multiple holders. Attach to one frame. All this needs to be painted in the same color.
As you can see, such a product costs $ 5, and it will cost you completely free, since it will be made from old things.

Also, from one such blank, you can create a leg for a table lamp. And if you have 4 extra balusters, fix a suitcase on top of them to turn it into a convenient table in which to store things.

Make a shelf that you will then attach to the wall. To do this, using the locking attachment on the drill, make holes in the planks, put the balusters here and fix them. Paint the product, screw metal fasteners to it so that it can be hung on the wall.

From one massive baluster you can make a hanger for bags and jewelry. You only need to attach four corners to the bottom of this product, placing them evenly so that the product is stable.

If you cut the balusters into equal lengths, then you can make a convenient shelf for books out of them.

You can also store books upright by placing them in beautiful boxes. Fix these containers to the balusters. In the same way, you can attach greeting cards, greeting cards.

It is easy to make garden decoration from these items. To do the following, take:
- balusters;
- paint;
- dostochki.

Paint the balusters. After these layers have dried, draw circles on the top to make them look like the holes in the birdhouse. Paint the planks, cut them and make gable roofs. Such decorative birdhouses will turn out. And if you want to create real ones for the birds, then you need a massive baluster. At its top, fix one or two sawn boards, fix the birdhouses on top.

See How To Restore Furniture With Your Own Hands
What can be done from balusters with your own hands for the kitchen?
You can make many useful things for the kitchen from curly bars. Take:
- baluster;
- paint;
- brush;
- saw.
Saw the baluster crosswise into several pieces so that the wide sides are at the bottom and top. Then these coasters will be stable and on top you can put a dish in which you put food. Cover containers with lids to prevent food from drying out.

The fruit bowl also looks amazing on such holders. You can make these in a shabby chic style. To do this, you need to paint the balusters with white paint. When this coating is dry, use sandpaper to go over the bulging parts to remove excess. It will be easier to do this if you rub these places of the candles before painting.

Try making a high-legged cutlery set. You will also create it from curly carvings. At the bottom, attach them to finished planks or plywood circles. Keep it all in one color scheme to get a set of dishes.

And here's how to make a slide for the dining room. Take:
- balusters;
- plastic or wooden bowls of the same shape but different sizes;
- glue;
- paint;
- brush.
Saw the baluster in two. Now put the first container down, place a piece of baluster in it. Then glue the second container on top, followed by the second fragment of a curly wooden product. At the top, place a small container and the top of the baluster. Cover it all with the same paint, let it dry.

You can make more massive products. To do this, you need to attach down the large legs, sawed off from the baluster. Then there are three circles of wood, which are also attached to fragments of carved balusters.

You can serve several dishes at once if you bring them not on one tray, but on a triple one. They are made of wood and connected with fragments of carved bars, then painted white.

The kitchen will be amazingly beautiful if you use balusters as a pumpkin holder.

Decorate this room with homemade vases. You will make them from ordinary glass jars, which must be pre-painted. Then you place these containers on delicate legs, pour water inside and place flowers.

Transparent containers with lids, in which are poured dry legumes, cereals will also look amazing in the kitchen if you place them on the pieces of balusters. And on top of the lids, glue the tops from these carved decorations.

The kitchen will be even more comfortable if you transform the lamp located here with the help of the simplest balusters. Paint them dark and light and connect together, alternating shades.

You can use old vases, lamps, and balusters to make bowl legs. In such containers, it will be possible to serve vegetables or simply decorate the kitchen with them, the local area.

If your kitchen has a little free space, use it by creating such a charming table. Here you will place flowers, photo frames, shells.

Here's what you can turn wood balusters into. If you want to see how they are made with your own hands, then you have such an opportunity.
And what can be done from a baluster with your own hands is described in the second video. See how to make a table with carved legs from this material.


