- Author Arianna Cook cook@women-community.com.
- Public 2023-12-17 14:23.
- Last modified 2025-01-23 09:40.
Raising the floor level, the reasons for this decision, the choice of the optimal method, materials and technologies for their installation. Raising the floor is a complex of work, during which it is necessary to take into account many aspects. It is important to know what additional load the supporting plate will withstand, it is not easy to choose the right material with which the surface level will rise, given the huge assortment in hardware stores, the method of its installation - you need to decide on it before starting the repair.
The main reasons for raising the floor level
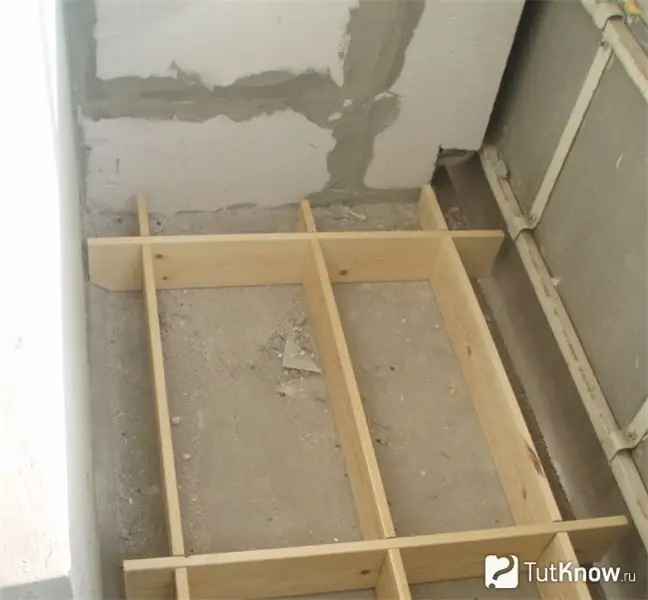
For owners of apartments and houses with standard ceiling heights, the question of raising the floor is not worth it. Carrying out insulation, they try to go down as low as possible in order to keep the height of the room intact. However, if the house is located on piles, and the floor insulation from below did not bring the desired effect, the best option would be to increase its height and at the same time additional thermal insulation.
Another option in which the floor height must be raised is to level the base. In this case, there is no need to choose, since most finishing materials are demanding on the quality of the rough coating.
Raising the floor is often required in separate rooms. Usually it is a balcony and a loggia. When they are connected to an apartment, there is a desire to level the floor levels. A similar problem appears when buying a building option. The floor level in all rooms of such an apartment is a rough concrete slab. Therefore, it will have to be lifted in any suitable way to the desired height.
Thus, there are not so many reasons why you need to raise the floor level, but there are many more options to bring your plans to life.
Choosing a way to raise the floor
The decision of which material and option to use when increasing the height of the existing floor should be influenced by the following points:
- Financial … Decide how much you are willing to invest in such a renovation. Independent work will require time and effort, while a certain amount of money will be saved, due to which you can buy better building materials or choose the option of raising the floor at a higher price.
- Rational … Think about whether it is worth doing such work, or if it is not as important as it seems. Often the desire to do something with the floor is a fleeting feminine whim or a design idea. On closer inspection, it turns out that it is quite possible to do without such time-consuming work, or to find a more interesting and simple option for improving the appearance of the room.
- Labor intensive … Answer yourself if you are ready to do everything yourself, or if it is faster and easier to hire specialists. The work of the craftsmen costs about the same as it will be spent on building materials (the calculation is carried out by square meters).
The options for raising the floor are varied and depend on how many centimeters you need to raise the surface. You can reduce the height of the ceiling in the following ways: by insulating the floor with mineral wool, installing a log system, pouring a concrete / cement screed over expanded clay or expanded polystyrene, equipping a self-leveling floor. Another option is to raise the floor level using Knauf Superpol gypsum-fiber boards and simultaneously insulate it.
Selection of material for raising the floor
If there are not so many ways to raise the base, then there are much more materials with which this can be done:
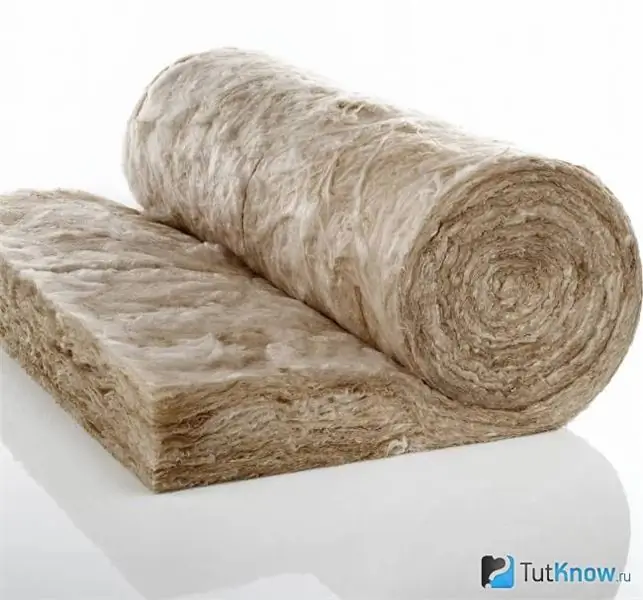
- Heaters … Among them, mineral wool, expanded clay and expanded polystyrene - polystyrene and polystyrene foam are best suited for raising the floor level. Minvata goes along with lags (a lag system is installed, insulation is placed in the niches between them), expanded clay is used in wet and dry screed, expanded polystyrene (more often foam is used) goes under a wet concrete screed. This option of raising the floor level kills several birds with one stone - it makes it warm, muffles sounds, and reduces the height of the room.
- Dry and wet screeds … They are made both in pure form (only a cement mixture) and include a layer of insulation. The result is impressive - the floor level is raised.
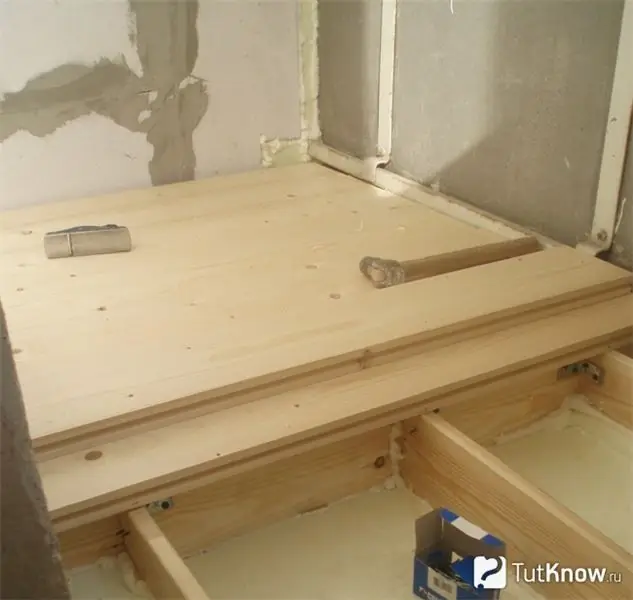
- Lags … They are always used if the topcoat is a tongue-and-groove board or plywood for linoleum, carpet, laminate. With the help of a lag, you can raise the floor level to any desired height, the main thing is to choose the right cross section.
- Self-leveling floors … They have a small thickness. Allows you to level the floor and slightly increase its height. It is difficult to work with mixtures for self-leveling floors, you need to have experience. In addition, they are expensive.
- Super floor from Knauf … It is attractive because all work is carried out dry. As a result, the floor level was raised, and a small additional sound and heat insulation was carried out. Finish - grooved board, plywood and laminate, linoleum, carpet on top of it.
Floor raising technology
Choosing a way to raise the floor, you need to understand that each of them has its own installation technology, its own set of tools and materials. You will also have to do some work required to prepare the rough base.
Using mineral wool to raise the floor
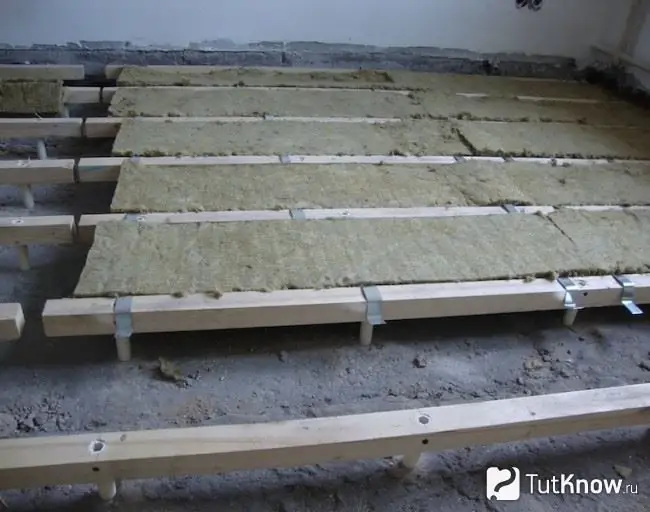
A convenient material if the floor needs not only to be raised, but also to be insulated, and at the same time to get quite decent protection from extraneous noise. Mineral wool is divided into several types - slag, glass, basalt (stone). This insulation does not fit under the cement / concrete screed due to moisture absorption and insufficient compressive strength, therefore the only way to install it is along the logs.
To work, you will need the following tools and materials:
- Insulation and a sharp knife for cutting it. Use insulation in rolls, it is more convenient to work with it, there are no additional cold bridges.
- A bar for arranging a log. The section is selected individually depending on the height to which the floor is planned to be raised, plus the thickness of the mineral wool is taken into account.
- Waterproofing and vapor barrier membranes. The waterproofing is placed under the insulation, and the vapor barrier is placed on top.
- Construction stapler and construction tape. A stapler is used to fasten the films to the logs, and adhesive tape is needed to fix the joints of the film.
- Drill screwdriver and dowels. They are needed to fix the lag.
Preparatory work for such a raising of the floor is minimized:
- Clean the subfloor from debris and dust, prime with an antiseptic compound and dry.
- Set the logs on a level - lay two long beams along the long walls of the room, the rest across at an equal distance from each other. Fasten them with self-tapping screws to the base: drill a hole in the floor and timber, drive the base of the dowel into the floor, complete the fastening by screwing the self-tapping screw into it. The step between the lags is equal to the width of the mineral wool rolls (half a centimeter less so that the mineral wool does not dangle, it lies tightly).
- Cut the insulation according to the size of the cells between the lags.
It is not difficult to raise the floor height using the lag and mineral wool system. The order of work fully coincides with the floor insulation. Lay dense polyethylene on the prepared base, make overlaps between the rolls, fix the joints with construction tape. Place pieces of rock wool between the joists. Cover the insulation with a vapor barrier film, secure its joints with construction tape. Install the topcoat.
The use of expanded clay for raising the floor

This material cannot be used on wooden floors due to its heavy weight. For concrete slabs, an accurate calculation is required to determine the maximum possible loads. Consult with a specialist, it is problematic to do it yourself.
Raising the floor with expanded clay is carried out using dry technology and wet. In the first case, the material is filled up, protected from moisture on both sides, the finishing is put on top - plywood and on top any of the coatings, from laminate to linoleum, tongue-and-groove floorboard. Using the wet technology, expanded clay is poured under a cement / concrete screed.
To work on both types of floor lifting, a minimum of tools and materials are required: expanded clay, polyethylene for a waterproofing substrate and adhesive tape for fixing joints, a rake for leveling expanded clay, cement / concrete mixture (screed), a bucket for mixing it, a drill with a mixer nozzle, reinforcing mesh, trowel for leveling mortar.
For dry installation, you will need insulation, a waterproofing film (polyethylene 200 microns thick), a vapor barrier membrane, a bar for arranging a log system, a drill-screwdriver, dowels for fastening a log. No special work is required to prepare the floor for raising the height, you just need to remove debris and dust.
Raising the floor with expanded clay using dry technology consists of the following steps:
- Prime the base with antiseptic and dry.
- Lay the logs, level them and secure them.
- Lay polyethylene on top of the log, connect the joints between the panels with construction tape, fix the film with a stapler to the logs.
- Fill with expanded clay and level it with a rake.
- Close the material on top with a vapor barrier membrane, securing it to the logs with a construction stapler.
- Install the topcoat.
Raising the floor with expanded clay in a cement / concrete screed is more difficult. Such works are classified as dirty, in addition, the screed dries for a long time, up to 28 days, so you can start finishing the finished floor not earlier than this time:
The order of work is as follows:
- Treat the substrate with an antiseptic primer and dry.
- Lay dense polyethylene on the base, put it on the walls (cut it off after installing the skirting boards).
- Fill the expanded clay with a layer of the required thickness, check the evenness with a level, level with a rake.
- Install a reinforcing mesh on special racks.
- Seal the screed according to the instructions.
- Divide the floor area into equal squares in your mind. Pour the screed in parts, carefully smoothing the solution with a trowel.
- Wait until the raised floor is dry and working strength (28 days).
- Install tile, porcelain stoneware, carpet or other topcoat.
Raising the floor with foam
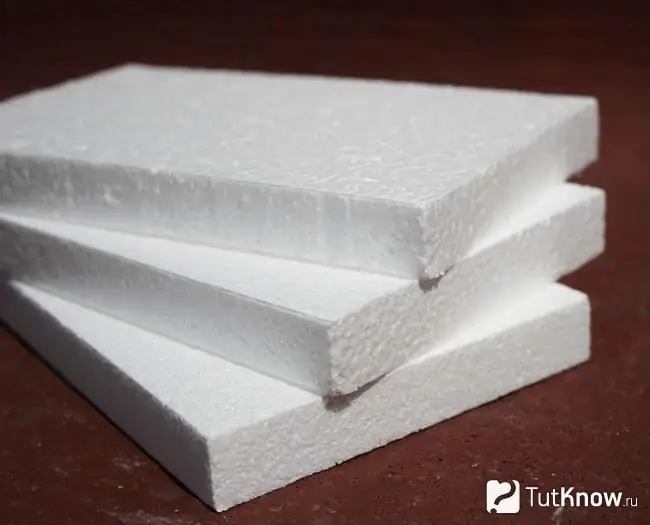
Expanded polystyrene is a convenient option for raising and simultaneously insulating the floor. To save some money, use regular Styrofoam or Styrofoam. In a concrete screed, its quality, such as flammability, will not matter. You will get a warm floor and, as an addition, good sound insulation.
The set of tools and materials is small: this is foam, a hacksaw for cutting it, plastic wrap, construction tape, cement mixture, a drill with a mixer attachment, a trowel, reinforcing mesh, construction tape.
Preparatory work before lifting and warming the floor with foam plastic is quite time consuming in the case of a large curvature of the base. This material is fragile, any humps on the subfloor can lead to its destruction. Therefore, it is imperative to pour a self-leveling concrete mixture to level the primary base.
If the concrete base is relatively flat, all work will be done quickly and with a minimum of physical costs:
- Clean subfloor from debris and dust, prime with antiseptic and dry.
- Lay polyethylene, connect the panels with construction tape.
- Lay foam on top of the waterproofing. When laying, observe the dressing of the seams. To achieve the desired floor height, lay the insulation in two layers.
- Lay another layer of polyethylene and place the reinforcing mesh on top.
- Prepare a screed solution.
- Install - fill the floor in parts, level the mortar with a trowel. Work quickly so that the joints between the pieces of the new floor are invisible.
- After about a month, install the topcoat.
Raising the floor with lags
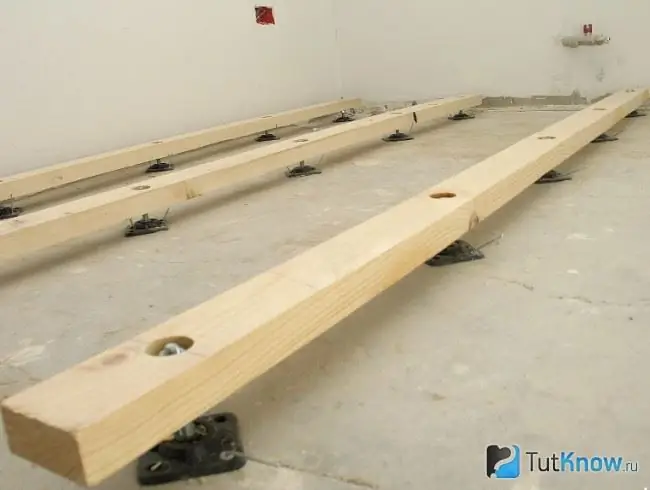
If you don't know how to raise the floor, use the lag system. This is a convenient way for wooden bases that you don't want to dismantle. Buy high-quality, dry timber of the required square section, dowels, plywood and any finishing coat, nails, screws. For work, you will also need a drill-screwdriver for fixing the logs and an antiseptic for treating wood from decay.
Further work order:
- Clean the sub-floor, apply an antiseptic primer and let it dry.
- Lay logs along the wide sides of the room. Pre-treat them with an antiseptic and dry them.
- Check the evenness of the log with a level. In case of deviation from the horizontal, adjust the height using a different number of thin pads.
- Lay the cross logs. If you plan to fill the space between the rough and the finished floor with some kind of insulation, make the lag step half a centimeter less than the width of the rock wool roll (1, 2 m) - this is a versatile material.
On top of the log, you can immediately lay a grooved board, which will make up the finished floor, or sheets of plywood. On top of it, any finishing coating is placed - laminate, carpet, linoleum and tongue-and-groove boards.
How to use sand concrete to raise the floor
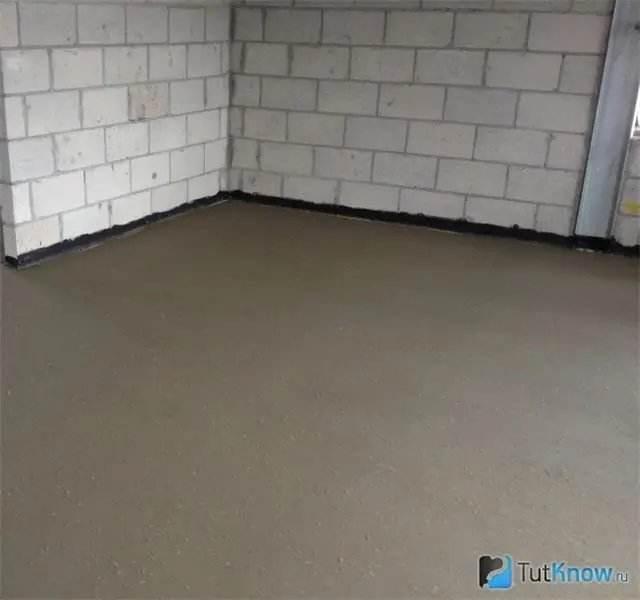
Sand concrete or sand-cement mortar is a universal means for raising the floor. You can buy ready-made mixtures in hardware stores.
To raise the floor in this way, you will need a certain set of tools and materials: the mixture itself, water, a container for preparing a solution, a penetrating primer that makes the concrete base rough, a trowel, spatulas, as a rule, material for lighthouses, self-tapping screws and other tools, based on a specific situation at the facility.
Preparation of the base before pouring the concrete screed is necessary and includes: removal of debris and dedusting of the surface; sealing of shells with mortar; knocking down obvious bumps and covering up the roughness remaining from them; marking the level of the future screed on the walls; treatment of the base with a penetrating primer; application of waterproofing mastic and installation of beacons (height 1 cm above floor level). You will also need a small amount of plaster solution to fix the beacons.
The direct process of pouring sand concrete screed consists of the following steps:
- Prepare a solution. The standard ratio of dry mix to water is 2: 1.
- Pour the prepared mixture into the far corner of the room.
- Using the rule, stretch between adjacent beacons and smooth the surface with a trowel.
- Repeat the action as many times as necessary to completely cover the floor.
- Wait about a month (28 days). During this time, the composition will dry out and gain strength.
The raising of the floor with sand concrete is finished. Any suitable topcoat can now be applied.
Self-leveling floors to raise the level of the base
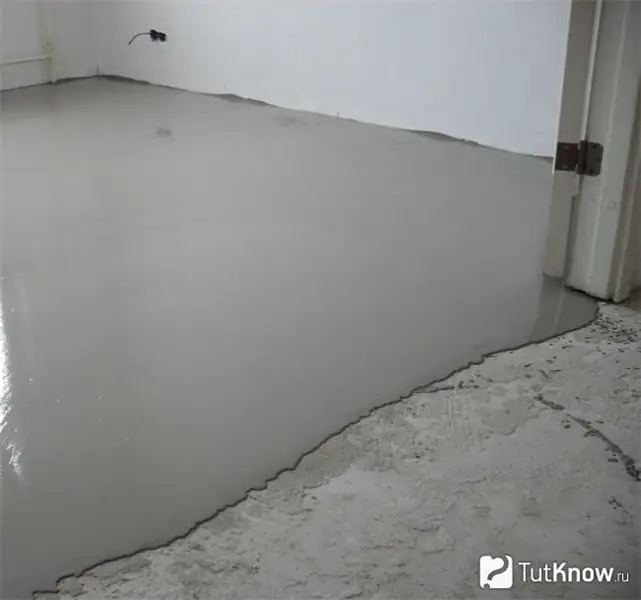
If the task is not just to raise the floor level, but also to do it in the most aesthetic way, the most suitable option is bulk polymer floors. Their thickness is small - from 0.5 to 3 cm, with an increase in this parameter, the cost rises.
This option is interesting for exclusive design solutions, since using 3D technology, you can create incredibly beautiful and realistic paintings. This option is too expensive for a conventional floor lift. Additionally, an ideal evenness of the base is required, and this is a rather large complex of works.
The very technology of pouring a self-leveling floor is simple. You will need a ready-made mixture, a needle roller with a long handle to roll the floor and expel air bubbles from the mixture, special shoes with spikes, a container where the mixture will be mixed.
Procedure:
- Carefully dust the prepared, leveled and dry base.
- Prepare the mixture, mix it well from bottom to top, not allowing air to enter.
- Pour the mass into one of the far corners of the room, spread it over the floor using a trowel-like tool, but larger and with a long handle.
- Roll the finished surface with a needle roller.
- After complete hardening (drying), cover with varnish.
Polymer self-leveling floors are different - epoxy, polyurethane, cement-acrylic. Epoxy ones are cheaper than polyurethane ones, they are suitable for creating volumetric 3D paintings, but they quickly turn yellow under the influence of sunlight. Use them to raise the floor in rooms located on the north side.
Dry screed for raising the floor
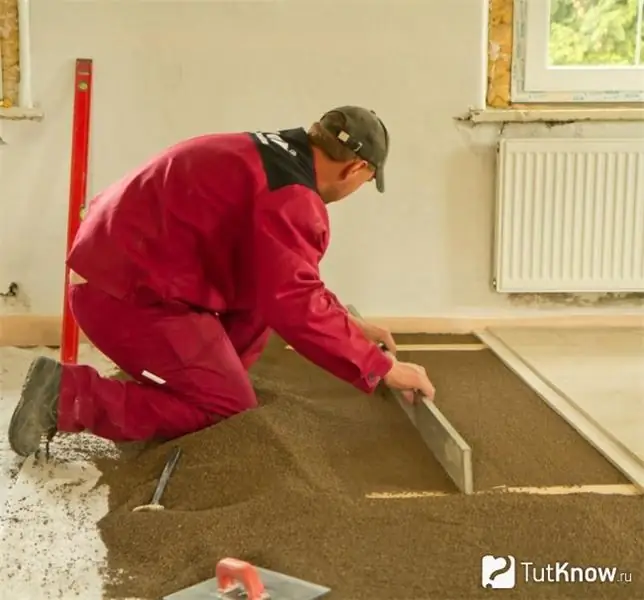
With the help of this system, it is possible to increase the floor height by 6-16 cm: dry backfill - 2-6 cm, thickness of gypsum fiber sheets - 3-10 cm. In fact, the floor will be insulated with expanded clay and the arrangement of a new subfloor from GVL "Superpol".
The laying technology is quite simple, no complicated manipulations with the old base are required. For work, you will need: fine expanded clay (Compavit from Knauf), gypsum fiber sheets, strips 10 cm thick from basalt wool, profiles, level, as a rule, a rake, self-tapping screws, adhesive mastic, putty, primer and a tool for marking and cutting gypsum fiber sheets.
The technology of raising the floor level using a dry screed and GVL sheets:
- Allow the gypsum fiber sheets to acclimate before laying. Store the elements of such a floor horizontally before installation.
- Clean the old base (concrete, wood) from debris and dust.
- Apply with a level mark on the walls to which the dry screed will be poured.
- Cut off the folds of the gypsum sheets that will fit against the walls.
- Place a thick plastic wrap overlapping and secure the edges with tape.
- Lay a basalt wool damper tape around the perimeter.
- Install the profiles on the floor, adjusting them in height using a level. The frequency of the substrates is at least 70 cm so that the level does not bend.
- Pour expanded clay onto the film between two beacons and level it with a rake (or rule) according to the height of the installed beacons. Do not forget to wear a respirator, the material is very dusty.
- Remove the lighthouse located closer to the wall, add expanded clay in its place and level it.
- Repeat the steps in the cells, each time removing the beacon, which is already covered with expanded clay, adding a new one in its place and leveling it.
- Lay the underlay. You need to move along it so as not to spoil the surface of the backfill.
- Start laying the gypsum-fiber sheets along the wall opposite the door. Observe the dressing principle by moving the gypsum fiber panels at least 25 cm relative to each other (do not crosswise joints!).
- Coat all folds with glue or mastic.
- Fasten all the joints with self-tapping screws (30 cm step).
- After laying the entire floor, seal all joints with plaster putty.
- Cover the gypsum board floor with a primer and dry.
- Install the topcoat.
Try to use only Knauf branded ingredients in this method of raising the base level. This will ensure a guaranteed result and a long service life of the coating. How to raise the floor level - watch the video:

You can raise the floor level in a variety of ways. Before starting work, decide what goals you are pursuing, then make an approximate calculation of consumables, make a discount for the error (+ 25%) and only after that go to the hardware store.


