- Author Arianna Cook cook@women-community.com.
- Public 2023-12-17 14:23.
- Last modified 2025-01-23 09:40.
The specifics of floor insulation with glass wool, the main advantages and disadvantages of the material, how to properly prepare the surface for thermal insulation, the algorithm for carrying out the main work, finishing. Insulation of the floor with glass wool is a fairly common way of conducting thermal insulation in the last couple of decades. This is largely due to the unique properties of this material, which meet the needs of modern consumers. Glass wool fibers are 4 times longer than other insulation materials, so it is very durable and resilient.
The main features of glass wool floor insulation
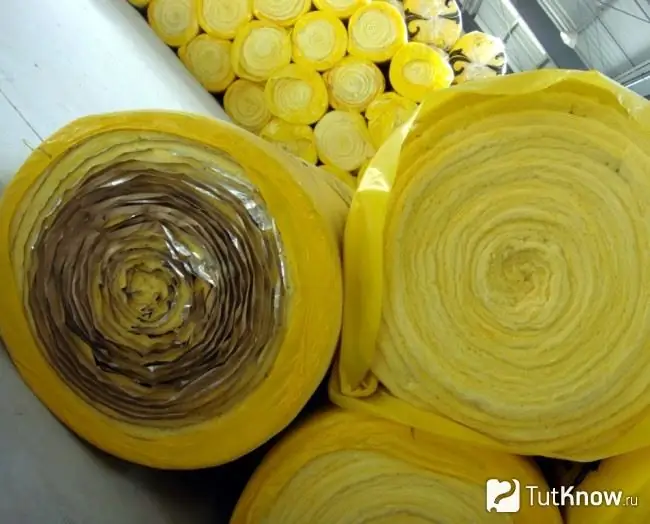
Let's first consider what this insulation is. This type of thermal insulation material is produced on the basis of broken glass or molten quartz. The good quality of cotton wool can be additionally indicated by its light shade, which begins to become dirty when binding elements are added to the material.
Glass wool is produced in the form of slabs or rolls. Usually, the description indicates that after deformation, it returns to its previous shape. If the purchased material demonstrates such properties, it means that it is of really high quality.
There are certain standards that also apply to the dimensions of the heat insulator. Its thickness can be from 40 to 200 mm, length - from 1200 to 14,000 mm, and the width of the wool is 600 or 1200 mm. The density of the material varies in the range from 18 to 75 kg / m3.
The area of application of glass wool is quite diverse. It is used to insulate roofs, floors, facades, partitions, and a number of building structures. Loose blown wool helps a lot in cases where it is necessary to fill load-bearing and hard-to-reach areas.
When insulating the floor, it is necessary to take into account the following features that the material should have:
- Sufficient strength, since floors are often subjected to stress, in contrast to walls;
- High insulating qualities, which will make it possible to reduce heat losses;
- Weight of material;
- Necessarily low moisture absorption;
- Ease of installation and value for money.
Advantages and disadvantages of glass wool floor insulation
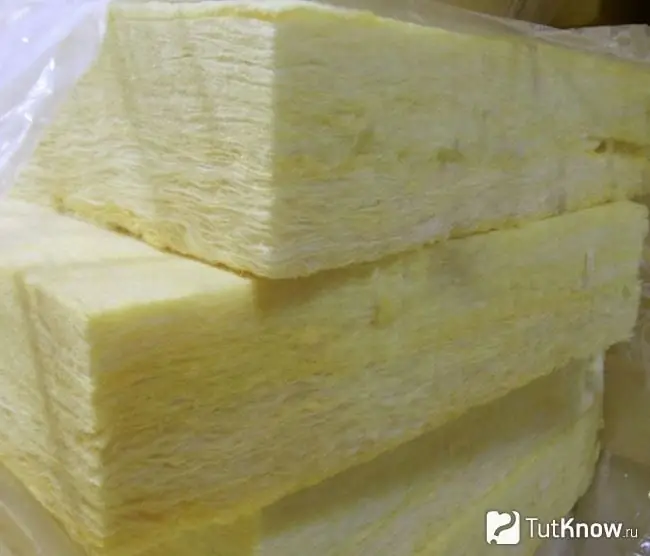
This heat insulator has many advantages. Let's dwell on the following qualities:
- Excellent insulating properties, since the material is able to retain heat in the room, not allowing cold air to penetrate inside.
- Relatively low weight, which greatly simplifies the installation, laying and transportation of this material.
- During operation, reliably hidden glass wool does not undergo any destruction and retains its original appearance.
- The insulation is not susceptible to self-combustion and, more importantly, does not emit harmful or toxic chemicals during the smoldering process.
- The material is durable, practically does not wear out and can be used for up to 50 years.
- Does not attract domestic rodents.
- Resistant to fungus and mold.
- It is chemically inert.
- Differs in special elasticity, which makes it possible to produce insulation on uneven surfaces (ventilation shafts, pipes, etc.).
- Does not shrink at high or low temperatures.
- Able to add up to + 5 ° C to the room temperature.
- It is a good sound insulator.
It should be noted the possible negative consequences of the use of glass wool. They are associated with the composition of this material, or rather, with fragile glass fibers that swirl in the air along with dust. As a result, they not only penetrate our lungs, but also settle on the skin and clothes. In addition, some types of this insulation may contain chemically harmful substances, so the composition should be carefully studied.
Advice! It is not recommended to use glass wool in rooms with high humidity, due to the fact that this material can easily absorb moisture.
Glass wool floor insulation technology
One of the most common methods of thermal insulation is floor insulation with glass wool using wooden logs. The installation of the insulation is started only after the complete preparation of the surface.
Preparatory work before installing glass wool
This stage of warming is extremely important, although many do not pay enough attention to it. First of all, the surface must be cleaned of the remnants of the previous floor covering, glue and concrete mortar. Any existing growths must be knocked down with a hammer and a chisel, otherwise it will not be possible to achieve a perfect fit of the insulation.
Now you can remove all accumulated debris from the floor, and sweep the surface until the concrete base is completely clean. After that, depressions and cracks are closed - for this, a repair putty is used. If there are deep holes, it will be easier to seal them up with polyurethane foam. As soon as it hardens completely, the excess is trimmed flush with a sharp knife.
After this procedure, the surface should be primed with deep penetrating solutions. It is imperative to wait for the primer paint to dry completely: if it is absorbed too quickly, it is applied several times, but each subsequent layer only after the previous one has dried. Not only the floor is primed, but also the walls in the room to a height of no more than 15-20 cm.
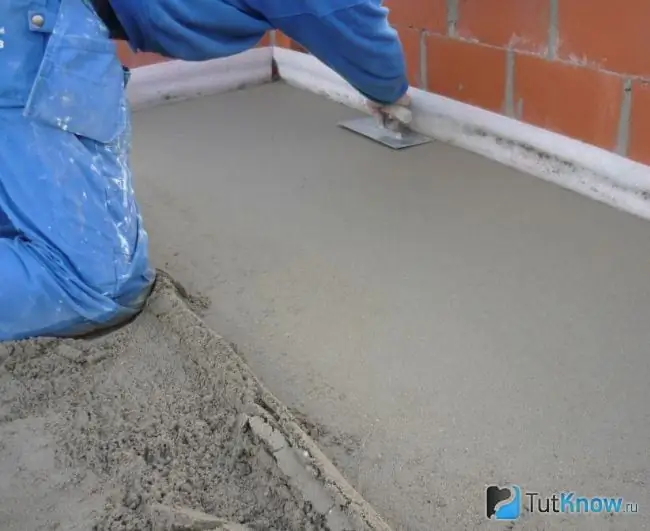
As soon as the paint dries, the surface is leveled with self-leveling solutions. In some cases, it may be necessary to create a semi-dry screed.
To do this, right in the middle of the room, the required amount of dry solution is poured out, in which a depression is made. Water is poured into it, in accordance with the proportions indicated on the package. The solution is mixed with shovels, its consistency should not be too dry, but at the same time it should not spread over the surface. It is possible to reduce the amount of dust that will rise into the air by periodically adding a small amount of water.
The prepared solution is evenly distributed throughout the room. It is enough to create a layer no more than 10-15 mm high. Once this is done, it is tamped or rolled with a metal roller. A reinforcing mesh is laid on top of the poured mixture, after which the surface is trampled down again.
In order to make a screed according to the level, at the required height of each wall, tentative beacons are installed in advance, along which the entire surface will be leveled. If irregularities or other defects appear on it, they are sprinkled with the required amount of the mixture and rubbed over.
The evenness of the finished screed is checked by the building level. After that, you can start grouting. The screed dries out for about a day, then the remnants of the damper tape are removed. To increase the strength of the dried concrete base, it is sprinkled abundantly with water for several days.
Now you can start waterproofing work. If the insulation is carried out on the 1st floor, laying roofing material on hot or cold mastic would be a good solution. A damper tape is glued along the perimeter of the room, along the junction of the floor and the wall, which is on sale ready-made, or you can cut it yourself from dense polyethylene. It will prevent deformation of the coating and protect against temperature extremes.
Of the tools and devices, the following items will be needed: a hammer, work gloves, a construction level and a plumb line, a chisel or chisel, a screwdriver, a trowel and a trowel, containers for mixing mortar, a hacksaw, a construction stapler, a knife, shovels.
Among the materials: rolled glass wool or in the form of mats, polished edged board, cement, sand, alabaster, water, nails, staples, screws, damper tape.
Instructions for installing glass wool on the floor
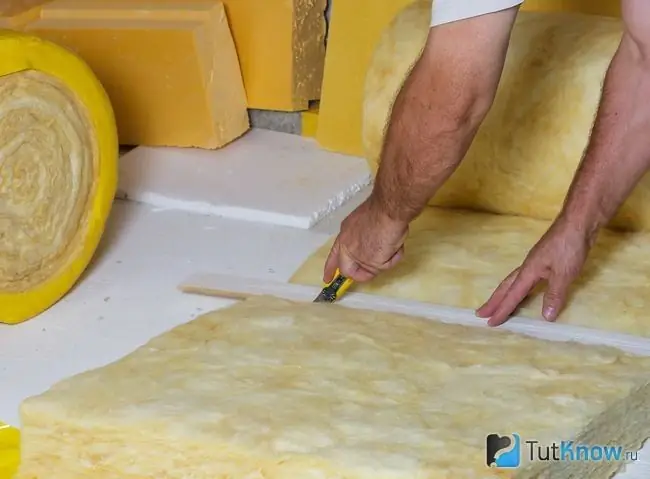
Glass wool for the floor is not safe in the first place for our respiratory tract. During work, be sure to use a protective suit or overalls, as well as a respirator and construction gloves. If fibers come into contact with exposed skin, do not comb them, but immediately try to wash off with water and a small amount of soap.
The algorithm of actions will be reduced to the following stages:
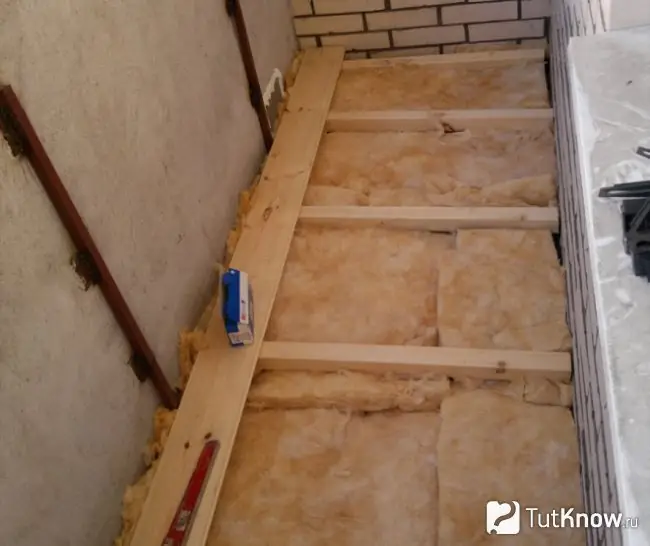
- On the prepared surface, from which the remnants of the previous floor covering have been dismantled, logs or even simple wooden blocks are laid out. Their height should be no more than 20 cm, since they will take away the useful volume of the room. Wood can be different: from oak to pine.
- The bars are laid out over the entire length of the room at a distance of about 50 cm from each other. Transverse logs are installed between them every 100 cm. Thus, a finished frame is formed.
- Glass wool is stuffed into the resulting cells. There should be enough of it so that it lies tightly enough, but at the same time it does not rise above the lags. If the insulation is produced in the form of mats, then they are cut according to the size of each cell.
- After filling the entire pre-prepared frame with cotton wool, you can lay waterproofing or plastic film on top of it. Do not forget to overlap and carefully glue the joints - this will avoid moisture ingress and swelling of the heat insulator with the loss of its qualities.
- If engineering communications pass along the surface of the floor, then they are first covered with insulation. Then a mark is made at the point of passage in depth and width. After that, according to the measurements taken, a groove or groove is cut out in which the pipe will be hidden.
- You can start creating the topcoat (which will be discussed in the next section). Linoleum, laminate, parquet, board and other options can act as a finishing floor.
Finishing the floor
The plank floor has been and remains one of the favorite methods of finishing the insulated surface. During installation, it is necessary to maintain the humidity in the room at no more than 12%, since the wood is especially afraid of dampness.
If the floor was insulated with glass wool in a residential area, then it is better to opt for coniferous wood. An example can be spruce, pine, fir, larch, etc. For wooden flooring, it is advisable to use an edged board, for which additional processing is not necessary.
When purchasing a board, be sure to pay attention to its condition. The wood should be moderately dry, because wet or overdried can deform over time. After that, it is examined for defects, such as splits, cracks, and various spots. The material should be bought with a margin of at least 10-15%.
Before starting work, the tree is impregnated with special substances that increase its refractory qualities, and also protect against the appearance of fungus and mold. It is imperative to put waterproofing under the future wooden floor. In this capacity, penofol or rather dense polyethylene usually acts.
One of the most common methods for installing a plank floor is to install it on wooden joists. The advantages of this method include the fact that lags make it possible to hide existing disadvantages, such as irregularities, drops, communications, and so on. The optimal solution would be a wooden beam with dimensions of 50 by 100 mm.
Lags are brought into the room a few days before installation and left there so that they take their shape and undergo temperature acclimatization. After that, two parallel beams are installed opposite opposite walls. Every 1.5 meters, a nylon thread is pulled between them, along which the remaining logs will be installed. It is very convenient to fill the resulting space with heat-insulating material.
If installation takes place on concrete, then they are fastened with dowels or anchors. For a wooden base, self-tapping screws or long nails are used. For a better connection, brackets are used, and only then the board is fixed with self-tapping screws. Holes for fasteners are drilled in advance.
As soon as all the logs take their place on the floor, they are sewn up with fiberboard plates, the size of which is selected so that each joint is at right angles to the center of the timber. For laying the first slabs, a stretched cord is used, which should recede from the wall by about 1.5 cm.
Gaps will invariably form between the flooring and the wall. In order to close them, it is best to purchase a plinth.
The following recommendations will help you to correctly make a finished wooden floor:
- After the boards have been measured, it is better to number them. This will avoid confusion and achieve the necessary sequence.
- When laying the floor, the plank is laid so that the so-called “age-old rings” on the wood look in opposite directions.
- Work starts from the wall, keeping a small ventilation gap, as the tree must "breathe". In the future, this gap is closed with a plinth.
- As soon as the first board is laid, staples are hammered at a distance of 4-6 cm from the edge of the timber. You will get a slot into which the safety rail is driven. A wedge is driven in between it and the bracket. This will provide a tighter fit for the boards.
- After completion of the work, the joints must be carefully ground. After that, you can lay laminate, parquet or parquet board on the insulated wooden floor.
- If you do not plan to create additional coverage on the surface, then the board must be protected. For this purpose, it can be coated with varnish or linseed oil, or at least treated with soda. During the impregnation process, you need to move parallel to the existing fibers - this way the traces will be less noticeable.
How glass wool is made - watch the video:
[media = https://www.youtube.com/watch? v = 3bKR8BbNgCI] Considering the arsenal of heat-insulating materials available on the market, it will not be difficult to insulate the floor. Glass wool has a fairly large list of positive characteristics, among which its low cost, level of comfort and thermal insulation, and quality can be distinguished. It allows you to optimize the temperature regime in the room and therefore continues to be in demand.


