
- Author Arianna Cook cook@women-community.com.
- Public 2024-01-12 17:55.
- Last modified 2025-01-23 09:40.
We present ideas for unique crafts from bark, which you can easily embody with your own hands - a mysterious lamp, a picture of birch bark, flowers, a house. You will also learn how to mulch plantings with bark.
It is an affordable natural material and is easy to find. But take bark from fallen trees, or just find it in the forest area under your feet. This natural material has many uses. So, you can create crafts from the bark or use it as mulch and decorate your summer cottages.
How to make a lamp from the bark of a tree with your own hands?
Surprisingly, it can be made from this natural material. You will get magic glowing mushrooms.

Here's what you need to do this:
- cold porcelain;
- tree bark;
- moss;
- LEDs;
- wire;
- wires;
- glue;
- drill;
- batteries;
- soldering iron;
- oil paints;
- sculpting tools.
The prototype of this lamp turned out to be a forest picture, when mushrooms grew on an old tree. The craftswoman tried to recreate it.

The lamp will turn out to be very similar to a natural piece of wood. For such a bark craft, you first need to decide which mushrooms you want to recreate. The following picture will help you figure it out.

But the craftswoman wanted to create exactly toadstools. If you wish, you can make honey mushrooms.
First you will need to create the mushrooms themselves. You already know how to make cold porcelain. Now take a piece of this white mass and add a little burnt umber paint. Then you will need to mix it well.

Add a little less paint than necessary, as the shade will be stronger after the mushrooms dry.
Now take a piece of this mass, knead it with your hands, then use the tool to make a concave shape. In this case, it is a wooden egg wrapped in cellophane. It will help you create the desired shape of the hat.

Using a stack, make an even more concave part inside the hat, which is typical for these toadstools.

Now take another stack and start creating a characteristic pattern for these mushrooms around the entire perimeter of the lower ring. If you do not have such a tool, then make these plates using manicure supplies or using a not very sharp knife.

It will turn out to be very realistic. After all, this mushroom is already almost like a real one. And if you tint it a little more with oil paint, you get the desired effect. Take a lemon yellow color, with which you tint the middle part. And with natural umber, darken the edges and the middle.

See how the newly created lamp mushrooms differ from those that already have a natural shade.

Make some of these mushrooms. To make the bark light further, start creating the mushroom legs. They will be with a secret, because this is where the electronics are hidden.
First, determine what kind of light you will have. The following table will help you figure it out.

Depending on this, you will install one or another lamp. Then see what size the LEDs are best for. Here it is 3 mm so that they fit under the mushroom head. There are larger LEDs. These elements have special legs of different lengths. This is done in order to understand where the cathode is and where the anode is. The short one is the cathode, and the longer one is the anode. The photo clearly shows this.

As for the battery compartment, these compartments are closed and already with a switch. It uses an open four-cell battery.
Switches are very different, in this case it is a slide switch. The resistor helps to reduce the current value. If this device is not available, then the current strength will turn out to be too large. Through calculations, you can find out that here the value of the resistor is 150 ohms. By purchasing it, you will know which one to purchase. As cables, it is better to use an acoustic thin one with such parameters 2x0.25 mm2.
Now you can start making a bark lamp. Use wire cutters to remove the length of the LED knife, expose the wires, and warm up the soldering iron. Attach the resistor to the red contact and use a soldering iron to connect these places.

Now you need to solder the resulting products to the anode. Then it remains to insulate these wiring with electrical tape. Now take the wire and use a thread to attach it to the wires.

After that, you can decorate the blanks with cold porcelain. After all, they will turn into a mushroom leg to make such a ribbon. Lubricate the wire together with the thread with PVA glue, then screw cold porcelain tape to this part.

Start rolling this piece between the work surface and your palm. The leg of the mushroom should turn out to be a beautiful oval shape. Then connect it with a hot gun with a cap.

You need to hide this junction. To do this, you need to make a flattened part from the rolled porcelain sausage, which you will cover with hot melt glue. Then go through the same serrated shape, do the same as you decorated the mushroom inside.

Check periodically to see if the mushrooms are glowing. If so, leave them to dry completely, and then go over these blanks with the same paint as you did before.

Now you can move on to the final decoration. Here you will already make a lamp from the bark. Take 2 pieces of this natural material and glue them together with epoxy glue.

With a drill or screwdriver, carefully drill a hole in this workpiece for each fungus. Now you need to insert each mushroom into its hole, fix the structure on the back with hot silicone from a heat gun.

Assemble the electronic components as in the photo, connect the switch and batteries here.

To then hang the composition, take a wire, the ends of which bend and screw this part to the bark from the back side. To do this, also use a heat gun. So far, the workpiece looks rather fragile. But very soon she will find the necessary fortress.

Further, for this DIY bark craft, you will need to take unnecessary egg trays. After all, with their help, you will strengthen the lamp, with the help of a blender you will make papier mache.

To do this, grind the boxes, just tear them, put them in the blender bowl and pour water there. Let the moisture absorb well into the paper, squeeze out excess water. Then you grind this mass with a blender. You can also do it with your hands. Then you will need to knead this substance to make a viscous sculpting material. Now coat your workpiece with it from the back side, and glue the tape on the wire.

See how realistic these bark crafts are. Especially if you shoot them against the backdrop of nature.

If you live in a country house or are there and you have trees, attach such lamps to them. They look very impressive in the dark.

You can also make other bark crafts. Birch bark has long been a popular material. After all, amazing things are created from birch bark.
What to make from birch bark - ideas and photos of crafts
Amazing pictures can be made from this material.

After you have removed a thin layer of birch bark from the bark, dry it, then you will need to cut these elements. You can place templates on the bark, trace around them and cut out elements for flowers and sheets. Glue black paper onto cardboard or plywood. Start attaching the leaves here with glue.
Glue the flowers in advance from several petals, attach the middle inside. Also glue a wooden stick here and wrap it with white duct tape or paper. From these elements, you will make stems. Glue the twigs. Cut the birch bark into thin strips, twist them tightly into spirals, you get such decorative elements that you also attach to the picture. It remains to decorate it with a frame and can be placed in the most conspicuous place.
If you do not know how to prepare the bark for such work, then check out this. In the forest, you need to collect birch bark from the trunks of birches, which have been in the dead wood for a long time. Look at the next photo, which shows how you need to cut the bark into strips and roll it into a ball in this case. This birch bark is suitable for weaving shoes, baskets, belts.

You can also get birch bark from fallen large birches. In this case, panels and paintings are made from it. Then you need to take a strip at least 80 cm wide, see which part of the tree you need to collect it from.

Before making a craft out of birch bark, you need to prepare it. First, the collected bark is boiled, then you cool it, straighten it and try to divide it into thin plates. Then you need to place the materials collected in envelopes by color under the press. But already dry plates are put here. Keep in a horizontal position so that they are straightened. And you can apply them. For example, to make such a wonderful piece of work.

For this, a prepared piece of bark is taken. It is good if it is not very thin. But too thick will not work either. Then give the child paints, let him start creating. You can first transfer the drawing here with a gel pen and start painting. Then the picture is framed. For this, wooden sticks are suitable, which are glued together in the corners, and a rope is attached to the top.
You can also make wonderful flowers from birch bark. For this, some petals are pre-painted. You can boil them in a solution of onion peels so that they acquire such a reddish hue, then they are fixed on wooden sticks that will become stems.

Those can be painted white or wrapped with such electrical tape, or glued strips of birch bark.
The next master class with step-by-step photos will help you understand what else can be made from the bark. The step-by-step instructions are very accessible and understandable, so even beginners can master such needlework.
How to make a house out of birch bark with your own hands?
This is how it will turn out.

Take fresh birch bark, cut it into strips and remove the thin white bark.

Put it all in a saucepan, pour water here and bring to a boil. Then cover and turn off the heat. When the water has cooled down a little, take each strip, roll a spiral from one and the other end. Fix in this position with a clothespin and put back in the saucepan.

Then take these blanks out of the water, let them cool and dry. After that, you can remove the clothespins and start creating a cube from these materials. Look, you need to slightly untwist two blanks and put them horizontally. This will be the floor and roof. Place the other two vertically. Due to their curls, these details will be held together.

Now take one blank for the roof, first roll it out on one side, align with the curls of the house. Then, in the same way, arrange this blank on the other side.

Now you need to take the thread. You will pass this rope through the roof, fix it here with a stapler, at the same time make the upper part of the house sharper, as required by the project.

Take acrylic or tempera paints, start painting the house. In this case, you can use the template. From above, close the tip of the roof with a birch bark ridge, fasten with clothespins so that the part dries in this position. Here is such a house made of bark.

How to mulch the soil with bark?
This is another way to show you what can be made from bark. This material comes in coarse, fine and medium fractions. You can use the one that's right for you.
It is best to use pine bark, but first it must be boiled for 15 minutes so that the existing larvae leave from here.
But, they say that such pine bark is an excellent fungicide and will protect plants from pests. She also:
- protect the tree trunk from freezing;
- will not let weeds grow;
- it will pass moisture well and will retain it;
- will decorate this site of the site;
- in warm weather will save the earth from overheating;
- durable, this mulch can be used for 6 years;
- decaying, forms useful compounds;
- a strong wind will not blow it to the sides;
- protects against soil crust.
A few more recommendations:
- It is best to apply mulch in the fall or spring. If you do this in the spring, wait for the ground to completely thaw and warm up. First, the soil needs to be well fertilized, then cover the bark with a layer of 6 cm.
- If you want to mulch garden beds, then plant first. When the shoots appear, with the bark of the fine fraction, you can mulch the gaps between them.
- When laying mulch under trees, avoid touching the tree trunks to prevent rotting of the trunks.
- Do not place the bark on dry ground, but rather on moist soil. Also, do not use fresh bark, as it contains a lot of resin, which is harmful for planting. First you need to dry the bark well, then use it.
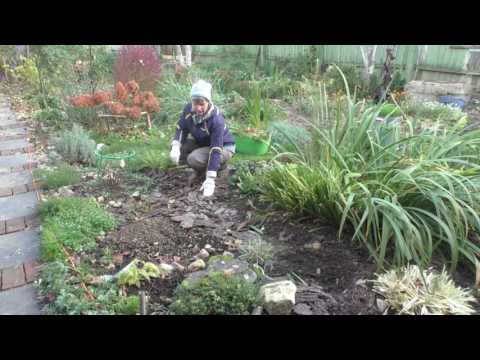
Here are some bark crafts you can recommend to make, and how to use this natural material. See how experienced gardeners mulch the soil.
But what kind of bark crafts can be adopted. A quick video will help you quickly create a beautiful composition based on this material.

And how to weave from birch bark, the third video will tell.


