- Author Arianna Cook cook@women-community.com.
- Public 2024-01-12 17:55.
- Last modified 2025-01-23 09:40.
See how to draw spring in stages with a pencil and paints. You can also use a sponge, paper and thread to create an artistic masterpiece.
Knowing how to draw spring, you will indulge in an interesting lesson. Below are image options for children and adults.
How to draw spring with a pencil?
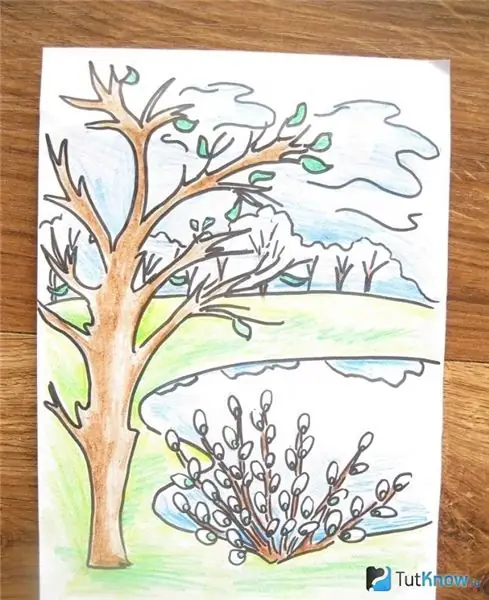
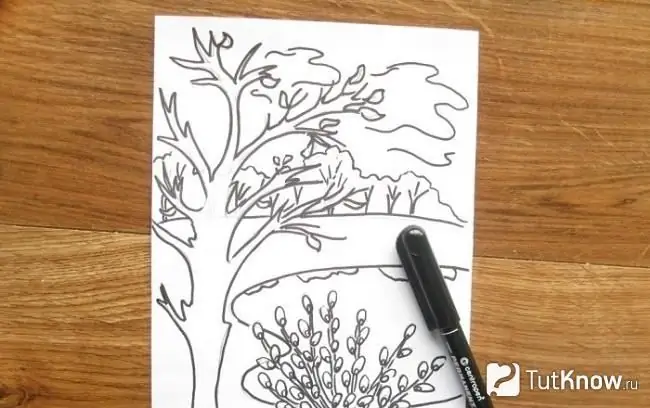
Such a landscape can be created by adults and schoolchildren. It can be seen that the willow has blossomed, this is one of the signs of spring. Also, the first leaves begin to appear on the trees, the sky becomes lighter. The ice has already melted in the reservoir, and clouds are reflected in it. You can also draw the sun and add other details to the canvas. You can then depict a hare or other animal here. But first you need to draw the landscape.
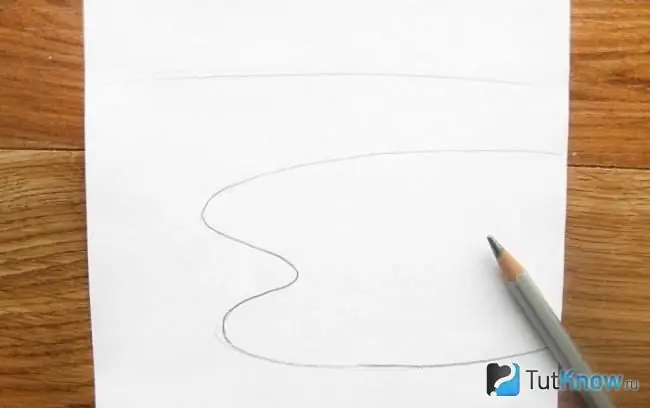
Take a piece of paper, draw a horizon line on it, then draw the outline of the lake below.
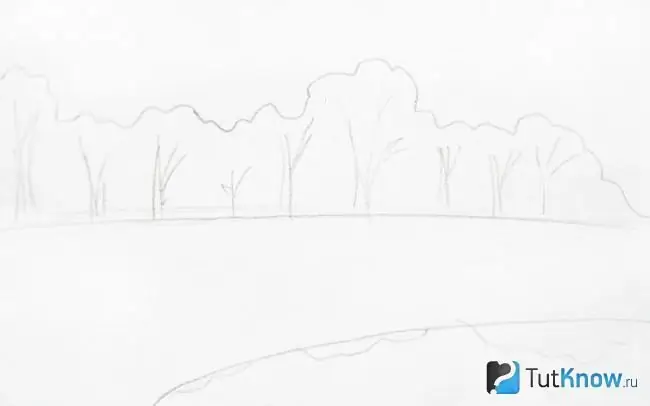
Draw trees on this horizon, above them draw clouds. Some of these celestial bodies are reflected in the water.
Here's how to draw spring with a pencil further. Take this tool and draw the main tree on the left side. At first it will be just the trunk and branches. You will draw a few leaves later.
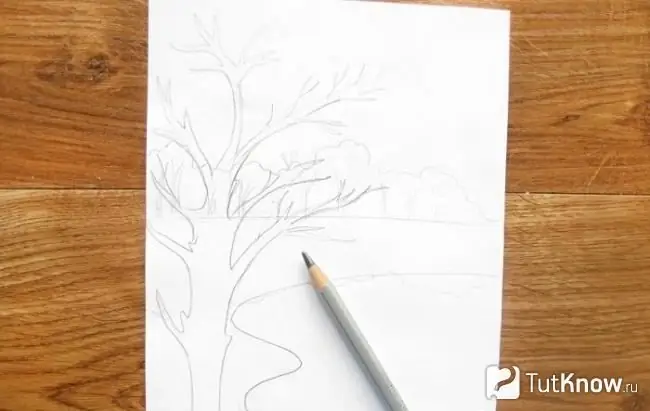
On the right side there will be a willow bush. To do this, draw first line segments starting from one point. These are branches. They depict the flowering fluffy elements of this plant.
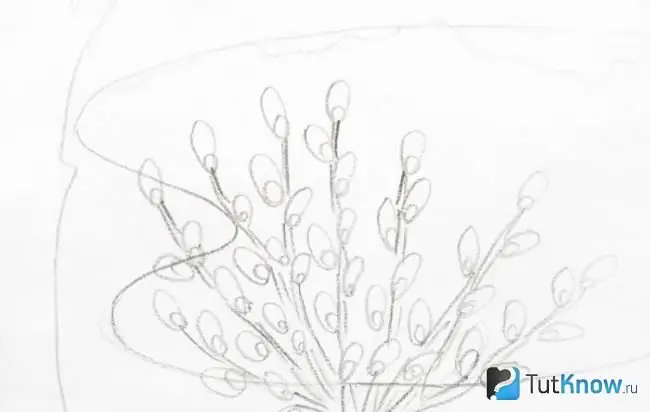
If necessary, add more clouds. Now all the lines of your landscape need to be outlined with black marker. If some features are superfluous, then first erase them with an eraser.
Then you can start to color this drawing. The tree trunk and branches will be brown. Paint some blue strokes on the sky and clouds. Cover the tree with small amounts of leaves. Also, use colored pencils to make the willow bush more realistic.
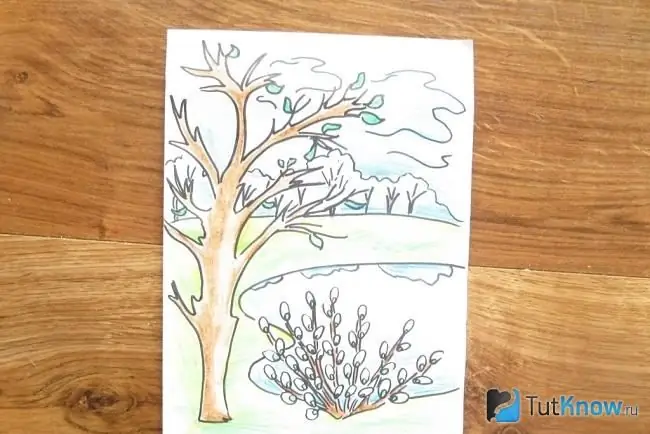
It remains to depict green grass. Here's how to draw spring with a pencil.
With this tool, you will create other works as well. Check out some samples.
If you will be using colored pencils, then only a few are needed. First, with a simple one, draw a winding stream. Then, taking this tool, map out where you will have trees and bushes. Take a brown pencil and draw here the trunks and branches in this color. Using green, depict leaves, a Christmas tree in the distance and grass breaking through. It remains to go with a blue pencil along the top of the drawing to get the sky.
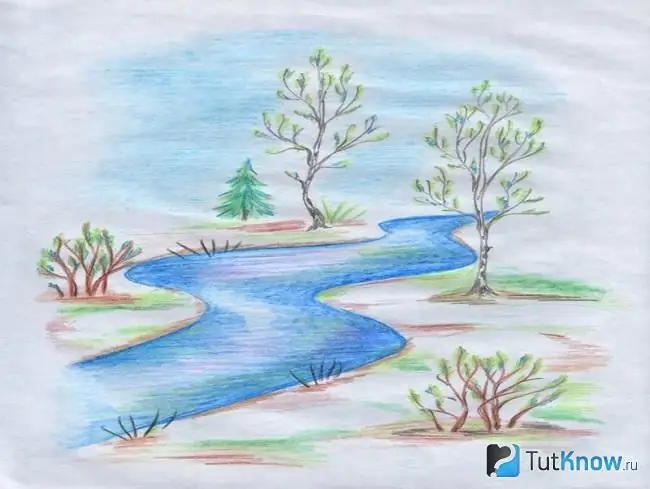
But this is already spring in full swing. And if you want to show her first steps, then pay attention to the following options for landscapes.
Read more about painting in traditional and non-traditional ways
The painting "The snow is melting"
It is this moment that the next landscape conveys. In the foreground there is a snowman, then you can see how the icicles melt, birds return from the warm edges.
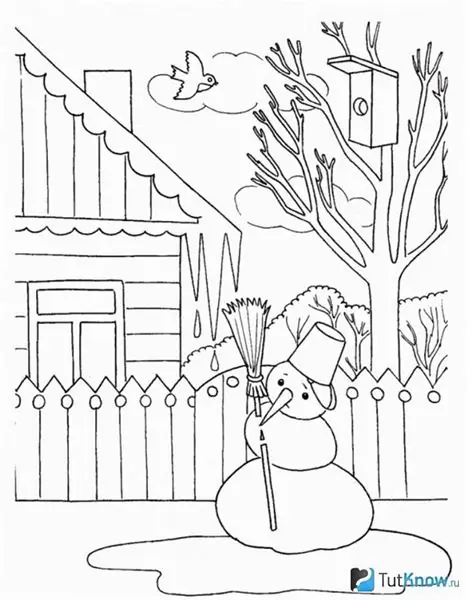
All this is conveyed by this drawing. There are clear geometric lines here. Use them to draw a part of the house, a window, a pipe and horizontal and vertical boards on it. Draw a picket fence with an openwork top. On the right, draw a tree with a birdhouse. A bird is flying here. The snowman consists of three ovals. They squinted slightly as the snow began to melt. Therefore, below the snowman, draw the outline of the puddle that has formed. Here's how to draw spring with a pencil. But if you want, then decorate your masterpiece.
When the snow melts, snowdrops break through. This very moment is captured on the next canvas.
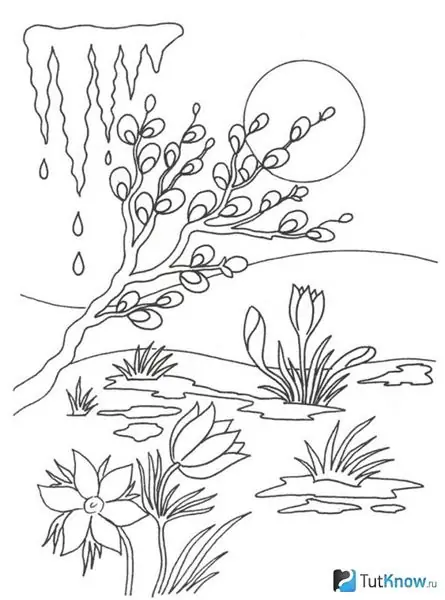
First draw the horizon line, and below - a wavy line, this is the border of the clearing. There are islands of snow on it, next to which the first snowdrops appear. Picture them. Somewhere only the first foliage has come out, in other places there are buds, and thirdly - they have already blossomed. In the background, draw the sun and melting icicles. On the left obliquely there is a willow branch, also depict it.
If you need to draw a person, the following canvas will help this.
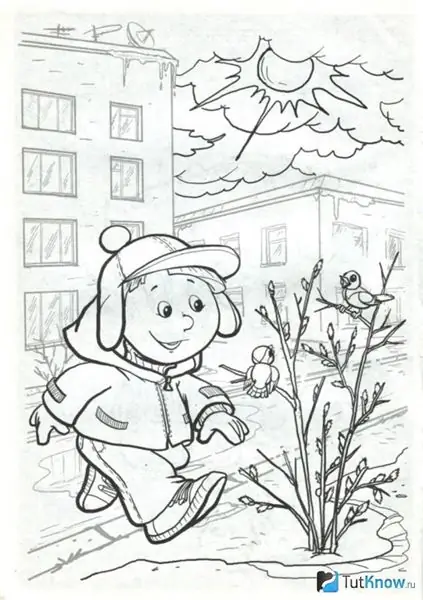
The boy saw two birds on the blossoming willow bushes and hurried towards them. There is also a small snow island around this bush. We see puddles behind on the path. Draw them. Draw buildings using straight lines. On top of one of them are television antennas. The clouds hung low over the city, but the sun could overcome them. Draw the circle of this celestial body and the rays around it.
If the child was asked to draw spring in the forest, then the following sample will help.
Here the birch is located on a hill, and between these islets there is a brook, which is still covered in some places with ice floes, but the current is already visible. On the hills, depict white snow and dark thawed patches. It can be seen that he has already melted. The birch trees have not yet covered their leaves, there is snow on some branches.
There is it in the next figure. Such a landscape also conveys how beautiful spring is in the forest.
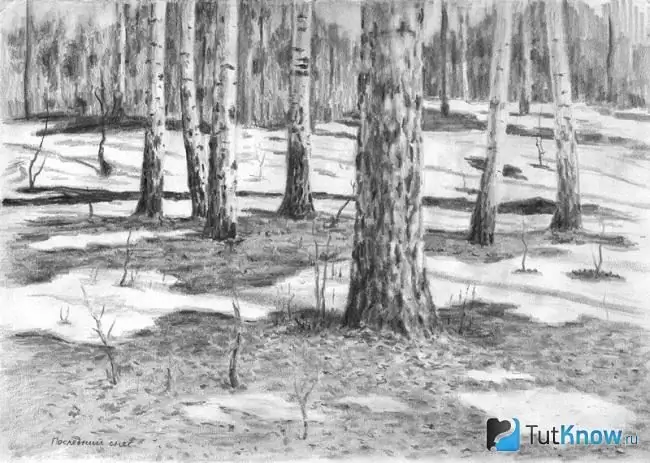
But there are already many clearings that are free of him. The snow melted around the birches. In the background there is a small hill, where there are still snowdrifts. See how to depict birch trunks to make them realistic.
And if you need to draw spring in the forest using paints for this, then the following canvases will come in handy.
Read also how to teach your child to draw
How to paint spring with paints?
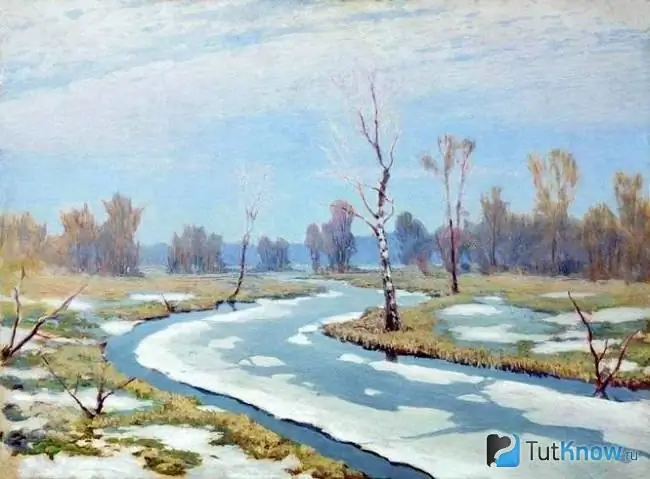
The landscape is very beautiful as it is dominated by deep blue colors. This is the color of the river. Although there are still small pieces of white ice, it is clear that the ice drift has begun. The snow also melts near the trees, depict them.
The snow is melting in the forest park. There are still small drifts near the trees, but they have significantly settled. The path is wet, as there is melt water here. Trees are reflected in it. It is easy to draw them using a dark pencil.

Also depict the attributes of the park, these are:
- bench;
- flashlight;
- trash bin.
If you want a more fun landscape, then take paints or crayons and draw a clearing covered with grass and spring flowers. Draw the shadows of the trees here so you can see the sun shining brightly in the sky.
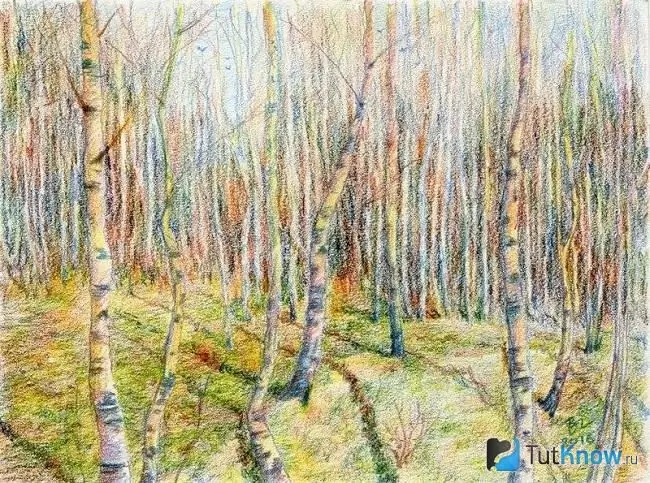
Read more about interesting drawing techniques
How to draw spring in stages - ideas for children
The guys really like to portray what they see or can think of. The following pictures were created by children.
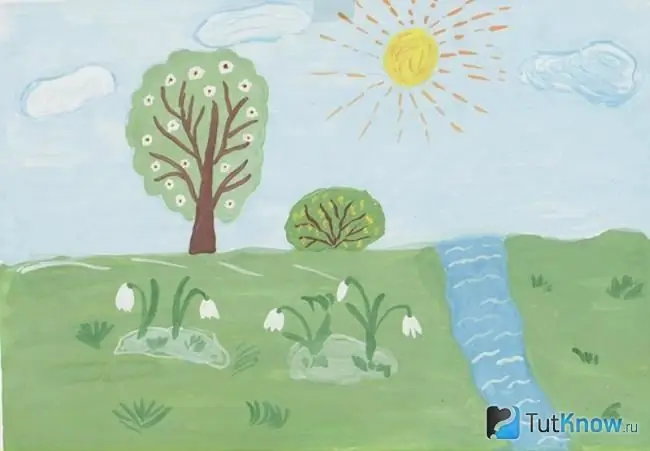
Show them how to first cut a piece of paper almost in half using the horizon line. It should not be flat in order to convey the curves of the clearing. Above there will be a sky with clouds and sun. The lower part of the figure includes a green meadow, snowdrops. A river or stream flows down the hill. Draw it with blue paints, and when they dry, then you need to make some white veins. Draw the crown of the branches of the tree, and then around, backing slightly upward, make an oval using a wavy line. Inside it, you need to draw green foliage and flowers.
To make it easier to draw a tree, you can first depict the lower part of the trunk, and then the crown leading up. Draw it with green paints, and when it dries, then use a thin brush to depict the branches, and then the flowers.
The next little artist did his best too, so he was able to draw a drawing "spring" so that it was so realistic.
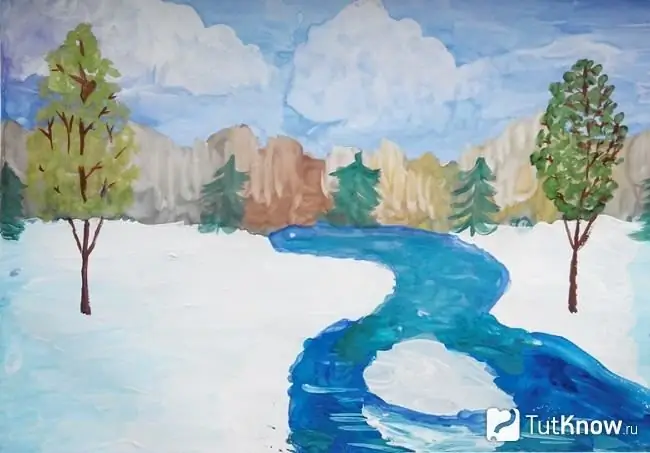
This canvas has a foreground and background. But first you need to draw a horizon line. Trees will be located above it. To draw a dense forest, you can draw a jagged line above the horizon to show the tops of these trees. Now from the horizon line there are two almost parallel curving lines that show the melting of snow. An ice floe is floating in the middle of this stream, it is reflected in the water. Use the same colors to paint light clouds and a blue sky. In the foreground, paint two trees with brown and green paint.
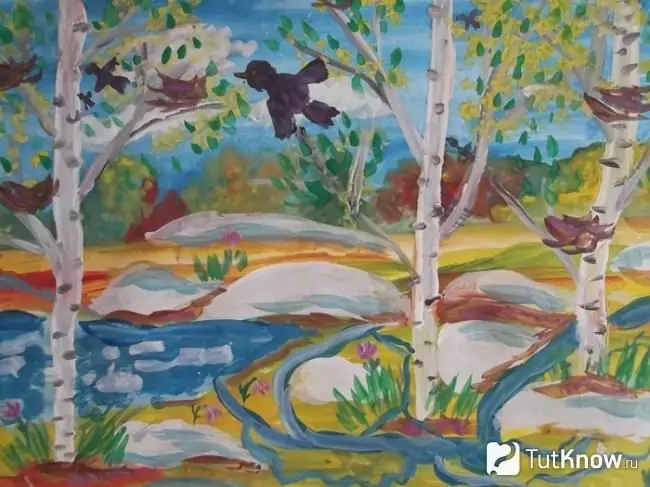
The next drawing is beautiful and bright. Although there are still small islands of snow in the landscape in some places, but the buds have already begun to bloom, birds have arrived. Draw the nests among the white-barked birches that the birds made. Use blue paint to depict melt water and streams, and with green paint breaking through leaves and flowers.
Now look at how to depict spring flowers. This skill will come in handy when you create a forest clearing or flower bed in the country where these plants are planted.
How to draw spring - a workshop on drawing snowdrops
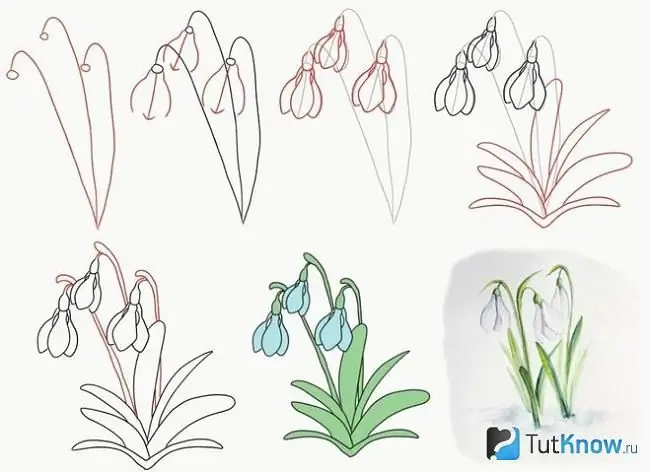
A step-by-step master class will help you quickly learn how to draw snowdrops. First draw three lines with curled tips at the top. Then, at each such tip, draw a small circle from which a blossoming bud emerges. In the next step, draw the leaves. Then paint over the stems with a green pencil and cover the leaves with the same color. You can leave the snowdrops white or paint them blue.
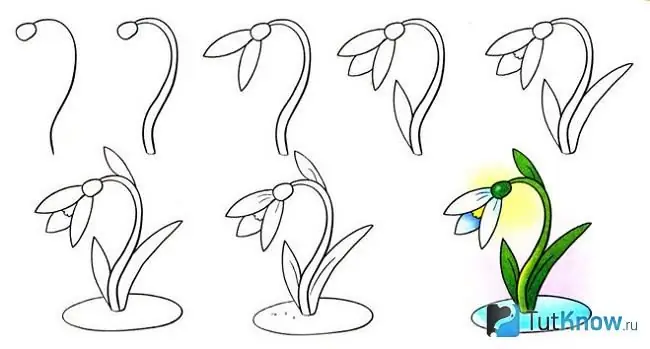
Watch another master class, from which it will also be clear how to draw a snowdrop. Draw a curved stem first. Then draw a small circle at the tip, from which three petals emerge. Draw the leaves, add the desired shades to the flower, it will turn out to be so beautiful.
Spring painting in stages
You can draw not only with pencils and paints, but use completely unexpected materials to create your masterpieces. Take:
- photo frame;
- yarn of the desired shades;
- blue cardboard;
- napkins;
- PVA glue;
- pencil;
- counting sticks;
- scissors.
First, draw with a pencil the arrangement of the elements. There may be a birch, a herringbone, clouds, sun.
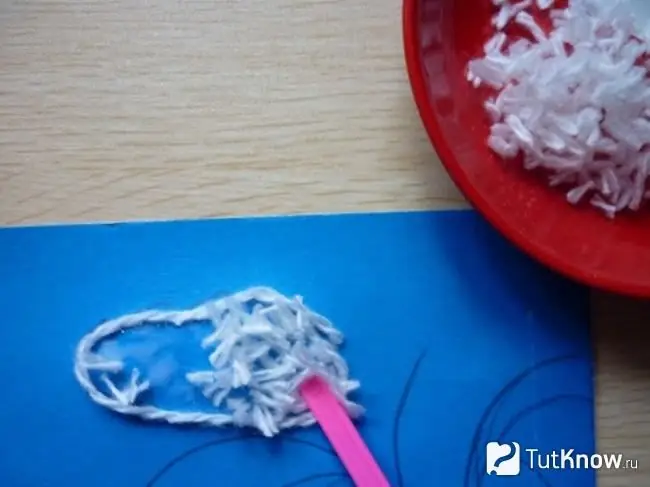
Now start covering the strokes with the thread of the desired color. First apply the glue to the cloud, then wrap it with white thread on the outside. After that, you will need to cut this yarn into smaller pieces and close the clouds with it.
To further make this picture, form the rays of the sun from the yellow yarn. Take several turns, glue them to the designated place.
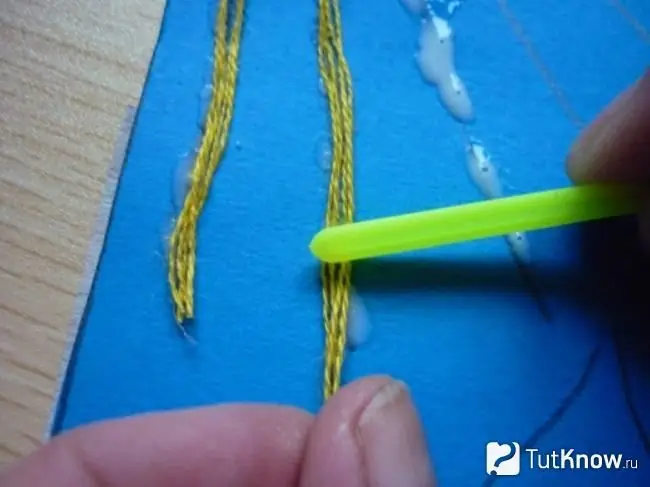
Three drops of glue are enough to attach the rays of the sun to the selected area of the panel.
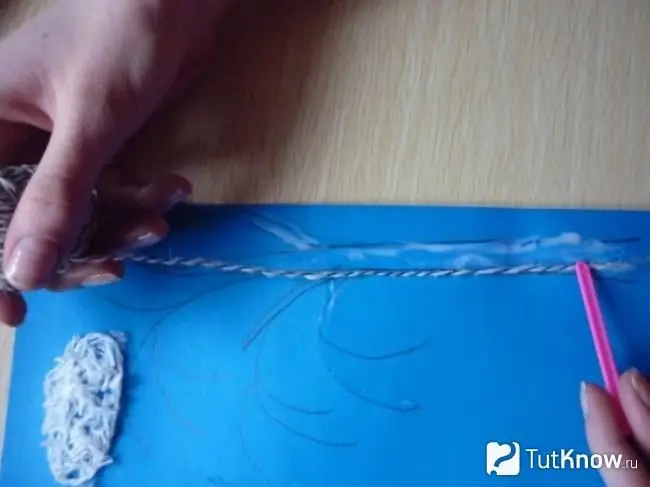
It's time to arrange a birch. To do this, take light and dark yarn, twist two turns so that they turn out to be of such a variegated color. Glue them along the contour of the tree and on the branches.
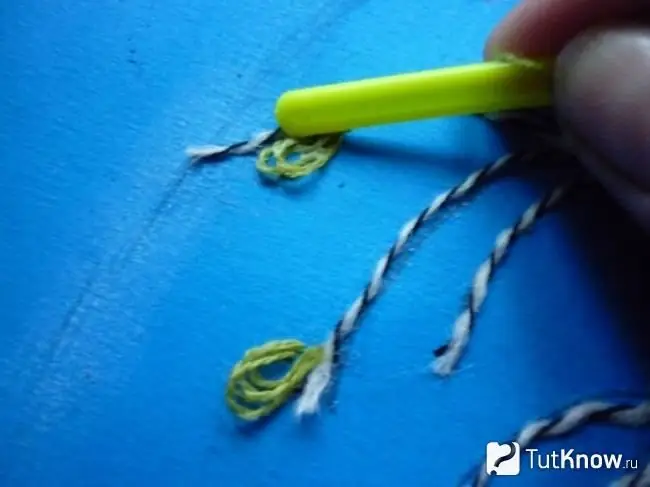
Now take green threads, shape them into leaves and glue them onto this spring painting.
To decorate the Christmas tree, grease it with glue, then attach a green thread around the edges, and then fill the entire tree in this way.

It's time to make the grass. Speaking about how to draw spring using threads, it should be noted that in this case you need to cut the green ones into almost equal segments and attach them to the selected places.
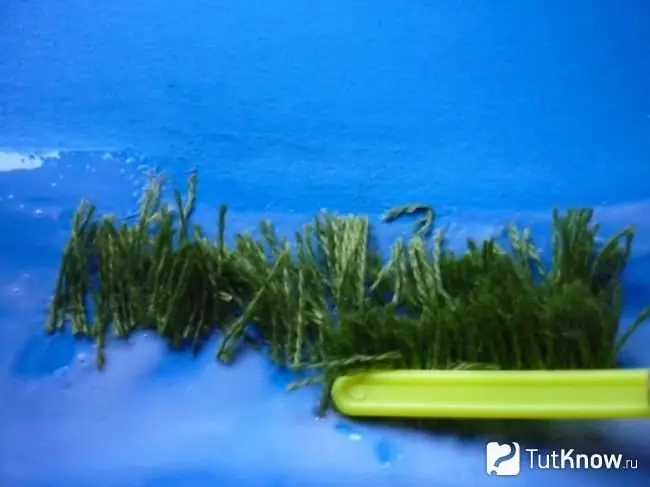
Of course, this area must first be greased with glue. To make a flower, wind yellow threads around a rolled strip of paper. Then tie them up at the bottom and cut at the top.
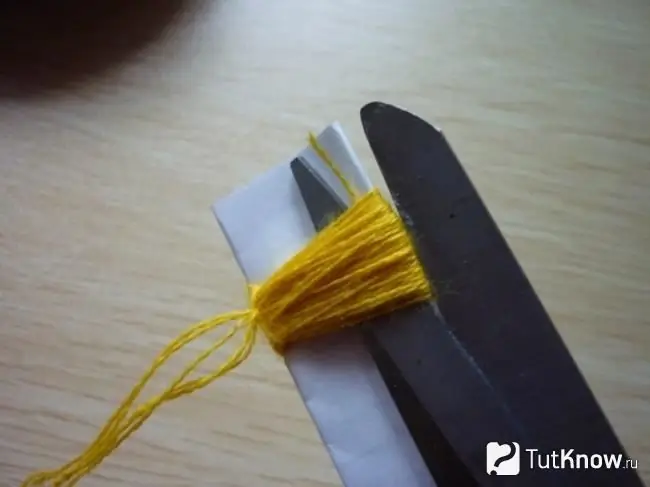
Pull this thread and fluff the resulting flower. Glue it onto the green grass.
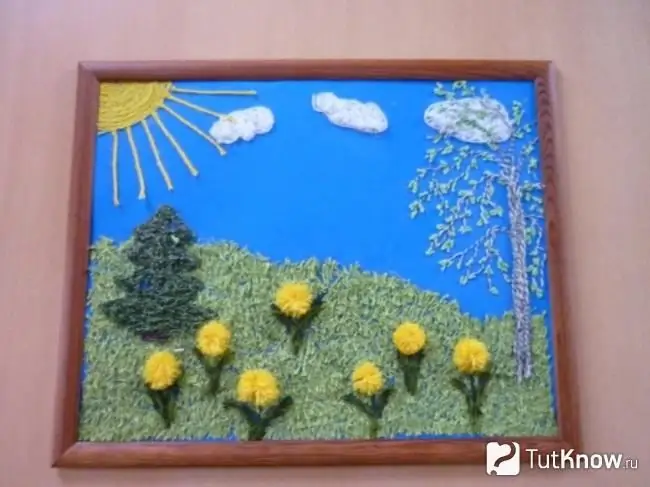
Look what a beautiful spring picture you have.
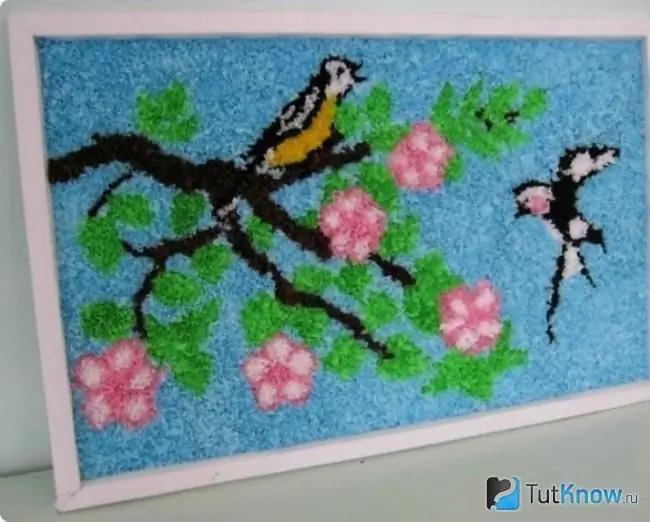
Make leaves from dark green thread, and use light green yarn to decorate the grass in the meadow.
Try to make another composition from the same material. It will turn out to be soft and fluffy.
- First, draw outlines of the future composition on a sheet of white cardboard. There is a flowering branch with leaves and birds. Now cut the threads of a certain color in different containers.
- At first, it is more advisable to make smaller items. To do this, put the chopped white yarn on the head greased with glue, on the wings of the birds. The yellow threads will become the breast of one of the birds.
- Brown yarn will help make branches, and with green yarn you will form leaves. Take pink and white threads and make beautiful flowers out of these materials.
Spring picture from paper
This material will also aid creativity. Here's how to draw spring using it.
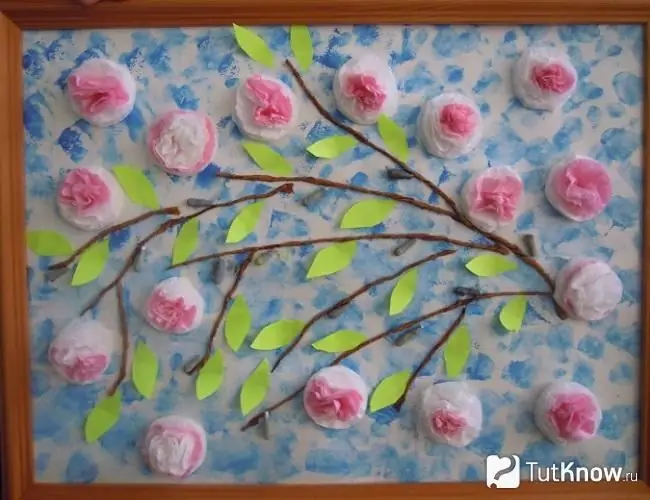
Take:
- twine or brown thread;
- napkins or cotton pads;
- paints;
- green paper;
- cotton buds;
- brushes;
- stapler;
- scissors.
Master Class:
- Fold the napkins into a tube and cut a few circles out of them. Then staple these blanks in the middle with a stapler. Lift up the top circles to form flowers.
- Prepare pieces of string that will become branches. Remove cotton wool from the sticks, paint it in a dark green color so that these blanks turn into blossoming buds or catkins of a birch. Cut the leaves out of green paper.
- Now you need to take a sheet of white cardboard. Dip a sponge in blue paint and cover the background with this solution. When it's dry, glue the twine here, which will be the branches. Then you will need to glue the leaves and colored pieces of cotton wool. Frame the craft to give it a finished look.
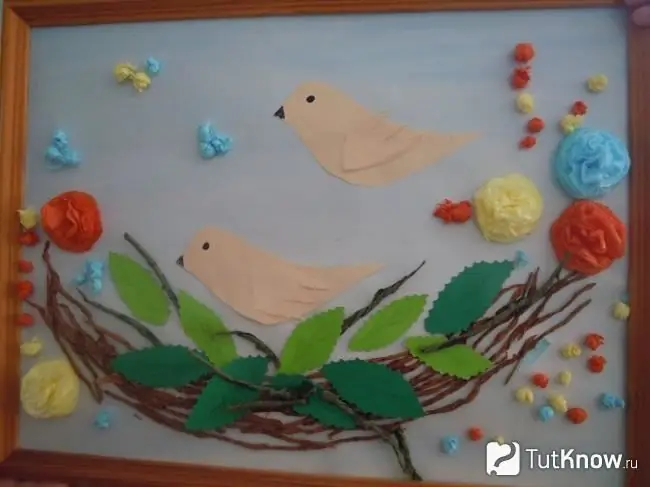
You will also make the following work from paper, which will help depict spring on a cardboard canvas. Attach flowers created from napkins here, and form a bird's nest from brown threads. Cut out leaves from fabric or green paper, glue them in some places of the nest. Cut out the birds and their wings from light brown paper. Have the child tear the napkin into identical pieces, crumple them, and then glue these balls onto the picture to make it fun and interesting.
The next work will also be drawn first with paint. First you need to paint the background with blue paint.
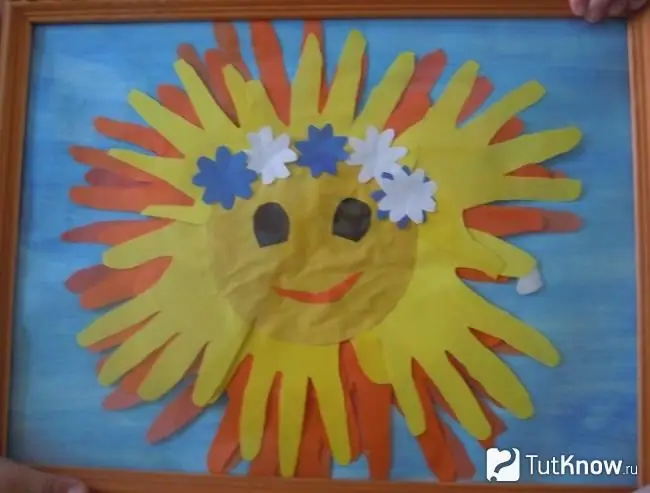
- Have the children put their palms on the back of the yellow and orange paper and circle them with a pencil. Then they will cut these blanks, which will become the rays of the sun.
- They will need to be attached along the ring of this star, and cut it out of yellow paper and glue it to the center.
- It remains to decorate a wreath of flowers in this way, stick it on the sun's head, after which the work is completed.
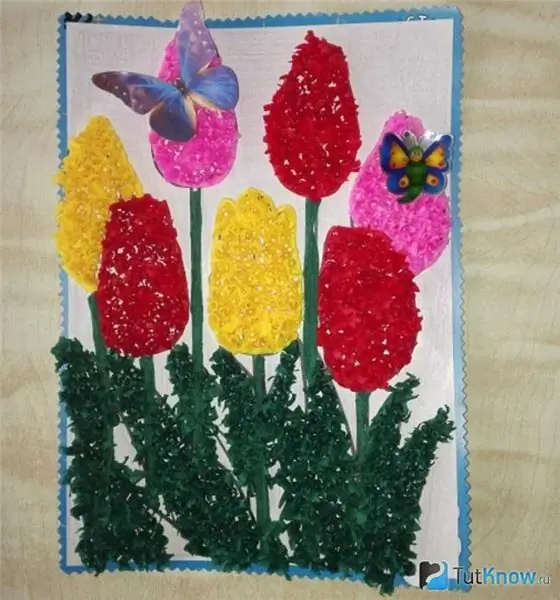
You can cheer up the spring mood if you make crafts out of paper using the facing method. See how children like to make such bright bouquets. Trims from napkins are attached to a pre-created shape, which they draw with a pencil.
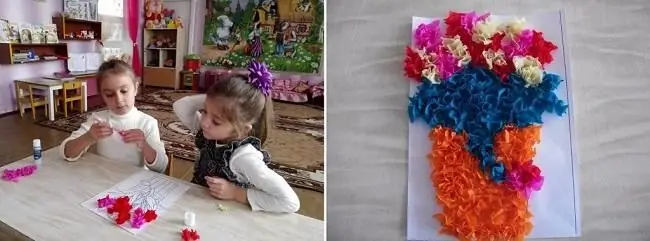
In this technique, you can paint a variety of spring landscapes. If the children want such tulips to bloom on the canvas, then you need to glue the cardboard with a light cloth, and attach an openwork braid from the edge or cut a border out of paper. Now you can draw tulips and glue bright trims as their buds, and the green ones will become leaves.
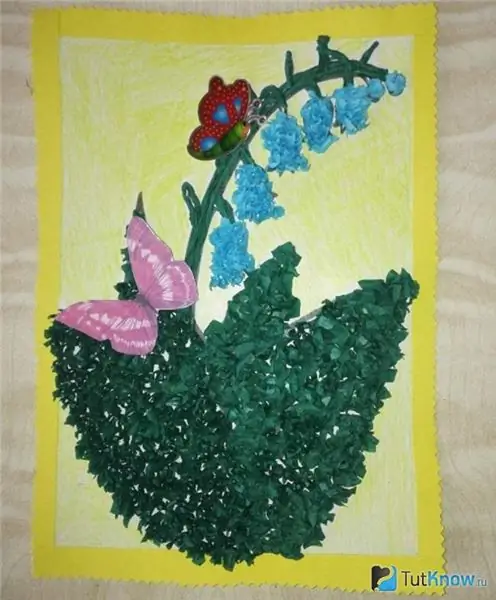
The spring flower lily of the valley can be depicted so that its flowers are not white, but blue. The child will draw a butterfly on paper, cut it out and stick it to his work.
Here's how to draw spring using the most fun ways. The video will show how wonderful this time of year is and how you can portray it on paper.
In just 10 minutes you will learn how to paint a spring landscape.
In the same short time, you will be able to depict this time of year using the pointillism technique.


