
- Author Arianna Cook cook@women-community.com.
- Public 2024-01-12 17:55.
- Last modified 2025-06-01 07:38.
You can easily turn plastic bottles, buckets into elegant baskets. Old newspapers and magazines make flowers, trees, and even a pencil holder. How exciting it is to create beautiful things with your own hands from unnecessary ones. If after the repair there are empty plastic containers from paint, glue, turn them into adorable baskets.
How to make a bucket basket with your own hands?

Very few people will guess what such cozy baskets are made of. Here's what was taken for needlework:
- plastic bucket;
- sandpaper;
- wooden clothespins;
- glue;
- white alcohol;
- lace sewing;
- threads;
- the cloth;
- jute twine;
- wooden beads.

First, let's prepare the plastic bucket. Go over its outer sides with fine sandpaper, then degrease with alcohol.

Carefully, so as not to injure yourself, remove the iron springs from the clothespins. In this case, it is convenient to help yourself with a small flat screwdriver.
Prying the edge of the metal blank with a screwdriver, you must first release one wooden side of the clothespin, then the second.

Lubricate one piece of wood with glue. Moment, attach them to the outer side of the bucket, applying clothespins to it with the flat side. Glue the second one too, placing it closer to the first. We attach them all in the same way.

Measure the diameter of the bucket inside with a measuring tape, then wrap the inner side of the container with it at the top and bottom. Determine the height of the container. Based on the measurement data, you need to cut out two parts: the bottom, which has a round shape, and the sidewall, it is rectangular. Sweep the small edges of the latter together, sew a round bottom to the bottom.

Sew sewing or lace to the top of the resulting part.

Place this cover inside the bucket with the seam inside.

Wrap the handle of the bucket with twine, you can fix it with glue. If you have not used it before, then the end and the beginning of the thread must be fixed with it. Replace the handle.
We are finishing the master class, the basket is almost ready. It remains to cut a rope of sufficient length, string its tip along a bead on 1 and 2, fix it by tying it with 2 knots. Wrap a beautiful container with this decorative element.
Here's how to make a DIY basket. This can be used for staging the fairy tale Little Red Riding Hood, so that the main character takes the pies to her grandmother in it. You can also store here tools and threads for knitting and other handicrafts.
How to make a pencil holder from unnecessary things?
For this, you can also use all sorts of unnecessary items, including the wooden clothespins that you used out.
They also need to be disassembled, separate the metal part. Degrease a small plastic container or glass, glue the halves of wooden clothespins here, but paint them first.

So, for this job we used:
- wooden clothespins;
- a glass or other container of this shape;
- paints;
- brush;
- glue;
- degreasing solution;
- sandpaper.
If desired, even toilet paper sleeves will play in a new way. See how to make a pencil holder out of this material. You will need:
- 3 bushings;
- PVA glue;
- newspaper.
Cut a strip from the newspaper, the width of which is equal to the height of the sleeve. Such a pencil case can be made with or without a bottom. In the latter case, it will need to be moved around the table, if it is necessary to move it, but not lift it.
To make the bottom of the stand, place the sleeve on a piece of cardboard and draw the bottom circle. Cut the cardboard blank along the contour, adding a little. Glue it to the bottom of the sleeve.
Apply PVA to one side of the ribbon, glue it to the sleeve. Also issue two more. Glue all three together. When the structure is dry, you can fill the original containers with pencils.

If you want to know about another way to transform bushings, then pay attention to the following idea. For her were taken:
- toilet paper rolls;
- glue;
- the cloth;
- marker;
- buttons;
- scissors.
If you want, dress the sleeve in a suit like this. To do this, cut out a blank for a rectangular shirt from a piece of fabric, draw a tie with a marker. Glue this item. Attach the fabric for the suit with PVA on top, covering the top edge of the sleeve with it.

How to make a pencil holder using buttons? To do this, they are simply glued to the surface of the fabric to which the sleeves are attached. The third pencil case is decorated with colored paper and sports pictures cut from a magazine.
You can tie the canvas together with the bottom according to the size of the sleeve, arrange the pencil case in this way.

And here's how to make a pencil case from natural material. Two sleeves need to be shortened at different levels, then glue these and another one together. With a jigsaw, you need to saw the small branches into pieces, then glue them to decorate the pencil holder.

Empty bottles of shampoo, hair balm, and other colored plastic containers make great pencil holders.

Remove the covers. If you wish, cut the top off with a knife to make it wavy. Cut out a funny mouth from black colored paper, glue white teeth to it. Attach these items to the front of the shampoo jars. These fun pencil holders will cheer you up during work or study, especially if you attach doll eyes to them. They can be glued on top of bottles or on flowers, as in the first sample.
If you don't have doll eyes, you can easily make them by cutting out two empty clear pill capsules. Inside you need to put pieces of dark plasticine or beads to make the pupils. Empty cans can also help you figure out how to make a pencil holder. Instead of eyes, we attach the bottle caps, and the bottle ring will become the mouth.

If you want to make pencil holders for a kindergarten or for a large family, then cut off empty plastic cans, sand the edges with sandpaper. Attach them to the wall with self-tapping screws.

Old magazines also make great desktop pencil cases. The next master class will help you figure it out.

For this idea you will need:
- unnecessary thick magazine;
- PVA glue;
- thick cardboard;
- pencil.
Place the magazine on its edge, divide its sheets into 5 equal parts. Secure them with paper clips. Connect the first group of sheets to the last so that all of them are arranged in a circle. Place a pencil in the center. Pull the edges of each piece towards the middle, glue them here using PVA.
Put the blank on a sheet of colored cardboard, draw the resulting petals on it. Cut this figure out of cardboard, glue it to the bottom of the stand. When the solution is dry, turn the product over, store pencils, pens and markers in it.
An original pen holder can be made from unwanted books or magazines. For needlework, take:
- books;
- stationery knife;
- glue;
- straight extended containers;
- pencil;
- scissors;
- cardboard.
Cut the binding, stack the sheets. Cut a template out of the cardboard according to the diameter of the containers. Attach it to a small bundle of sheets, make two notches with a knife. The same holes must be cut in all sheets, then glued together in groups. Place containers inside to store your stationery.

DIY crafts from old newspapers
It's amazing how many amazing things you can make of them. How do you like this idea for inspiration?

For this to work, use:
- a big book;
- pencil;
- stationery knife;
- cardboard;
- newspapers;
- PVA glue;
- colored paper;
- wire.
Then follow these instructions:
- This house is made from a cardboard box. To make shingles, cut small rectangles from newspaper, fold each in half, and glue in this position.
- We attach them to the visor and to the roof, first making the first row, above it, slightly overlap, you need to arrange the elements for the second. In this sequence, it is necessary to arrange the roof and visor of the house.
- Make the shutters out of cardboard, like pipes, a balcony, and window frames. Then each of these elements must be glued into place.
- Draw a wavy line on the cover of the book, cut along it with scissors. Separating several sheets, also draw wavy lines on each top, along which you need to cut with a clerical knife.
- Make paper flowers and wire stems. It is wrapped with a strip of green colored paper or ribbon of the same color.
It remains to make a tree from newspapers. Let's dwell on this in more detail. Let's make something like this.

To do this, take:
- newspapers;
- PVA glue;
- knitting needle number 1, 5;
- paper tape;
- brush and white gouache if you are thinking of painting the wood.
To make a tree, you will need 7 double sheets of newspaper. Roll the tubes from newspaper strips, winding them on a knitting needle, glue the ends of the paper so that they do not unfold. You will need to roll 30 paper tubes. Take 15 of them, put them together, secure with paper tape.

Take a newspaper tube, stepping back a little from the bottom of the tree trunk, we begin to wrap it around. To make the tube well fixed, glue its ends to the trunk.

Divide the tubes of the trunk in half, wind the newspaper at the bottom of one half. Further, this fragment needs to be divided into several more parts, wrap each with a paper tube to make branches.

Wrap the ends. Wrap paper tubes around the trunk at the bottom several times to keep the tree stable. If you have used black and white newspapers, then you can leave your creation as it is. If colored, then cover the wood with a mixture of glue and PVA.
If you want to make such a tree from newspapers, then start creating it in the same way as the previous one, but wrap the trunk not with a paper tube, but with a strip of newspaper. It needs to be glued.
You will need more strips, each must be folded several times, then cut out the sheets. When you unfold the workpiece, you will have several leaves at once. You can make these fragments in the form of flowers.

Such a fabulous forest from newspapers will turn out to be mysterious. For it you will need:
- two identical blanks for trees, an animal, a girl;
- the same size cardboard templates.
Cover the cardboard tree templates with newspaper on both sides. To make the design more rigid, apply PVA glue to it from the face and from the inside. When it's completely dry, fold the tree underneath, glue it to the book. You will also make a wolf and Little Red Riding Hood.

If you want to make a composition so that there are flowers on it, then see how to make a newspaper so that it turns into them. With your own hands, you will need to prepare:
- newspapers;
- wire with a diameter of 2 mm;
- glue;
- scissors;
- nippers;
- ribbon or braid in light shades.
5 types of petals of different sizes need to be cut from the newspaper. To simplify the task, attach a piece of paper to the presented ones and simply redraw them.

Then you attach these templates to the newspaper, cut out the petals.
You will need 5 petals of each type. It is most convenient to cut a strip from the newspaper, fold it in squares, cut out several flower elements at once. Twist each one at the top as shown in the photo.

Use pliers to cut the wire so that it is as long as the stem. Wrap its top with small petals first, re-gluing each one in succession. Then, one by one, there are more and more large ones. The outer circle is made up of the largest petals.

To make a sepal for a flower, cut off two strips 6 cm long from the braid, wrap them around the bottom row of petals near the wire. Cut the ends of the braid in the shape of the letter V.

Here are some wonderful newspaper flowers you will get.

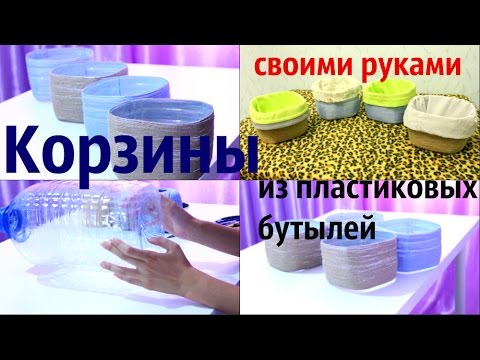
Do-it-yourself container for small things from a plastic bottle
These items can also be given a second life. You already know about a lot of things that can be made from plastic bottles, but not everything. If you have such a container at home, see how to make containers for small items or, for example, how to make a basket with your own hands. You can put flowers or a soft toy in it to give such a wonderful present.

For needlework, take:
- colored plastic bottle;
- white satin ribbon;
- glue;
- scissors.
Then follow this procedure:
- Cut the plastic bottle at the shoulders to make a handle for the basket out of this part, cut a tape 1, 5-2 cm wide on top of the resulting blank in a circle.
- You need to chop the bottle into strips of the same width with scissors, as shown in the photo.
- Now you need to braid the resulting strips in a checkerboard pattern like a basket. It is better to immediately take a tape of sufficient length, roll it into a ball and use it for work. If you still run out of it, glue the tip of the second strip to the first or sew it on. Hide the connection inside the basket.
- Take a pre-cut handle, decorate it with tape, glue it in place.
If you have plastic bottles in beautiful colors, they will make wonderful containers in which you can store your makeup accessories. To do this, use:
- plastic bottles;
- knife;
- scissors;
- iron.
Cut the top of the bottle with a knife, then trim the edges with scissors. In order not to be cut off by sharp edges, when you use containers, heat the iron, lean our blanks against it, as shown in the photo.

After reading the article, you learned how to get rid of unnecessary things in order to put things in order on the one hand, and on the other? create so many things from junk material.
Of course, there are still a lot of ideas on this topic. We suggest that you familiarize yourself with another one. See how to make a basket with your own hands from a plastic canister.
We suggest looking at how to make tubes from newspapers, so that you can then create beautiful useful crafts out of them.


