
- Author Arianna Cook cook@women-community.com.
- Public 2023-12-17 14:23.
- Last modified 2025-06-01 07:38.
After the construction of the bath, questions arise how to properly sheathe it with clapboard and avoid frequent mistakes. We present useful tips for choosing a material and how to install it. Content:
- The need for finishing
-
The choice of lining
- Wood
- Classes
- Installation methods
-
Plating instructions
- Preparatory work
- Frame
- Insulation
- Fastening the lining
Clapboard decoration is a solution close to ideal. Except for a couple of negative points. The steam that is now generated with expensive steam generators and ovens dissipates quickly and the air temperature drops. And it is not so easy to choose and lay the lining correctly. But for a real Russian master, nothing is impossible!
The need to finish the bath with clapboard

A real Russian bathhouse, which became famous in Russia, is an ordinary steam room in a bare log house without any decoration. This technology contributed to the long-term preservation of steam: heat-absorbing massive walls did an excellent job. The log house absorbs moisture well and just gives it away over time.
But this design has significant disadvantages today. Firstly, logs, which were previously considered the most affordable material, now cost a lot of money. So, it is simply a pity to destroy the building in such a merciless way. Secondly, in order to completely heat a mass of wet wood, it will take at least 4-5 hours, which is also not very convenient.
Today's technologies for arranging a bath are significantly different from the old Russian ones. Now it is much more convenient to decorate the walls with clapboard laid on insulation and foil. The consumption of heat energy is reduced, the warm-up time is reduced, the building remains presentable for longer.
Features of the choice of lining for a bath
Before sheathing the bath with clapboard, you need to understand the types of material. Not only the appearance of the building, but even the health-improving effect of visiting it depends on how competent the choice will be. Moreover, the type of wood, and the class, and even its profile, matter.
Lining for a bath: the choice of wood

Most manufacturers of building materials use both hardwood and softwood to create lining. Indeed, for different types of premises, different types of lining are relevant. For couples, deciduous wood material is more suitable than others. And it is better to finish the recreation rooms with coniferous wood.
Among conifers it is used:
- Larch … Durable material with low thermal conductivity. Possesses a pleasant appearance, is capable of emitting an unobtrusive smell of wood when heated strongly.
- Cedar … One of the most beautiful and valuable breeds. Such wood looks expensive and has antiseptic qualities.
- Spruce … Soft and easily workable wood. Spruce lining looks neat and attractive. In terms of strength, it is inferior to material from larch and oak, but it has a right to exist due to other positive qualities.
- Pine … The most commonly used material for lining. Since such wood is saturated with resins that are released when heated, it is better to lay it in a relaxation room with a lower temperature. Otherwise - high quality, great view, reasonable price.

Popular among hardwoods:
- Oak … An expensive breed that has established itself as a durable and flexible material. The room, sheathed with oak clapboard, is less likely to be exposed to rot and mold. When the temperature rises, oak wood releases substances that kill pathogenic bacteria in significant quantities.
- Aspen … High performance material. Main advantages: ease of processing, presentable appearance, low thermal conductivity.
- Linden … Wood with a homogeneous structure and a pleasant smell. Linden lining is considered perhaps the best option for interior decoration of a bath. It retains its natural color even under extreme temperature fluctuations.
- Ash … It is characterized by less strength, but a significantly better cut in terms of beauty. Moreover, the ash material never cracks and has healing properties.
- Alder … Wood that is highly saturated with tannins. Thanks to them, the air in the bath will always be clean and fresh. In addition, unlike oak, alder is easy to process.
On a note! By successfully combining various types of wood paneling, it will be possible to create the most successful interior and a deep healing effect.
Classes of lining for a bath

If it is easy and simple to decide on the type of wood, then it is somewhat more difficult to choose a lining of a suitable class. Having bought the cheapest material, it is easy to ruin the entire building, and too expensive does not always justify its cost. In order to avoid trouble due to the presence of chips, knots and other defects in the material, you should carefully read the following classification:
- Class "Premium", "Extra", "O" … Expensive, homogeneous wood without defects.
- Class "A" … Material with a homogeneous structure and the presence of 1 knot per 1.5 meters.
- Class "B" … Lining, allowing the presence of resin pockets, through cracks, more frequent knots.
- Class "C" … Very poor quality material. Not suitable for bath cladding, as it has a lot of defects.
Among the abundance of profile options ("Calm", "Soft-line", "Thorn-groove in length", etc.), the type "Euro" is highly popular. In principle, it is distinguished from the rest by its increased quality, which also affects the price. Ergonomics of Euro-lining, width, length and other characteristics are matched perfectly, which allows to reduce material consumption. The Euro profile view is also characterized by the presence of a deeper groove and a drainage ditch.
Methods for mounting the lining in the bath

Regardless of the type of lining installation, the boards are fastened to a frame made of wooden planks.
With regard to fastening methods, several different options can be distinguished:
- Horizontal … In this case, the frame bars are mounted vertically on the wall, and the strips themselves are perpendicular to them. That is, horizontally.
- Vertical … The method is the opposite of the previous one. The frame slats are installed horizontally, and the lining is attached to them in vertical rows.
- Diagonal … The frame consists of wooden planks, inclined to one side, and the lining, respectively, is mounted with a slope in the opposite direction.
On a note! The ideal mounting option for a bath is vertical or diagonal. In this case, the water from evaporation will not accumulate between the slats, but will drain freely. The speed of work and the final appearance of the room directly depend on how convenient the method of fastening the planks is.

There are 4 most common options:
- Through method … Most often used for shelves and seats. Since the self-tapping screw in this case is screwed directly into the bar, a hole remains on the surface, which significantly worsens the appearance of the coating.
- Kleimer fastening … The most convenient and primitive. In this way, the easiest way is to make a high-quality aesthetic installation. Since the cleats are mounted to the frame bars, it is allowed to dismantle the lining without damaging the strips.
- Fastening by direct driving a nail into a thorn … Not suitable for every type of lining. The nail is driven at a 90-degree angle into a spike that fits snugly against the crate. There is always a small risk of marriage, but it is insignificant in comparison with the next type.
- Oblique driving of a nail into the pot … The most difficult way, requiring considerable skill and effort. It is used less often than others, because it often leads to marriage.
Instructions for decorating a bath with clapboard with your own hands
If the material was chosen correctly and the installation methods were studied properly, finishing the bath with clapboard will not be difficult. The fast-paced process is broken down into several primitive stages that even a beginner can do. First, preparatory work is carried out, then the crate is mounted, insulation and insulation are laid, at the end strips are attached and covered with protective equipment.
Preparatory work before sheathing the bath with clapboard

Before finishing with clapboard, it is necessary to prepare the surfaces of the walls and ceilings. Deep depressions and bulges should certainly be leveled with plaster. It is equally important to treat all surfaces of the bath with an antifungal agent that saves the building from the appearance of pathogenic fungi. At this stage, it is also worthwhile to carry out all the necessary communications, which will later be hidden under the lining panels. The material itself is brought into the room 2 days before the start of installation, so that it matures and gets used to the climate.
On a note! Since the bathhouse is a building with high humidity, any metal elements must be made of galvanized iron. Otherwise, there is a risk of rapid failure due to rust damage.
Installation of the frame under the lining in the bath

For the production of the lathing, wooden bars of different sections are used, depending on the thickness of the insulation. The most commonly used option is a 20x50 bar. At the beginning of the process, the places for fastening metal suspensions are determined. As a rule, they are arranged in rows with an interval of 40 cm. The distance between the rows themselves should not be more than 50 cm. The hangers are mounted on dowels in pre-drilled holes.
The lathing bars are fixed on ready-made metal suspensions, taking into account the future location of the lining. For vertical installation of the lining, the bars are installed horizontally, and vice versa. There should be a distance between the battens of the sheathing to facilitate normal air circulation.
Insulation of lining in the bath

The lining of the bath inside with clapboard implies the obligatory presence of thermal insulation and vapor barrier. Insulation is tightly laid between the rows of the crate. For a bath, it is better to use foam glass - a material that copes well with soundproofing and heat-insulating functions in a humid environment. But the usual mineral wool is better left for rooms with more stable microclimatic conditions.
Since foam glass has universal properties, the vapor barrier layer does not need to be installed. For other types of insulation, this stage is mandatory. It is better to overlap the vapor barrier strips and secure them together with tape.
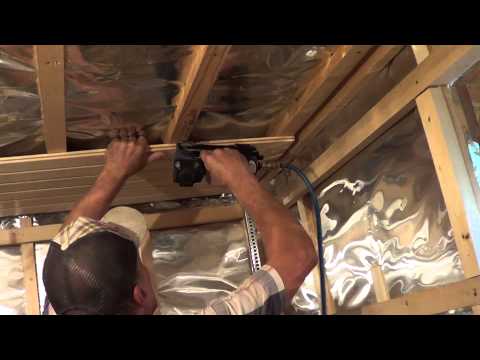
Fastening the lining in the bath

The installation of the lining begins with cutting the planks of the required length. At the first plank, you need to cut off the spike, then carefully set it with a cut into the corner and fix it. For easy and quick installation, you can use clamps, fixing them on the strip and fixing them on the crate. The new bar is installed with a spike in the groove of the previous one and is slightly tapped with hammers for greater tightness. This algorithm is typical for all subsequent cladding.
At the final stage, the finished wall and ceiling covering is treated with wax or oil compounds to extend the service life of the lining. The protective layer is worth updating from hour to hour. During the operation of the premises, it is not recommended to apply various solvents and abrasive substances to wooden coatings. If over time one of the boards is damaged by any mechanical impact, it must be replaced immediately.
For clarity, we suggest watching a video about decorating a bath with clapboard:
From this point on, the process can be considered complete. As you can see, the installation of the lining does not bode well for any difficult and lengthy stages. Of course, you will have to make an effort. But knowing how to sheathe a bathhouse with clapboard according to all the rules, you will be able to avoid the most stupid and ridiculous mistakes.


