- Author Arianna Cook cook@women-community.com.
- Public 2024-01-12 17:55.
- Last modified 2025-01-23 09:40.
Creation of a panel using stencils, spot painting, drawing with napkins, acrylic paints will help novice painters decide on their favorite type of artistic creativity. Many people think that they cannot draw like professionals. But once you start, your artistic ability will certainly develop, and you can create homemade masterpieces. After all, now there are a lot of drawing techniques, find the one that is close to you. Perhaps you want to create a panel or depict a summer landscape in watercolors. See what kind of art you like.
Unconventional drawing techniques - panel creation
If you are an aspiring painter, then you can use a stencil to make a wonderful piece of art.
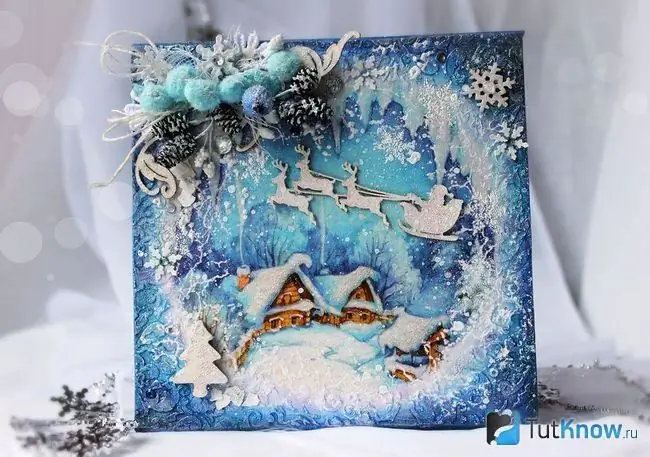
To create such a winter landscape, you need to take:
- a sheet of cardboard or fiberboard;
- texture paste;
- acrylic primer;
- a stencil with a pattern;
- napkins or decoupage card;
- varnish or transparent medium;
- PVA or special glue for decoupage;
- decorative elements: ribbons, cones, twigs, rhinestones, beads, flowers, berries;
- optional ? powder for embossing.
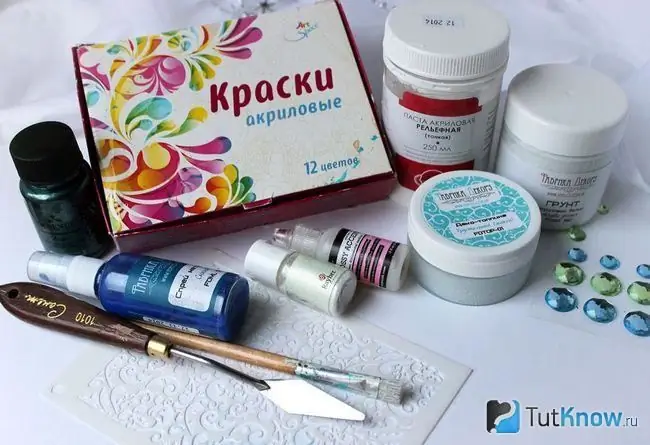
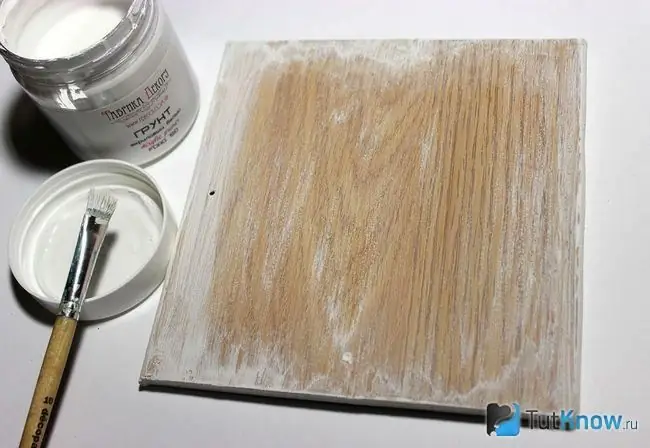
In this case, a panel on the theme of winter was created on the basis of a blank with a tree structure. It must be degreased on one side and the other. To do this, take a liquid intended for nail polish remover. Degrease the surface with it, and then apply the primer mainly around the perimeter of the workpiece. Start decorating this base from its wrong side.
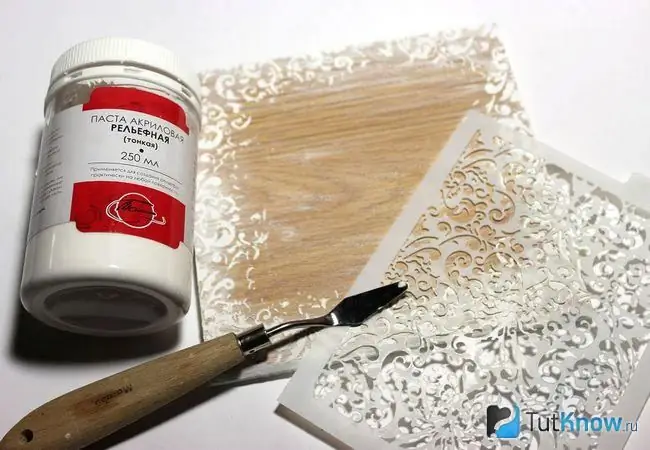
Let it dry. Then take a stencil, use it and an acrylic embossed paste to apply the appropriate pattern with a palette knife.
Now paint in different shades of blue with the brush, also using the stencil.
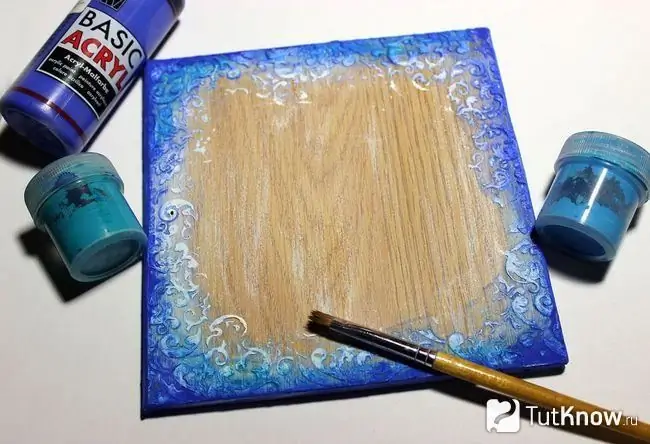
Beginning artists will certainly come in handy with this drawing technique. When the paint is dry, tint the resulting pattern using wax pearlescent paints. The texture will become more voluminous.
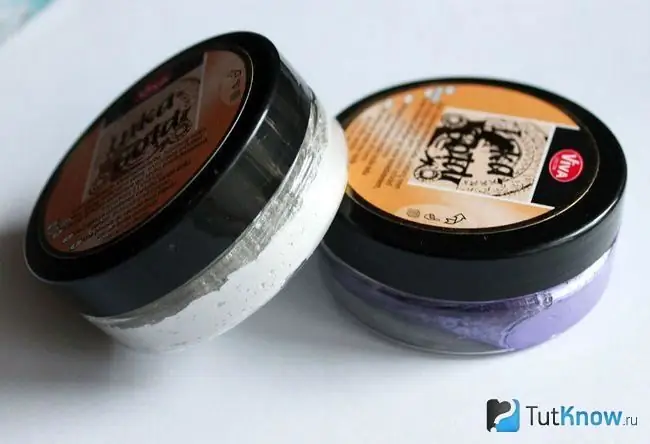
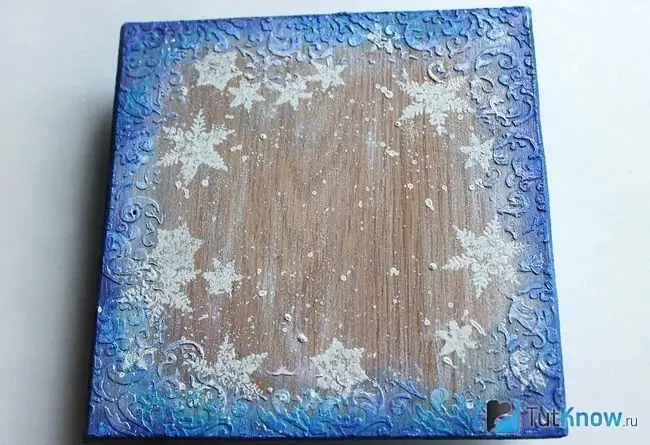
Now we need to make snowflakes using hot embossing. Then they need to be covered with a small layer of blue pearlescent spray.
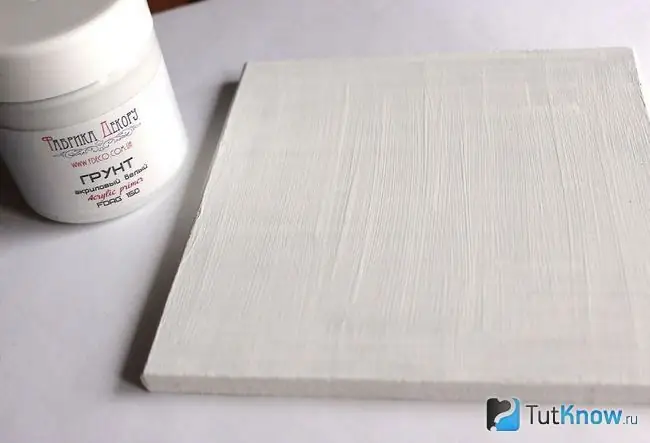
Turn the artwork over to the right side and apply several coats of primer here.
Be sure to let each layer dry before applying the next one. Otherwise, the paint will be uneven. When the top coat is completely dry, make the surface smoother by sanding it with fine sandpaper.
If you have a decoupage card, then the panel is created further as follows. It is better not to cut this paper blank with scissors, but to cut it off at the edges. If you are using a napkin, then take only the top layer.
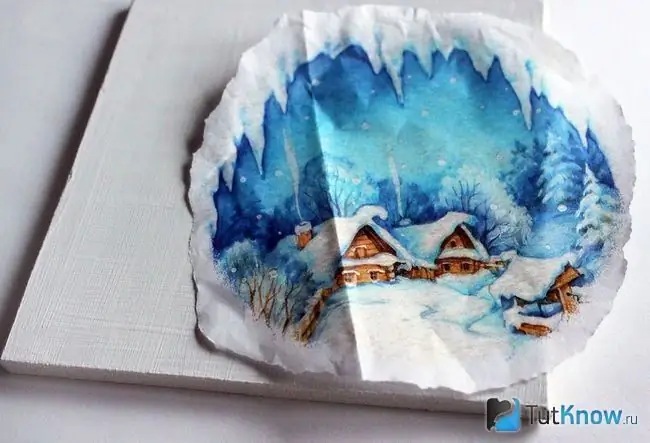
Glue this paper piece onto PVA diluted with water, or using decoupage glue. It is convenient to use a special brush called a fan brush.
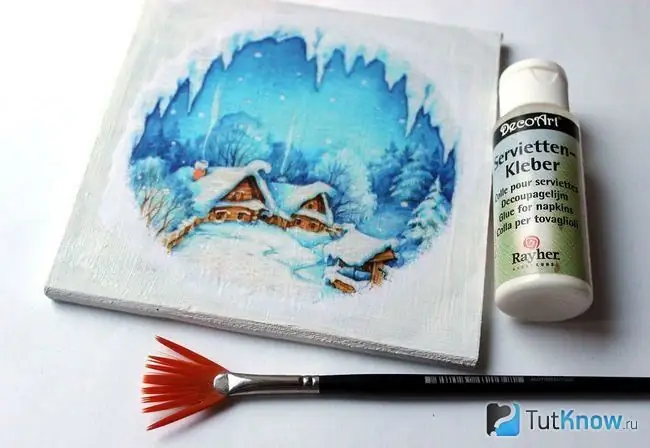
Stencil around the edges of the wood and apply textured paste here.
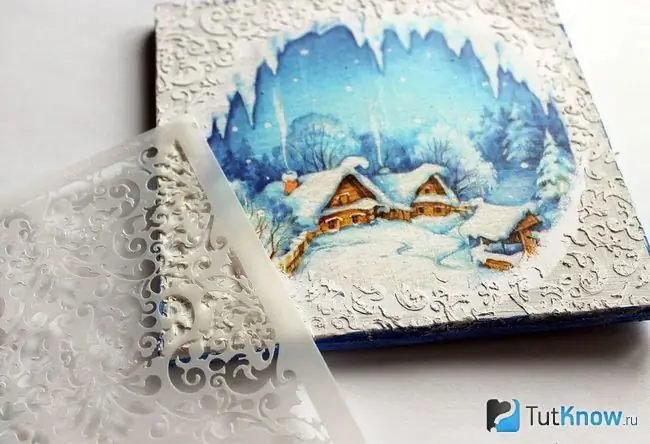
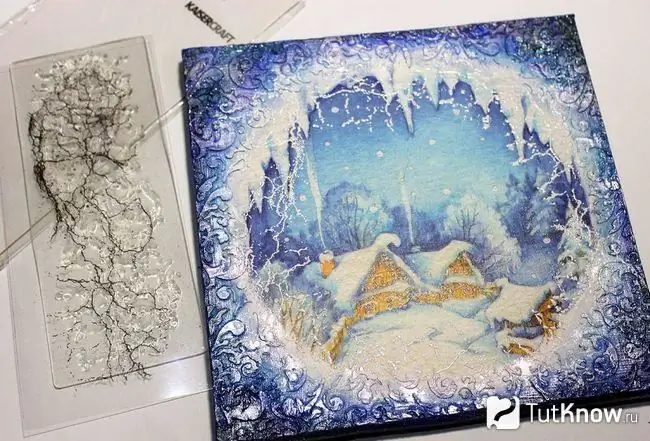
Proceed in the same way as for the decoration with the reverse side of the picture. At this stage, the panel will be like this.
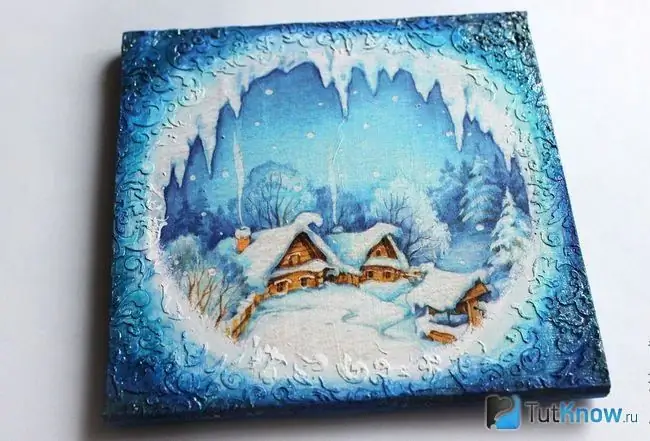
You can take a stamp and, using the embrossing technique, apply frosty cracks here with white powder.
Now you will need to cover the work with varnish or transparent medium. Make the upper left corner more voluminous by gluing chipboard, lace, alder cones, ribbons, lace here. You can also glue the look of Santa Claus with reindeer, a Christmas tree on the picture to get a real winter New Year's landscape. These elements can be made of cardboard or wood.
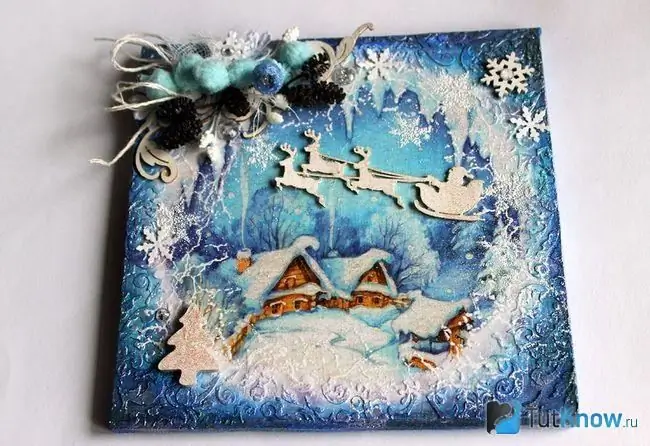
Spray the artwork with white acrylic to make it look like it's snowing. Sprinkle with glitter, you can also decorate the work with small crystal balls. Perhaps the following technique will be more to your liking.
How to paint with acrylic paints - methods and techniques
Such paints? an excellent material for creativity, they allow you to decorate a wide variety of surfaces. You can decorate a glass bottle, the decor for which is based on mythology. The roots of this tree symbolize the underworld, which is called "Nav"; the trunk of a tree symbolizes life on earth, this is "Reality". The branches in this case are the abode of the gods, this is "Rule".
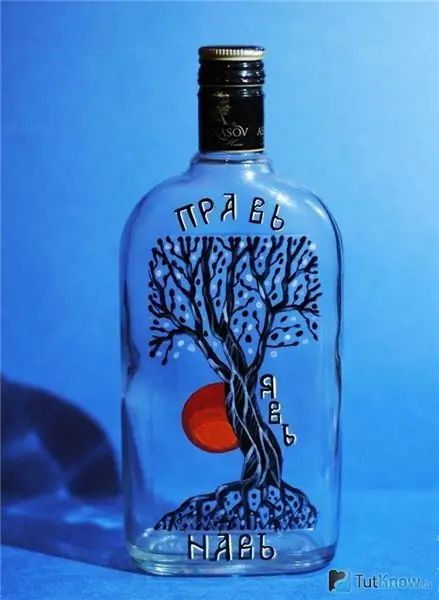
To have the same painting, you will need to take:
- flat glass bottle;
- round synthetic tassels;
- acrylic paints for glass;
- water;
- cotton pad;
- alcohol;
- palette;
- solvent glue.
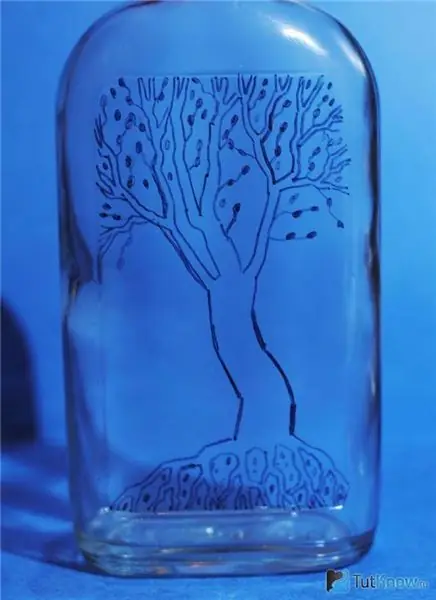
First you will need to remove the labels from the bottle. To do this, soak it for 20 minutes in warm water, and then remove all the stickers. If this does not work right away, then use a solvent for the glue. Now you need to wipe the bottle dry and degrease the glass surface by wiping it with alcohol. Take a thin black marker and use it to draw a tree on the bottle. If you don't like something, you can easily erase the lines of the marker with a cotton pad.
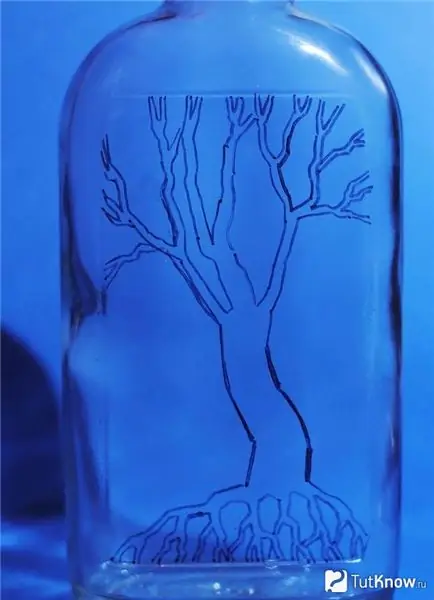
Now you need to depict small leaves on the branches, and also draw them between the elements of the crown. You will have almost the same ovals on the roots of trees, but these additional images symbolize stones.
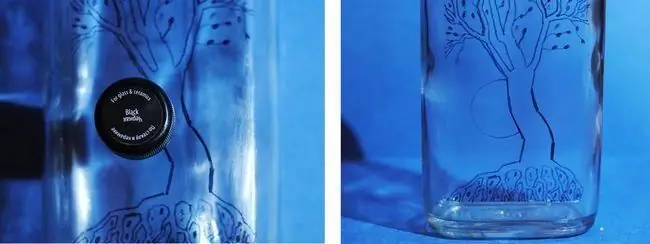
You will also need to trace the sun that sets. To do this, take a round object, such as a lid, and circle it.
Now pour water into the container so that you can rinse the brush and start painting on the bottle with black acrylic paint. When you see that the strokes have become uneven, it means that the paint has begun to dry out.
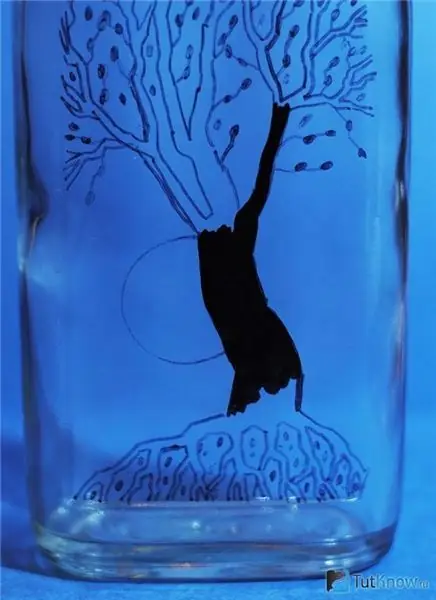
Then rinse the brush in water and continue to draw the trunk of the tree and then the branches. After that, go to the image of the branches using a thinner brush.
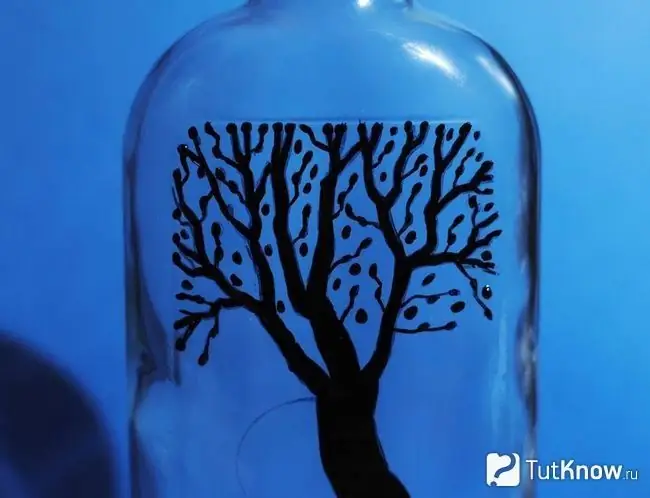
Using scarlet paint, depict the setting sun. And with the help of white, apply strokes to the crown and roots. Also, using this paint, paint white leaves between some of the branches.
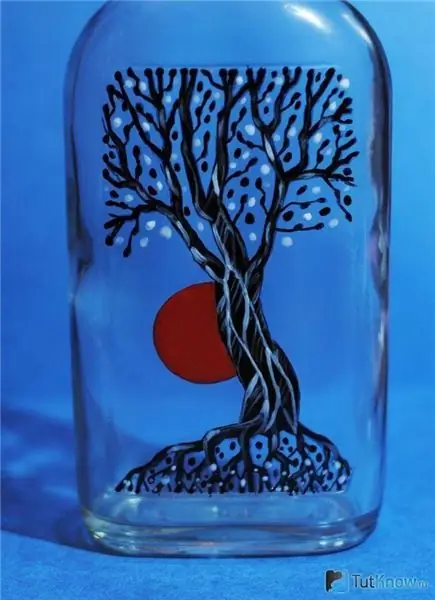
Wait for the paint to dry in the sun. Then start applying yellow paint on it. When this layer is dry, go orange.
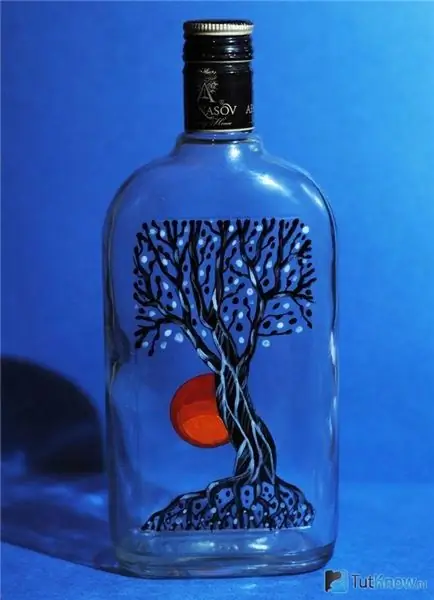
Here's how to draw next. Using a thin brush, write the desired words using black paint. When it's dry, then shade these letters with white.
To make the letters look even, it is better to first depict them with a black marker. If you don't like some features, they can be easily erased with a piece of cotton wool. Here is such a wonderful painted bottle.
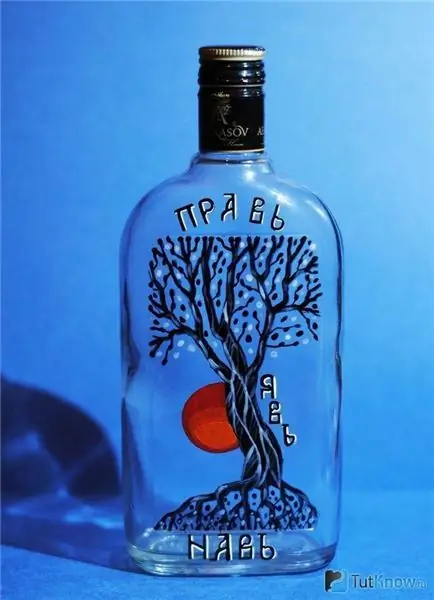
For beginners, this example is perfect for drawing. And if you want images of good spirits to be present in your home, then watch the next master class.
Technique of non-standard painting of a kitchen board
Before starting the creative process, see if you have:
- acrylic paints;
- synthetic brushes;
- whitewash;
- wooden plank;
- napkins;
- solvent;
- palette.
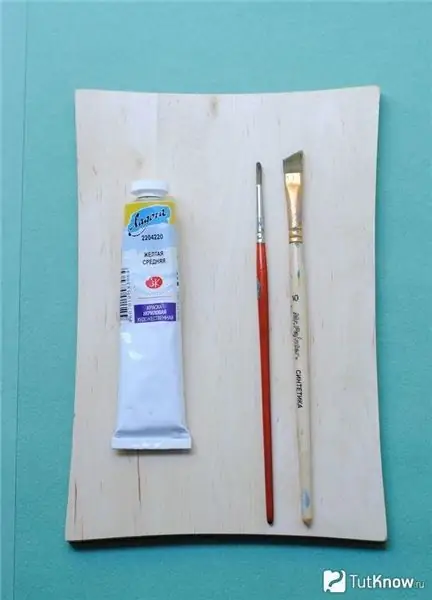
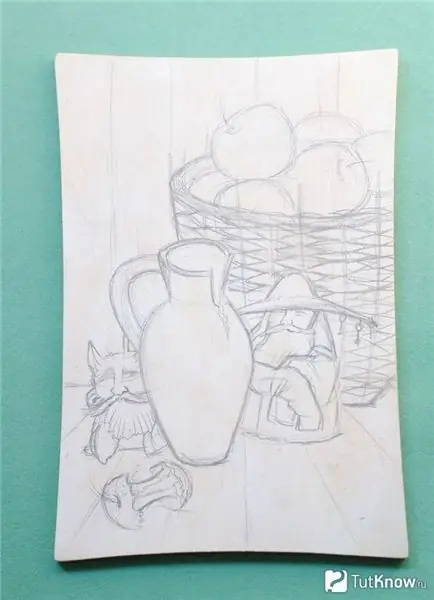
First, paint over the background of the board with white. Try to keep this layer even. If you paint the board with white, the subsequent layers will look brighter.
This acrylic white dries up pretty quickly, so you'll soon be able to draw the outline of your drawing with a pencil. If it is difficult to do it by hand, then use the provided image. It will need to be transferred to a piece of paper and, using a carbon copy, onto a blackboard.
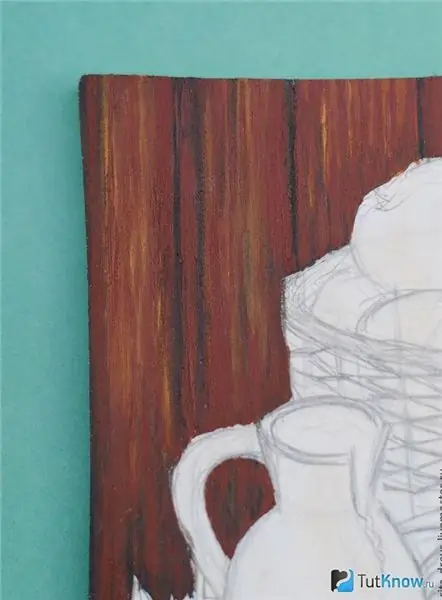
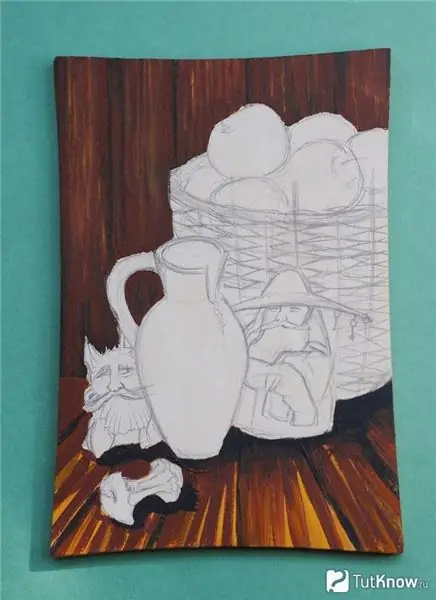
First you need to draw the background. To do this, use acrylic paint, the color of which is called burnt sienna. Do this with a flat brush. Then draw stripes so that you can see these small planks make up the back wall. To do this, take dark colors or mix them with lighter ones.
You will do the same with the planks that make up the floor, but here more use yellow paint, which sets off the brown.
Here's how to paint with acrylics further. Draw beautiful apples. To do this, first paint them in scarlet, when this composition dries, then draw a shadow below by mixing red and blue paint. Above, light falls on the apples. You will achieve this effect if you paint these areas with paint, consisting of a mixture of white and red.
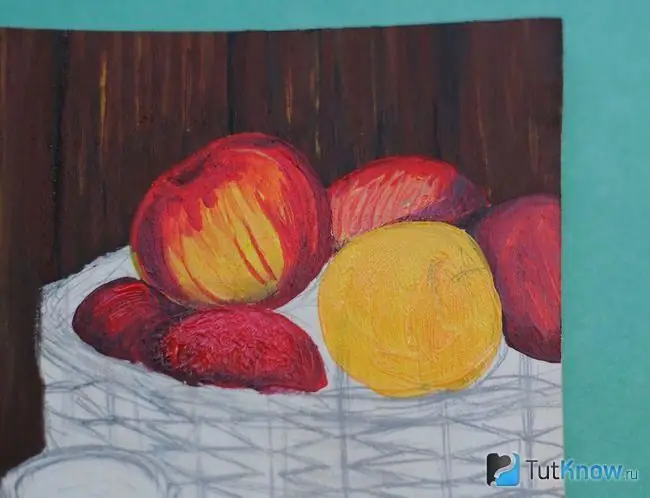
To depict yellow apples, first paint over them with lemon acrylic, then on the palette mix this tone with red and emphasize the shape of a round apple, applying this composition along the halo of the fruit. Also use a fine bristle brush to draw lines on the apple.
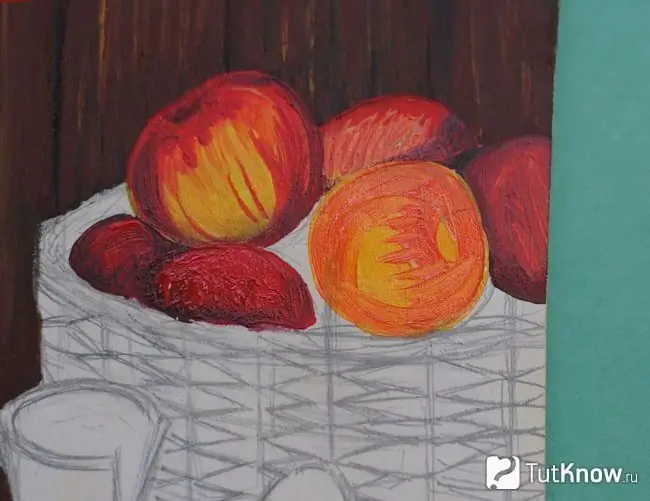
Making rounded strokes, now apply red to the fruit. To get the indentation where the ponytail should be, mix red with a little blue paint.
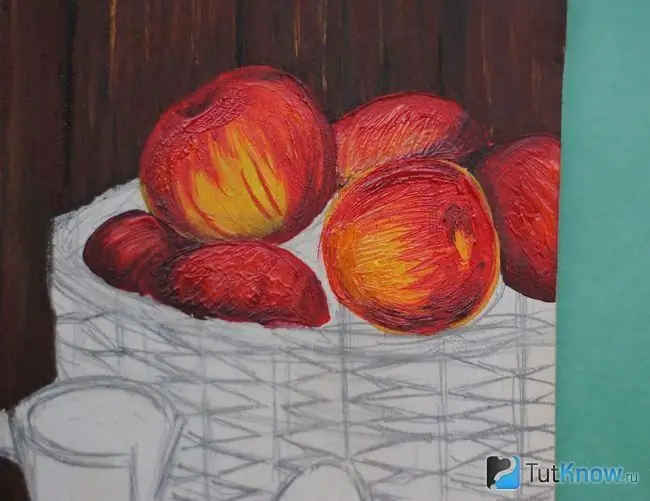
To show that light is falling on these fruits, mix red acrylic with white and lemon. Use this mixture to make small areas of highlights.
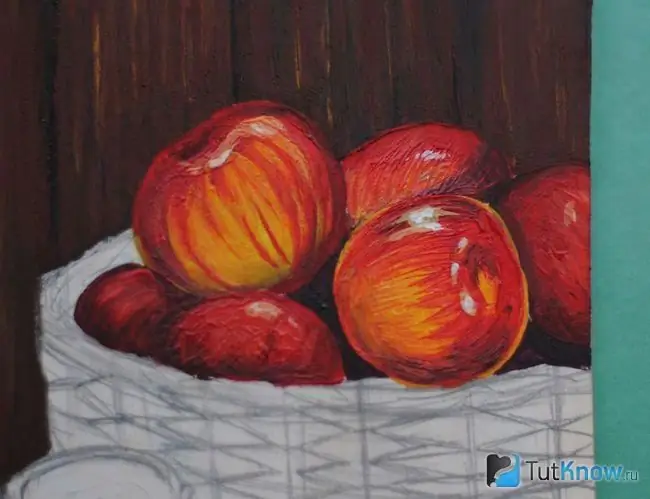
Here's how to learn how to draw next. It will be necessary to show that the basket is wicker. To do this, remember that the left side of the diamonds will be dark, and the right side will be light. Paint over the right one with ocher.
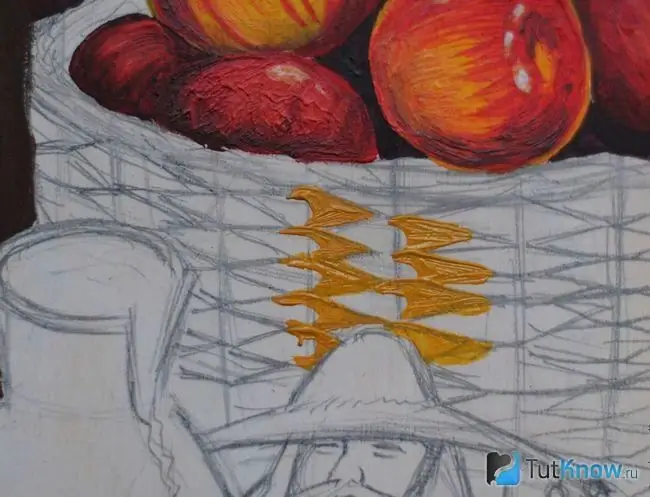
Take the red-brown color and the last, and the left diamonds, paint over with this composition. Cover the last and the first with the product you just made, but add a little sienna. Thus, you have designed these diamonds on the right side. And to decorate them, add a little blue paint to the same composition.
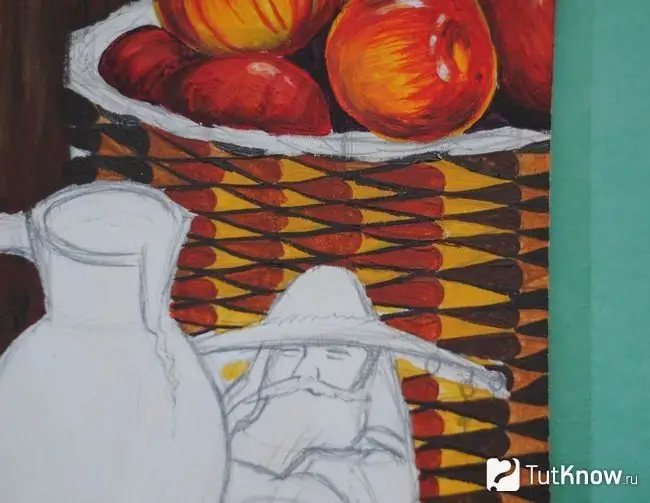
Select the highlights to make the basket more voluminous. Add the finishing touches and the weave will look like this at this stage.
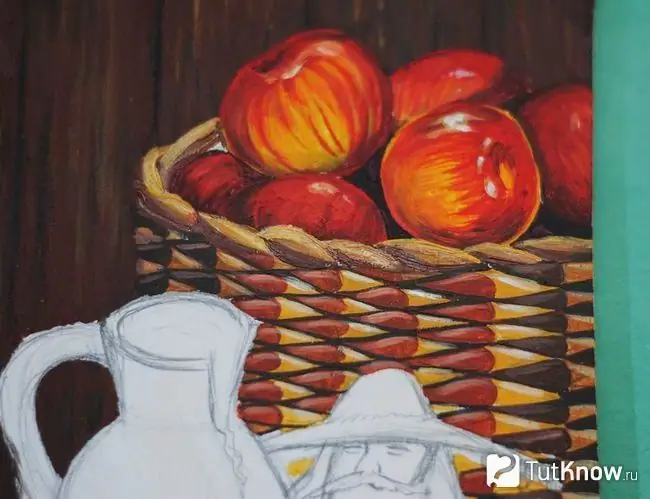
To paint over the brownie, cover his face with a mixture of white acrylic and ocher. And depict the shadow under the eyes and the left half of the face with pure ocher. Mix red acrylic with white to make a pink blush paint.
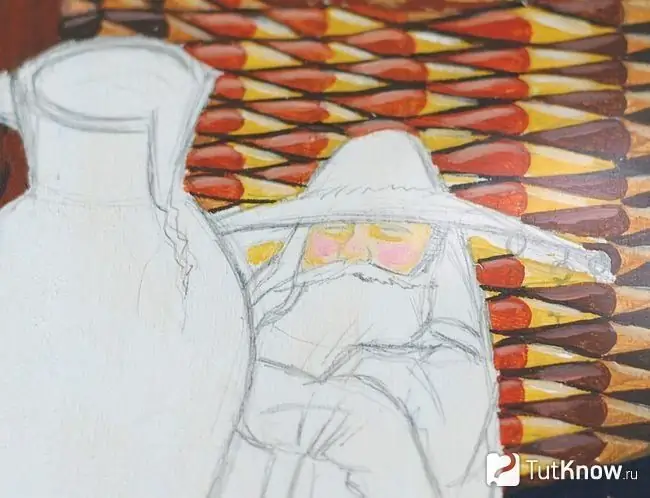
Take a thin brush, scoop up some of the mass made from blue acrylic and sienna with it and draw the slits of the eyes. And depict the oval of the face, nose, eyes with the help of sienna. Let the beard have such a blue-pink color that the brownie looks like an even more mysterious character.
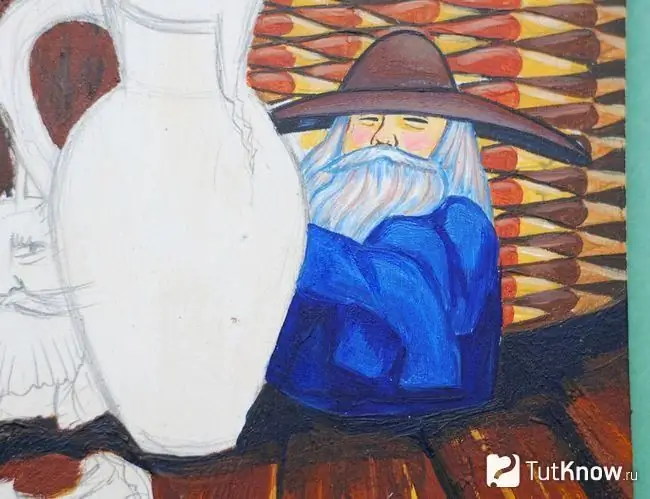
Paint the brownie's caftan with light blue and blue paint. Below is the barn, it needs to be painted over with a product made from ocher and light green acrylic. And by mixing light green paint with whitewash, you will draw his cheeks, ears, forehead, nose, hands.
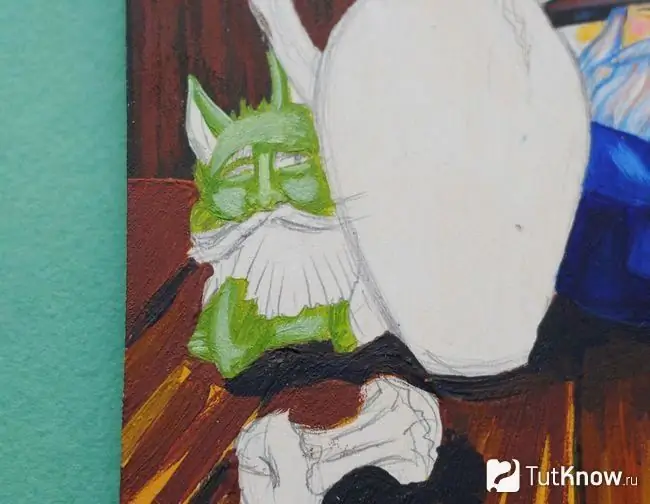
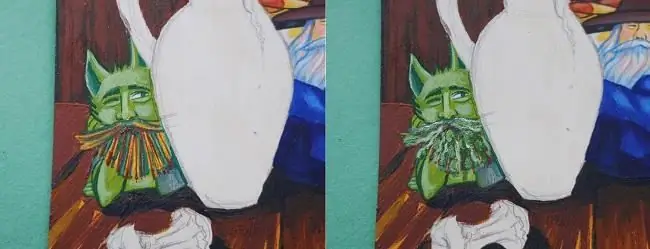
Then you can, based on the presented step-by-step photos, depict this character's beard as bright or make it at your discretion. First, draw such bright lines, and then you need to shade them to make the beard wavy.
To show how the shadow falls into the jug, paint over the inside of this container with a mixture of sienna and blue paint. Draw the outer part in yellow, and highlight the dark highlights with light brown.
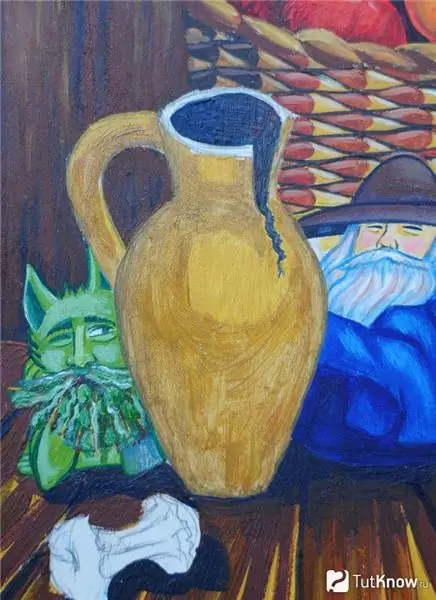
To make the shadows even more significant, paint the outside of the jug with dark brown paint.
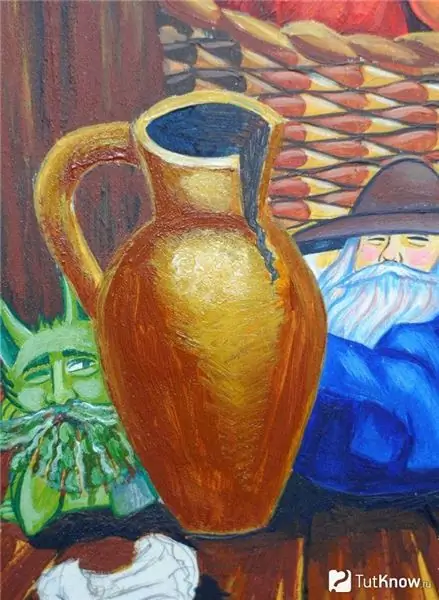
Draw the apple core so that it turns out to be the most natural, see that the peel of this fruit is painted with scarlet paint, and the highlights are made using yellow and white.
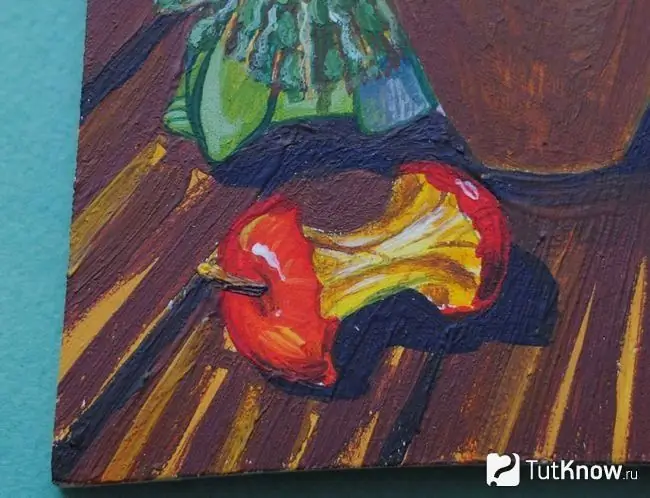
It remains to add the finishing touches, such as the keys under the brownie's hat, the scattered seeds and enjoy how you paint with acrylic paints, you did it great.
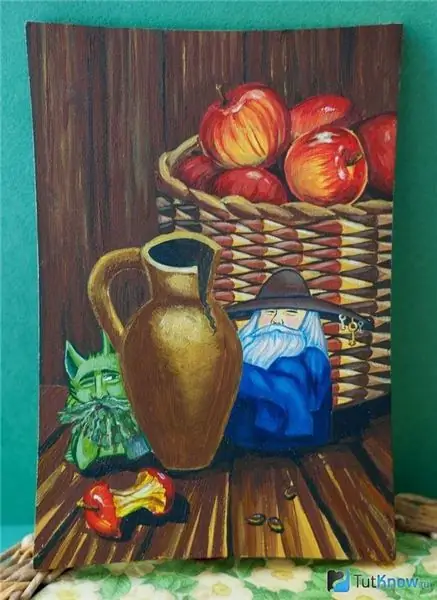
If you want to know about other drawing techniques, then we suggest that you familiarize yourself with another one.
Non-standard techniques for painting a rural landscape
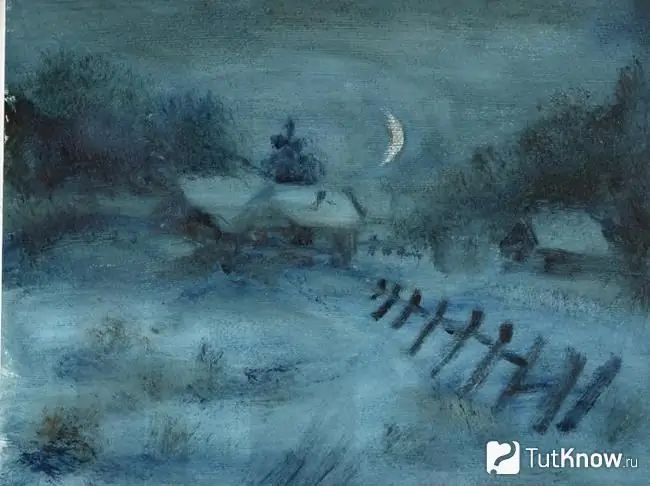
Looking at this image, it is clear that houses wrapped in snow are peeping through the evening mist. Snow-covered vegetable gardens, trees standing at a distance complement this mysterious picture. Drawing it is not as difficult as it seems at first. It is very interesting to do this.
You will need:
- only 2 colors of oil paints, these are red ocher and iron blue;
- linseed oil, suitable for painting;
- kitchen paper towels;
- brushes;
- the foundation.
In order not to buy a canvas, for beginners, it may be advised to prime with watercolor paper to practice on this basis. To do this, you need to take it by itself and apply white acrylic paint with a roller.
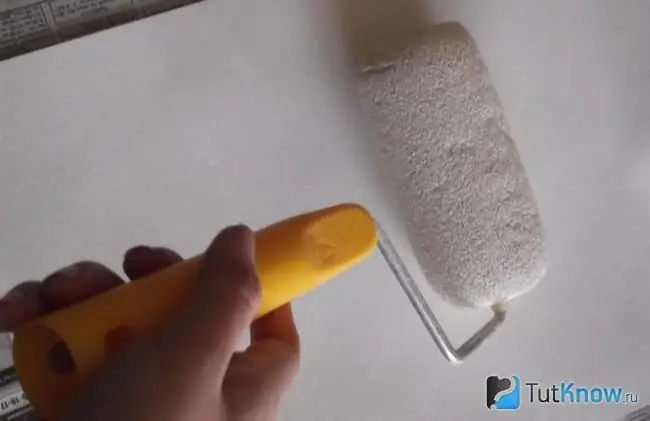
Let it dry. Put some paint on the tile and drip a little oil on it. If you do not have such unnecessary tiles, then wrap a sheet of plywood with cling film or take a plastic panel. Use these materials as a palette
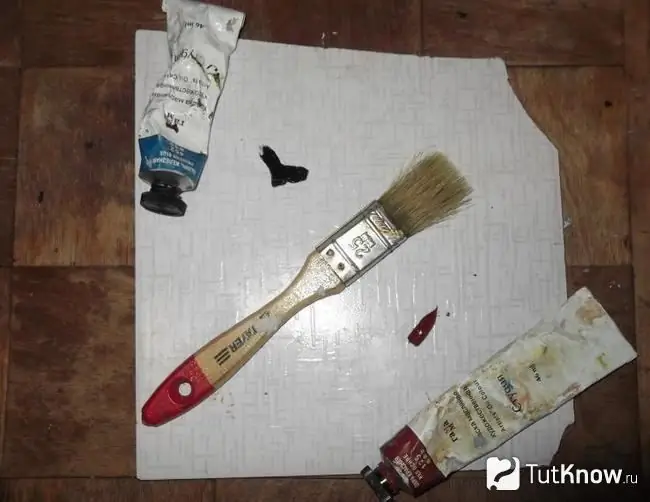
Start painting. To do this, dampen the tip of a large brush with oil and dip it in a little blue paint. First, paint a few strokes that will turn into the sky. When this layer is dry, apply the next layer with the same paint. Don't forget to leave white highlights.
Wherever you have trees, apply a mixture of blue and red paint. It is not necessary to mix these two colors thoroughly, then the effect will turn out to be even more interesting.
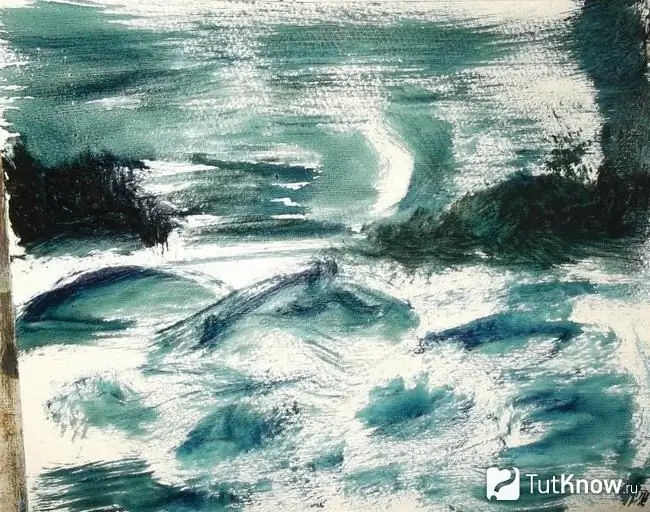
Now drawing for beginners will seem even more fun to them. Take a kitchen paper napkin and crumple it up. Dip in a small amount of linseed oil and, making smooth horizontal movements, slightly blur the background of the sky. Look, maybe you need to add a little paint or more oil to this place. Then dip a napkin in one of these substances. If you accidentally painted over the month, go over here with oil or cover it with acrylic sequins at the end.
Take a new napkin, slightly moisten it in oil and in the same way lighten the tops of the snowdrifts, the roofs of houses, the background for about a month, the horizon line. Take a flat bristle brush and paint houses under the roofs. Use a large brush to make a darker background for bushes and trees.
Experiment, in some area use more paint, in another wash it with linseed oil. On the third, make strokes with a brush. Now take a small brush to paint in the finer details. Now, if you wish, gild the month, sprinkle it and the snow with sparkles. The picture will turn out to be simply charming.
Another interesting drawing technique will help you create a wonderful massage brush-inspired gift. Perhaps it is precisely such a dot painting that you will like.
How to make a simple gift using a non-standard painting technique?
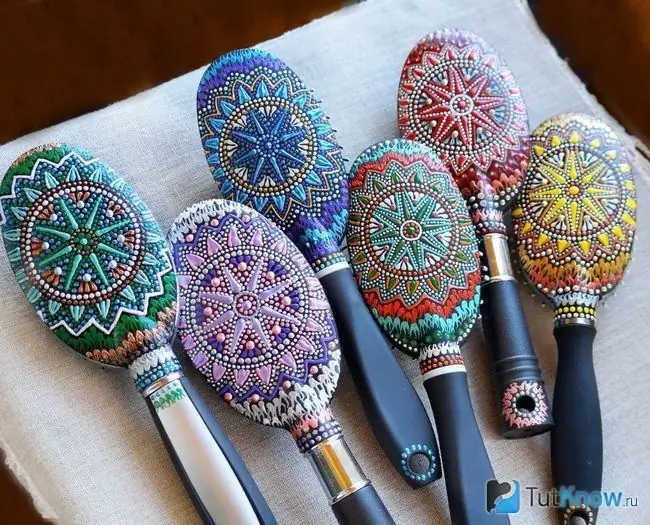
To create such beautiful presentations, you will need:
- several massage combs;
- acrylic outlines;
- primer;
- black acrylic paint;
- paint that allows you to get imitation of pearls;
- acrylic lacquer;
- ruler;
- fine sandpaper;
- cotton pads;
- brushes;
- degreasing agent;
- toothpicks;
- wet wipes;
- cotton buds.
Since acrylic paint does not adhere well to plastic, you need to sand this surface with fine sandpaper. Then the surface will be rough, and the paint will lay better.
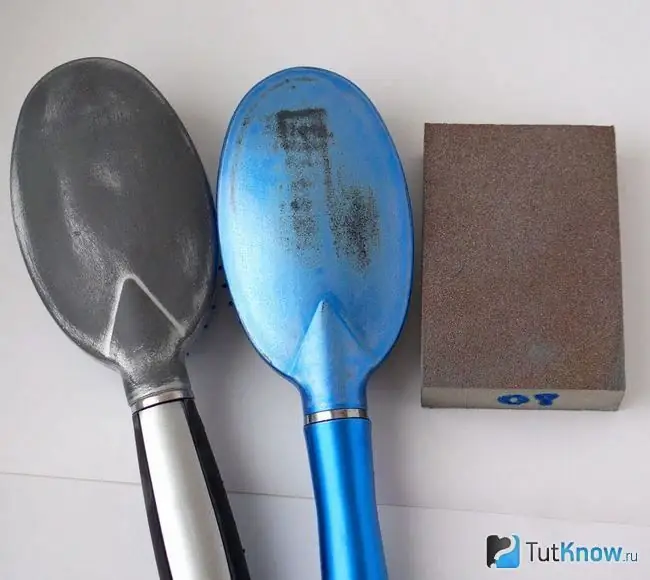
Wipe the prepared surface with a degreaser. You can use regular rubbing alcohol. Now is the time to apply a coat of primer designed for smooth surfaces. You can buy one at a building materials store. Be sure to dry the primer layer well, only then paint the surface with black acrylic.
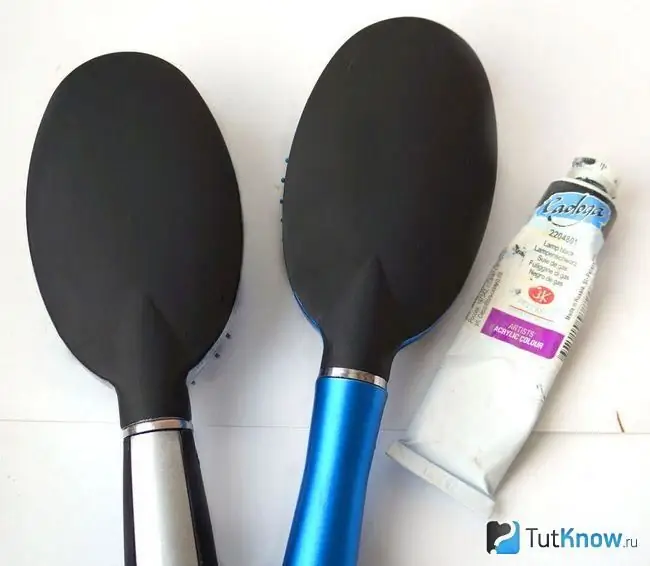
Again, you need to thoroughly dry the layer and only then cover with acrylic varnish. When it dries up, you can move on to spot painting. In this case, a geometric pattern is used. To do this, you will need these rulers.
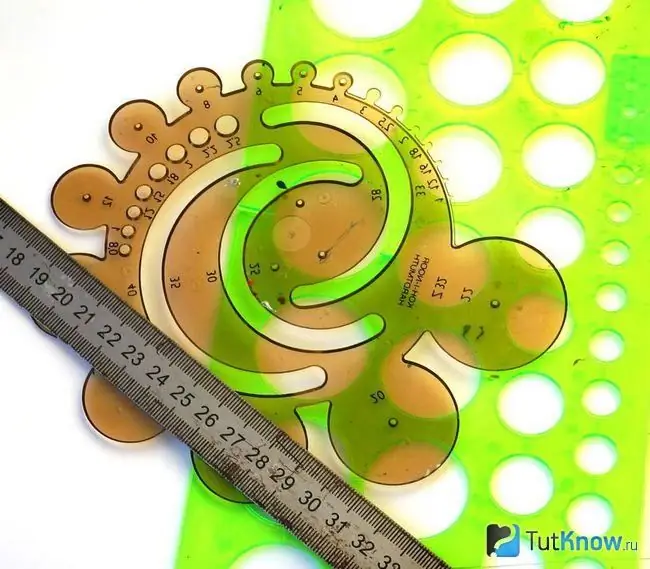
Draw the markings using a gel pen with light ink.
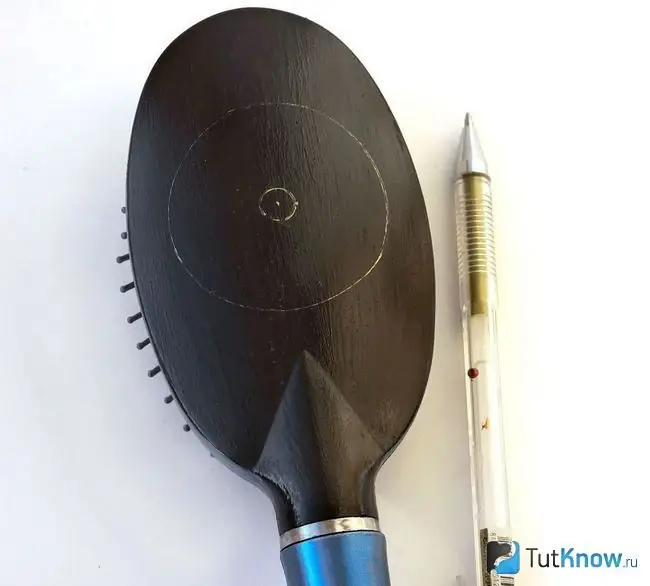
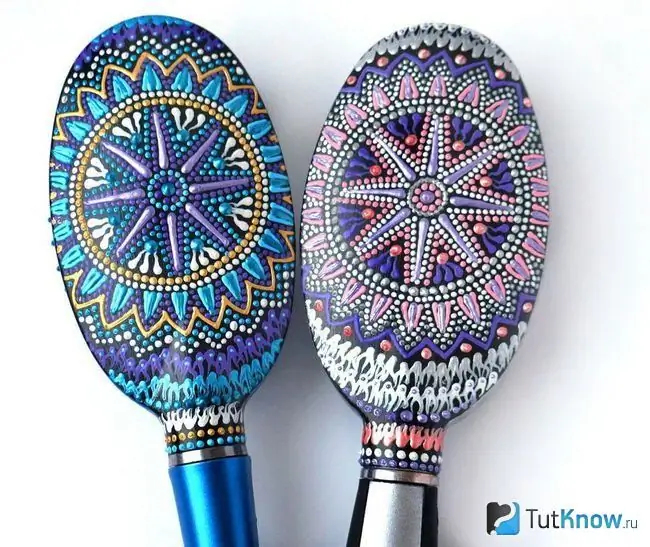
Now you can start painting itself. Take liquid pearls or acrylic outlines and start creating by creating a bitmap. If any point turned out to be unsuccessful, wait until it dries, then remove it with a toothpick. First, fill in the middle of the circular shape, and then move on to decorating the rays.

Fill in the sketch gradually. You can make the outer contours using continuous lines. Also, using them, mark some rays in the center.
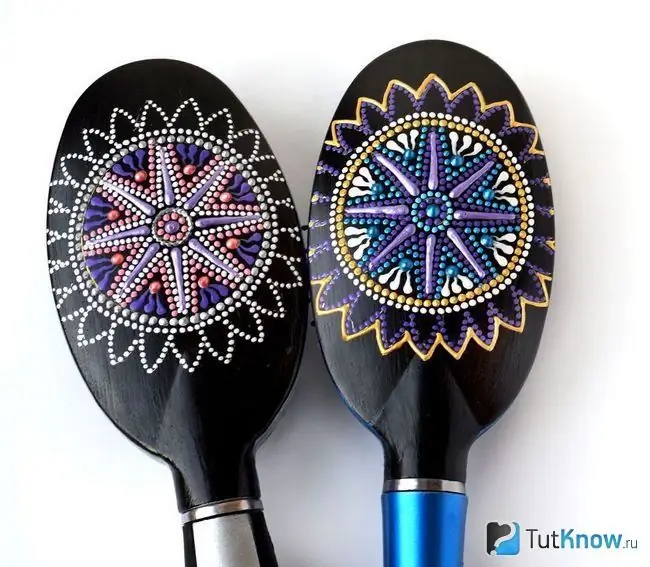
To get dots with ponytails, place a toothpick at the dot and draw out some of the paint.
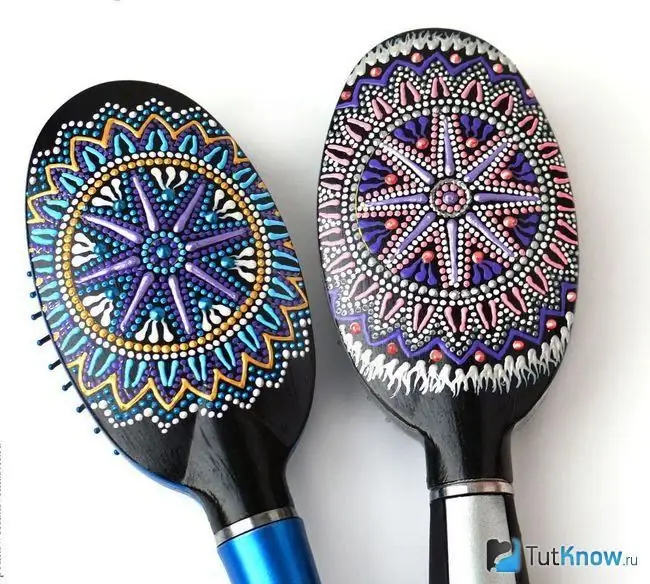
Fill the entire back of the brush with similar patterns, grabbing the handle and beginning of it. Now it remains to remove the traces of the gel pen with a damp cloth and admire what you have done.
Choose whether you want to paint with a stencil, use the spot painting technique, paint with acrylics, or create a landscape with a regular napkin. If you still have not decided what kind of fine art you prefer, then you can do it by watching the video.
Isn't it interesting to draw a blooming sakura using watercolors and a wooden pusher?

And 6 cool life hacks will help even beginners to draw as if it were done by professionals.


