- Author Arianna Cook cook@women-community.com.
- Public 2024-01-12 17:55.
- Last modified 2025-01-23 09:40.
If you are thinking of how to teach a child to draw, show him how to do it with your fingers, palms. And for children from 2 years old - using foam rubber, gouache, watercolors. As you know, children love to draw. Parents need to channel their creativity in the right direction.
Drawing simple drawings for toddlers
From an early age, children scratch on paper with a pencil. Parents should help the child to position this tool correctly between his thumb and forefinger, and the middle one holds the pencil.
To teach your child to draw, show him how to draw lines. They will be horizontal, vertical. Gradually, the child will begin to make these elements more even and parallel to each other.
Get the kid interested by showing him how to draw two large vertical lines, connecting them with several small horizontal lines to make a ladder.
Also, the segments will turn into a flag, a grid. To further teach your favorite child to draw, show him how to draw circles. After adding the necessary touches, turn these shapes into a sun, a balloon, into a flower.
Make sure that the child is holding the pencil correctly, not pressing too hard on it. The correct seating of a young student during classes is also important. At the same time, tell your baby what the colors are. Draw the sun with him, have the child paint it yellow, the apple green, the orange orange.
When the children have mastered such wisdom, you can teach them to draw objects that he sees daily. Let it be a house consisting of a triangular roof and a rectangular base. Show him how to draw a doll, car, or other favorite toy.
When the children have mastered all this, introduce them to the proportions. Explain that a doll's head cannot be larger than her body, and a car cannot be larger than a house. Drawing pets will also be a useful educational activity for toddlers.
Instill in kids an artistic taste. While walking in nature in spring, draw their attention to the flowering trees. In autumn, show how amazing the fruits of trees, for example, mountain ash, look, in winter, let them admire the snow-covered trees for a walk, and at home draw them.
There are new interesting techniques that allow you to teach children to draw from six months of age. By the age of two, such children draw beautiful pictures with the help of pencils, crayons, paints and can express their own "I" through this type of art.
How to teach a child to draw: interesting techniques
Let's get acquainted with them.
Finger drawing for toddlers
If you want to develop the artistic abilities of a child from infancy, then prepare:
- hypoallergenic paints;
- thick paper;
- apron;
- wet wipes.
Master Class:
- Dress your child in work clothes, tie a waterproof apron. Put him in a high chair, put a sheet of paper on the table next to the baby.
- For the first lesson, it is better to choose paint of the same color. Buy a hypoallergenic one that will not harm your baby if it gets into the mouth in small quantities.
- Tell your child that you will now be teaching him to draw. Let him dip his fingers into the jar, show him how to draw with his fingers and palms on paper.
- Don't forget to praise your baby. But if he became naughty, finish the lesson, continue it when the child is in a good mood.
- Dry his hands with wet wipes, change into clean clothes.
Perhaps he would like to draw more lying down. Then prepare:
- part of a roll of wallpaper or whatman paper;
- finger paints;
- wet wipes;
- cellophane film.
Cover the part of the floor on which there are no carpets or rugs with a film. Place wallpaper or Whatman paper on top. Arrange the paints right there. Let the child do the visual arts, and you can tell him what happened by completing certain strokes.
Foam pokes
The tools for this type of drawing are easy to make yourself, for this you need to take:
- dishwashing sponges;
- clothespins or tape;
- scissors.
Cut the sponges into thick strips lengthwise, and secure the ends with each clothespin or tape. By dipping such a device into paint, the baby will "print" on a sheet of paper.
You can offer the child to draw with cotton swabs, but such small objects are given to children over three years old and are closely watched during the creative process.
Stencil drawing
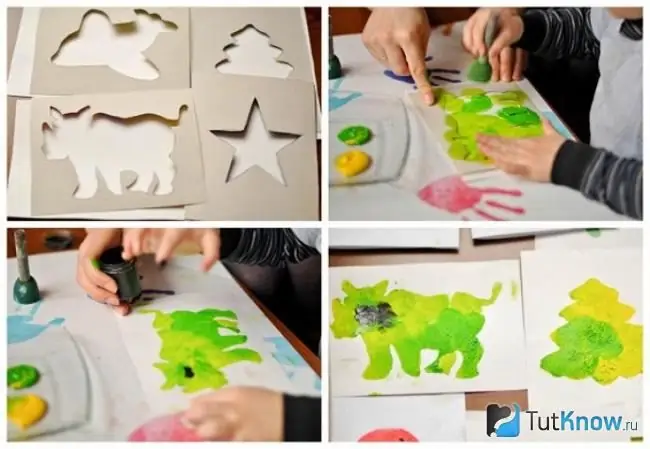
Here you can use ready-made foam brushes or make them yourself. The stencil is also easy to make yourself. This will require:
- a sheet of cardboard;
- scissors with sharp ends;
- stationery knife;
- pencil.
Draw yourself or translate your favorite pictures from the Internet. They should be of interest to children. Start cutting each with a clerical knife, continue with scissors.
Have the child place the stencil on a piece of paper. Dip a foam poke or wide brush into the paint and apply it to the inside of the stencil. You can use not one, but several shades, making a fabulous rhino or a bright Christmas tree.
Another type of painting is similar to this one, but in this case you need the inner part of the stencil. The child will attach the cutout drawing to a sheet of paper, outline its outer part.
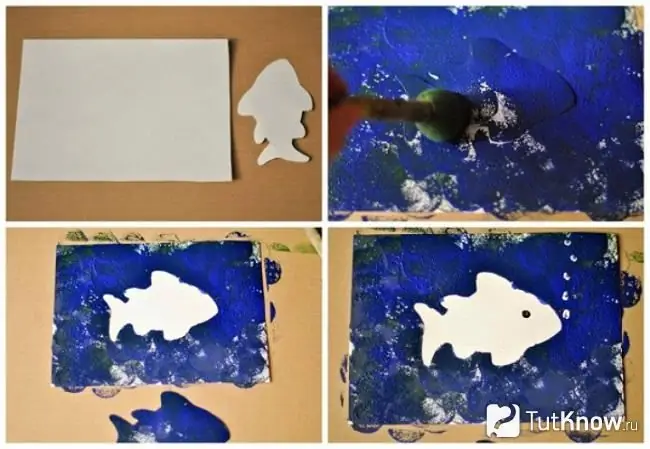
For example, this is a fish. Then the background is drawn in blue or light blue, it will remain white. If you give your child colored paper, for example, blue, then the fish will be that color.
Creative coloring
Check out two more types of drawing. The first will require:
- a sheet of cardboard;
- Scotch;
- paints;
- brush or foam poke.
Show your child how to stick tape on a piece of cardboard. You can do it evenly or chaotically. Have him paint over the background with one or more colors and wait for the paint to dry. Then help him peel off the tape, rejoice at the result together.
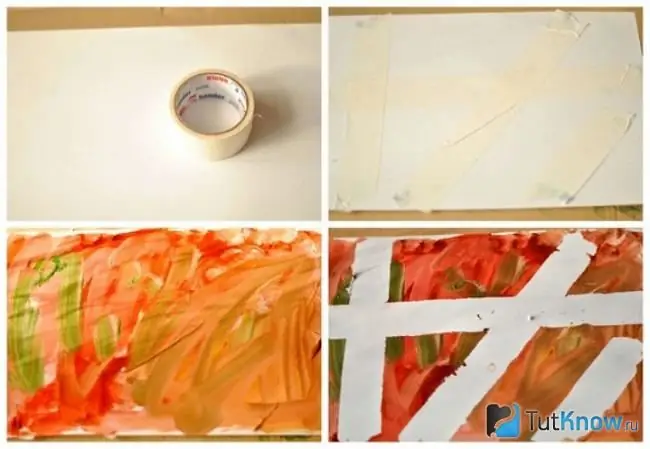
In this technique, you can draw a railway and a road, a path in the forest.
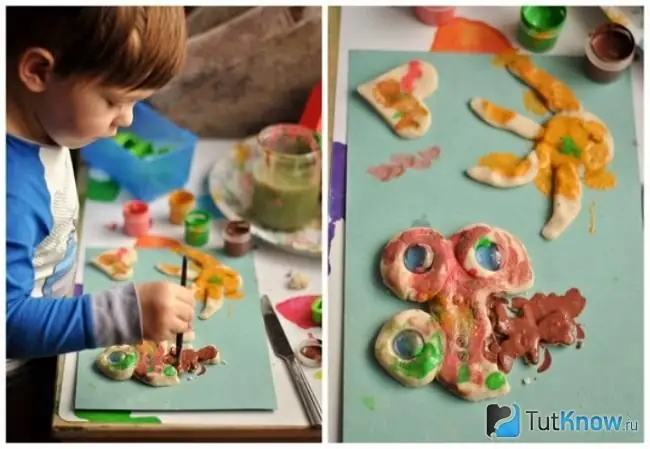
Sculpt flat figures from salt dough together with the baby, leave them to dry for a day. Now let him color them. You can glue these sculptures onto cardboard to create a three-dimensional painting.
How to teach a child to paint with watercolors?
The skills of drawing with watercolors will certainly come in handy for a young artist.
Parents will buy paints, brushes, paper for the child. There are some nuances here.
Necessary for watercolor painting
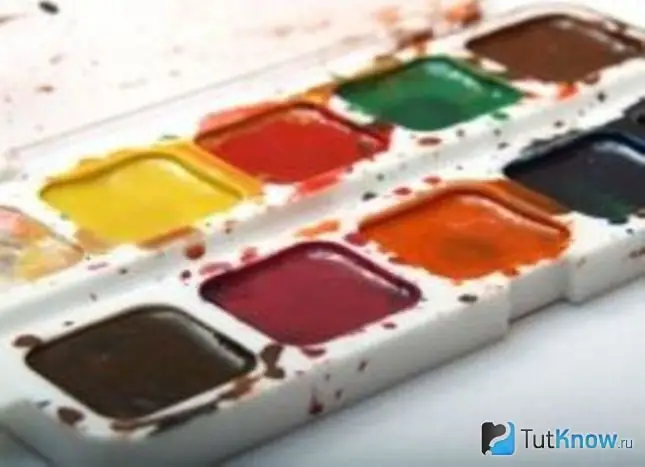
Watercolor paint is sold in cuvettes, tubes, sometimes dry. The paint in tubes fits well on the canvas, it is easy to mix, however, kids will not be able to calculate the required amount, and the consumption will be large. Buy small children paint in trays, but to keep the shades from mixing, show them how to wash the brush after they finish painting with one color and start with another.
Usually when painting with watercolors, children are advised to use a few colors. In order for them to learn how to get different shades, show them how to mix paints.
To teach children how to paint with watercolors, purchase soft brushes in different sizes:
- With a thin, pointed bristle, they are useful for depicting small details.
- The middle ones do the main work.
- Large brushes are used to paint the background and other large areas.
You've probably noticed that when using landscape sheets, the drawing can warp, especially if the young artist uses too much water. If you want to avoid this, then get a paper designed for watercolors, which is denser than usual and absorbs water better. You can buy white or colored, in the latter case, you will not need to paint the background, because to recreate the depths of the sea, you can take a blue one, and for an image of the desert - yellow.
Watercolor painting technique
Watercolor paper must be moistened with water, then stretched, secured with buttons on a tablet base.
If the paint is in tubes or dry, then it must be mixed with a little water, using a tool called a palette for this. But it must be diluted with the expectation that after the paint dries, it will become lighter.
Tell your child what colors you get by stirring different paints. So, as a result of the commonwealth of yellow and blue, green will come out, and blue and red - purple.
Introduce your child to some watercolor techniques. Tell us what happens:
- stretching, when the artist passes from a bright saturated color to a light one;
- washing, in which a painter applies paint of the same color to paper to get a background, for example, sea surface, grass, sky, forest;
- painting technique "on wet", at the same time, first the canvas is moistened with water, then painted here with watercolors;
- watercolor technique "on dry" - the next layer is applied only after the previous one dries.
When you teach a child to paint with watercolors, tell them that the wrong strokes need to be erased right there, if it dries up, it will be more difficult to do this. In the first case, you need to squeeze the brush well and, as it were, wipe the wrong stroke with it several times. In the second, it is necessary to remove the stain with a slightly damp brush, doing it carefully, so as not to tear the paper in this place.
How to teach a child to paint with gouache?
In order for parents to teach children to use this type of paint, they themselves must know the basics of such creativity. It is more expedient to buy children's gouache for children, which is also called poster. There is also an art one, but it is more expensive.
If you are thinking about teaching a child to paint with watercolors or gouache, what is the difference between these paints? The fact that the watercolor lays down on the paper in a thinner layer, therefore, several of them are applied to the same area. Gouache is denser, only the top stroke will be visible, so it is mainly painted in one layer.
If the child is assiduous, patient, then you can teach him to paint with watercolors. For the more impulsive, gouache is better. This paint gives great opportunities, opens up scope for creativity, since it can be painted on almost any surface:
- on glass;
- on the paper;
- on cardboard;
- on the fabric;
- on plywood.
To prepare the gouache for application to the canvas, part of the paint is put on the palette, but if it is not there, you can also use an unnecessary saucer, a plastic lid, or another almost flat container. Here gouache can be mixed with paint of a different color or diluted with a little water. Stir so that there are no lumps.
By the way, if the child forgot to close the jar, and the paint has dried, pour water into this container so that it covers the gouache, leave it for a day. Have your child paint on the prepared surface. At the end of the session, change him into clean clothes, and the worker should be washed. Usually, gouache is well washed, for this, the soiled places are soaped, washed in cold water. If the stains are ingrained, then a special product designed to combat such stains, called Dr. Beckmann Fleckenteufe, will help. It will also come in handy if the child has stained not only himself, but also a piece of upholstered furniture, textiles.
Do not leave children alone during such a creative process, otherwise they can paint the wall, and not just sheets of paper. But some parents look at it with a positive, leave the fruits of such creativity as a keepsake, shoot a video, post it on the Internet and get more than one thousand views.
But it is better to teach the child to draw with more traditional methods, which he will certainly also like.


